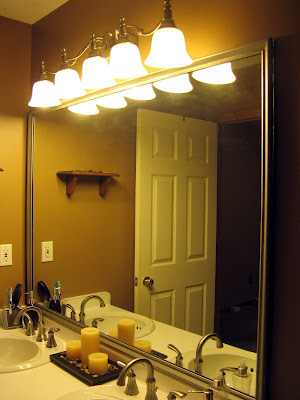
I am SO EXCITED! Spouse finished our bathroom mirror project over the weekend and I'm really pleased with the results.

To recap, we recently updated Bailey's bathroom (which is also the guest bathroom) with paint and new fixtures.

To recap, we recently updated Bailey's bathroom (which is also the guest bathroom) with paint and new fixtures.
I wanted to frame the mirror (as I've seen on numerous HGTV shows) to give it an updated look. We've been pondering this task for several weeks now -- picking out the wood, painting it, and figuring out how to adhere it to the mirror. Here's what the mirror looked like BEFORE....
And here it is framed! I am really happy with how it turned out.
We purchased long strips of molding and spray painted them to match the fixtures. Then Spouse cut the wood strips and mitered the corners using a handy mitering box which we happen to have. (For some odd reason, we actually have two of them -- I guess one never knows when the urge to MITER will take hold.)
The online instructions I'd read recommended using Liquid Nails as the adhesive, but Spouse found other tips which suggested hot glue instead. Liquid Nails apparently has to be HELD in place until it sets. Spouse didn't feel like holding onto the frame for six hours, so he opted for hot glue, which dries almost instantly. The other advantage of hot glue is that it can be easily removed from glass if necessary.
The only problem he encountered was the fact that the wood strips were not completely flat, which made gluing them to a flat surface a bit difficult. One area needs to be re-glued, but otherwise it appears to be holding well.
I'm really surprised at how different the mirror looks with the addition of a simple frame!
I'm really surprised at how different the mirror looks with the addition of a simple frame!


3 comments:
Hmm...I really like this! And I think we could do it in our bathroom too! Thanks for the idea Janet!
we've been contemplating this for awhile too. thanks for the hot glue tip!
Looks great! Amazing how much difference the little things can make!
Post a Comment