26 February 2013

Organization: Card Basket

 After I finished updating my craft room last summer, there were still a few outstanding tasks to be completed, including a storage system for handmade cards. I had designated a couple of the canvas bins (shown below) for cards, so I wanted a container that could fit into one of them but also sit out and coordinate with my decor.
 

I used to keep my handmade cards in a lunch-box type container but soon found it to be too small for my growing inventory. I was drawn to the larger size of the wonderful IRIS box we sell at Memory Bound, but it's too big to fit into the canvas bin. 

 I finally decided on either a basket or galvanized tin container, so I headed off to Target to see what I could find. In addition to my size constraints, the container also needed to have straight (not angled) sides to accommodate cards as well as a smooth finish to prevent damage.

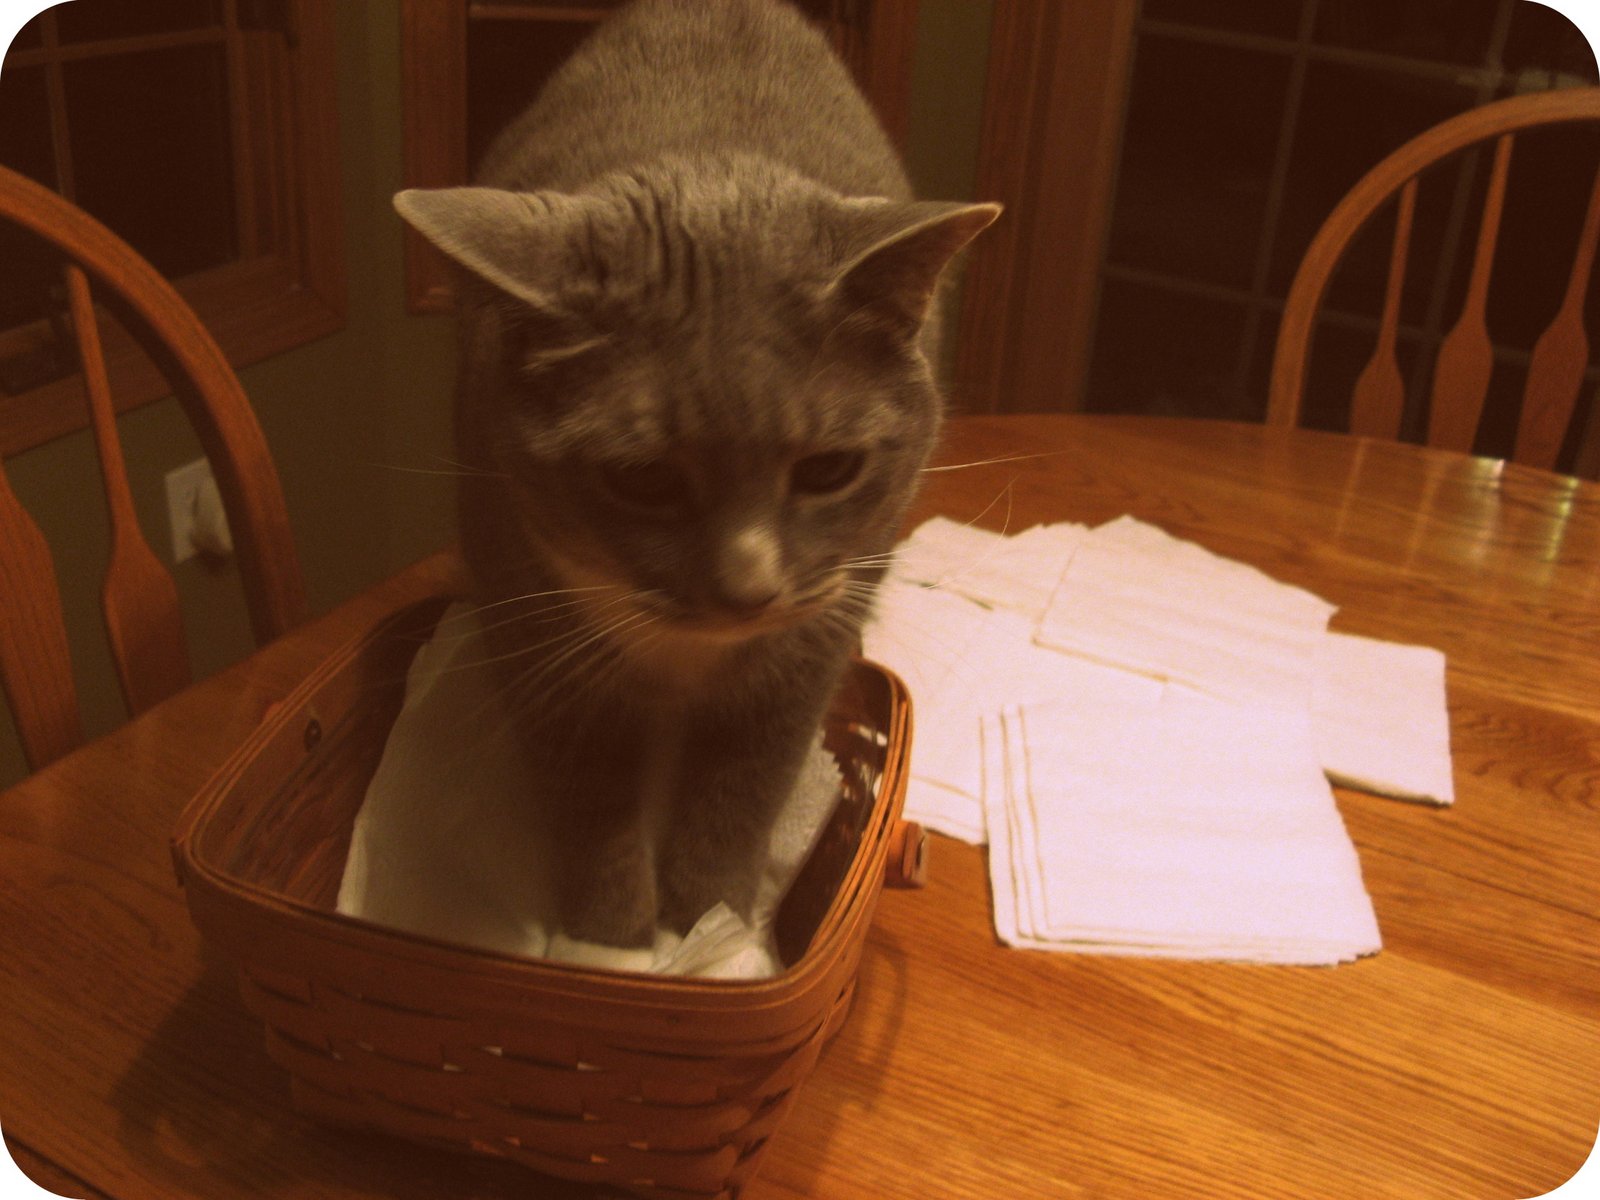
After considering my (fairly limited) options, I chose a black plastic woven basket which was wide enough to accommodate A2 envelopes (the size of card I usually make) and short enough to fit in the bin. Success!

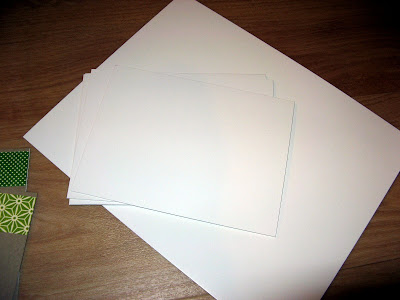
My first task was to create some simple dividers for the basket. I cut pieces of white chipboard slightly narrower than the width of the basket and a little taller than an envelope. Call me crazy, but I want the dividers to conceal the cards while they're in the basket, for the simple reason that the cards may not match my color scheme. I know, I know... :)


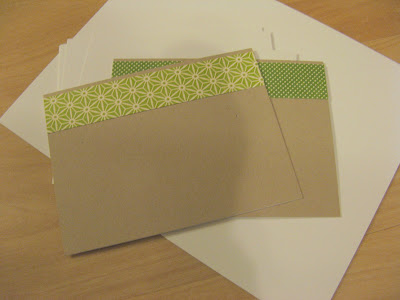
Because the dividers will be visible, I chose to cover them with kraft cardstock to match my space. Then I added a strip of patterned paper to the top of each divider. I used the same paper I've used in other areas of the room (to cover my ribbon jars, for instance), to keep everything coordinated!


Next I started to think about the labels for the dividers. I should have given this part more thought because I ended up going back three times to make more labels! I ended up with 12 categories -- birthday, blank, congrats, friendship, get well, good luck, hello, holiday, sympathy, thanks, thinking of you, and wedding. We'll see if those are the RIGHT categories, or if I still need more!

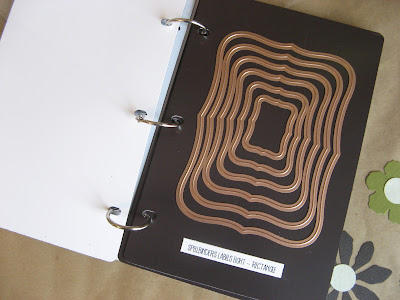
Next, I set out to create a black label for each of the dividers to tie the different papers together and match the labels I've created for other storage in the room. I decided to use the smallest die from my new Spellbinders set. After testing it out for size, it fit perfectly!

With the size determined, I created text boxes in Word for the labels, a little larger than the die. I used the same font I've used for my other storage labels, then filled the boxes with black color and switched the font color to white. (Click on the photo for a closer look.)

I printed the text on cream cardstock so that the white font color would look cream...again, to match the space!

Then I cut each label using the Big Shot. May I pause for a moment to say how much I LOVE my Big Shot and my Spellbinders dies?
 The labels turned out pretty cute, if I do say so myself!

And here are a few of the completed dividers!


I think I'm really going to like my new card basket, so much that I have yet to put it in the canvas bin. Looks like I need to get busy filling it up. :)
jp

25 February 2013

Step by Step: Hybrid Page with Word

 As much appreciation as I have for digital scrapbooking, I don't think I'll ever become a digital scrapbooker. I enjoy the tactile world of paper too much to abandon it for a screen! Having said that, I'm firmly entrenched in my own version of "hybrid" scrapbooking (using a computer to create certain elements of a page). The difference between me and other hybrid scrapbookers is that I haven't invested in Photoshop or other "real" digital tools: I use only Picasa and Microsoft Word. In today's post, I'll share with you how I approach a typical page using Word as a design tool. (Click on any of the photos -- especially the screen shots -- for a closer look.)

1. Arrange Photos for Printing
I don't usually print photos at home but when I do, I typically copy/paste them into a Word document and print several at a time on an 8.5x11 sheet of photo paper. Depending on the size of the photos, this is usually less wasteful than printing via Picasa. For instance, to print a single 5x7 photo for my page in Picasa would have resulted in all of this wasted paper:

Instead, I copied and pasted the photo into a Word document, then adjusted the size to 5x7. I set the "wrapping" to square so that several other photos could be added to the 8.5x11 page prior to printing. In this case, I had 2 smaller photos to print, too, so I decided to create my own "collage":

2. Design Layout
Instead of just printing the photos, I often take things a step further and use Word as a "mock-up" tool for layout design. 

As you can see here, I've created a true-to-size "canvas" to work on by simply changing the size of my page to 12x12. This makes it easier to see how the completed design will look. I moved the pictures around until I liked the arrangement, then I linked them via the "group" function so they wouldn't slide out of place. Using Word as a design tool is a great way to plan pages!

Given the size of the photos, I had to fill that awkward little space below the 5x7 picture. I created a small text box and "filled" it with purple to occupy the space, thinking I'd cut some patterned paper for that area once I printed the photos. 

Next I started playing around with how/where to place my title and journaling, again using text boxes to create a mock-up of how everything might fit together:

I don't have 12x12 photo paper (it's available...I'm just too cheap to buy it!) so once I was ready to print, I switched the page size back to 8.5x11 and removed the mock-up title/journaling pieces, saving them to another document so I'd have the correct size to work with.

3. Print Photos
Meanwhile, I decided to leave the purple text box in place and print it out with the photos as a design element. Here's the photo document ready to print:

This is my beloved Canon wide-format printer. It does a great job with photos and allows me to print on 12x12 paper, which I do a LOT. Unfortunately this model is no longer made, so it will be a sad day when I have to replace it or can no longer get ink!

 Here's the photo collage printed out and ready to cut:
 

4.  Design Title and Journaling
 With the top portion of the layout done, I was ready to focus on the title and journaling. I looked through my sticker and chipboard letters but couldn't find anything I liked, so I decided to die cut the title. Due to the font size, I knew immediately that my initial plan for the title and journaling would not work, so I cut a piece of scrap paper in the size I'd originally planned then started playing around with the space. Title at the right, sub-title under it, and journaling at the left:

 I measured the spaces on my paper mock-up and then created text boxes with those same dimensions in a 12x12 Word document:
 

 I created a separate text box for the journaling so that I could give it a dot border. It's easy to do this via the "line style" function:

 5. Print Title and Journaling
I typed my journaling in the text box, then created a separate text box for my sub-title which I decided to print on photo paper. I printed it on scrap paper first:

6. Adhere!
 Once I had everything finalized, I printed the piece on yellow cardstock and cut it to fit. I placed all the elements on the page without adhering them, just to be sure:
 

Then I decided to add a large square mat of light purple paper behind it all for a little added depth. Here's the completed page:

If you've never used Word for layout design, I encourage you to give it a try. I think you'll find that it's a surprisingly powerful (and economical!) tool for scrapbookers!
jp

23 February 2013

22 February 2013

Feline Friday: Downton Tabby Outtakes

 Since one can never get enough of Downton Abbey, in today's post I'll share the outtakes from Tinsel's recent Downton Tabby photo shoot.

Believe it or not, as soon as I put the pearls around her neck, she started to purr. Guess we should call them PURR-ls! Here is Tinsel's best imitation of Lady Edith.

As soon as I put the hat on, Tinsel hung her head in shame. Perhaps she is pretending to be Ethel, banished from society for her indiscretions.
 

At the end of the photo shoot, it looked like Tinsel had found Mr. Carson's liquor cabinet! :)


19 February 2013

Organization: Recipe Card Sleeves

Awhile back, I organized most of my recipes into 3-ring binders. I created several smaller binders (for main dishes, appetizers, etc.) so I don't have to deal with a big, cumbersome binder on the counter as I'm trying to cook. I have enough trouble in the kitchen as it is! :)

The binders hold 8.5x11 sleeves with recipes I've printed from various websites, but I wasn't sure what to do about all those I still have on recipe cards. My recipe card box is always a disaster, so I really wanted to find a way to incorporate them into my binder system.

After checking out various ideas online, I decided to look for sleeves to fit into the binders. I found 3.5x5 inch photo binder sleeves at Office Depot -- the perfect size for recipe cards. It was my lucky day!

But first, I needed to do some paring down. I started by dumping out the contents of the recipe box just to see what was really in there. Why do I have 17 recipes for meatloaf, which I never even make? I also found recipes for dog biscuits (I don't have a dog) and sand castles! Is it any wonder I have such trouble in the kitchen?

So I've been digging through the box and sorting the recipes into categories to correspond to my binders. From there, it's pretty easy to determine the "keepers" and "duds". I unearthed several recipes which were given to me at my wedding shower and others from my mom and grandma, many in their own handwriting. Although I may never make all of them, those special recipes clearly deserve safer storage!

I cut white paper to fit into each sleeve so that I could place two recipes in each pocket back to back. This step wasn't absolutely necessary, but it gives a neater appearance and only took a minute.
 

I outfitted each binder with several sleeves at the back. As I sort through my jumble of recipe cards, I just slide each "keeper" recipe into a sleeve.

 Now when it's time to make cookies, I'll have ALL of my cookie recipes in one spot...not split up in several places where I forget to look or can't find the one I need.

Although it's still a work in progress, I'm happy with how the new recipe card sleeves are working. Who knows...maybe they hold the key to some new-found success in the kitchen! Meanwhile, who wants dog biscuits for dinner? ;)
jp


12 February 2013

Organization: Die Cut Basket

 You know how there are some things you use so often that you don't stop to think about them? 

I feel that way about my die cut basket. It's nothing fancy but if it were gone, I'd definitely miss it! It was born out of my need to be frugal: I realized awhile back that every time I created a project with dies or punches, I'd end up with a leftover piece or two -- either I changed my mind on the color or the size wasn't quite right. So instead of throwing them out, I started tossing them into a little basket.

Now, when I need to make a project (especially a card), I start with the basket. I choose a few pieces, match them with some patterned paper, and I can create a card in no time. I've also found the basket useful for layouts. Why cut a snowflake when you've already got one that matches that winter page perfectly?

 These cards (which I posted awhile back) were made from odds and ends I found in the basket...


...as was this card I made for my daughter's birthday last month. I cut matching letters for the envelope. (It sure seems like there are a lot of HEARTS in my basket!)

I find I can save a lot of time (and money!) by using the odds and ends in my little basket. If you don't already have one, I'd suggest starting one today. You'll be amazed at how handy it can be!
jp

11 February 2013

Step by Step: Copying a Past Layout


 This year, I'd like to start doing some different things on my blog including more frequent "step by step" posts about crafting. I always enjoy learning how other folks approach projects, and I'm hoping this topic may be interesting to my paper crafting friends. Feedback is welcome!

Today's post is about copying a past layout to create a new page. As I teach classes, I often hear scrapbookers say they are hesitant to use a design more than once for fear the pages will look alike, but I do it all the time! It saves time and, with a few tweaks here and there, the new page always looks different than the first. Here's the process I used on a recent "copied" page.
  
#1 - What's the story? Choose photos to illustrate it.
For me, scrapbooking is really about the story. The photo is simply the illustration. I have a very hard time scrapbooking a photo if I don't know the story behind it. In this case, I had great photo AND I knew the story, so I was good to go!

This iPhone photo didn't need much editing. As it is, I don't have any fancy photo editing tools -- just Picasa, which has plenty of features for me.  Sure, I could have changed it to sepia or black and white, but I decided just to darken the edges with the "vignette" feature and keep the color, as I liked the brown/blue combination:

#2 - Find a page you like and re-use the design.
For this page, I decided to borrow a design I used for a 2012 page (another occasion when I had only one photo). I have no problem repeating designs, as long as they don't end up next to each other in an album. By varying the photo size, colors, and other design elements, no one will know the difference!

For the new layout, I decided to use cardstock for the shaped paper and patterned paper for the background, opposite what I used in the original layout. Since I didn't have any shaped cardstock, I simply traced a sheet, cut it out, and inked it with Walnut Stain Distress Ink. The inking masked all the imperfections in my cutting! :)

Following the original page design, I sliced off the left edge of the shaped cardstock, leaving a piece I can use for another project. I cut and notched strips from the double-sided paper, then inked and adhered them across the page. I've had the patterned paper for quite awhile, just waiting for the right photo! I'm pleased to say that I used almost two full sheets on this page, which is a LOT for me!

#3 - Place photo and elements.
Since I had a better photo to work with this time, I printed it at 5x7 to fill the space. Next, I cut and inked a mat and adhered the photo to the left side of the the page. I planned where all the other elements would go based on the original design but flipped the position of the title and the journaling. Because the main word in my title was longer than the one in the original design, I knew it would carry more visual weight so belonged at a lower position on the page.

#4 - Create title and journaling.
I like creating titles with a mix of Thickers or die cut letters for the main word and printed text or small stickers for the rest. I looked through my stash of Thickers to find letters for "flying" which matched my color scheme. The set I found was a bit too light, so I inked the letters with Walnut Stain. 


 With "flying" in place, I cut a scrap of paper to represent the rest of the title text as well as the journaling. This makes it easy to determine both size and position without wasting my "good" cardstock or paper.

Once I figured out the dimensions, I created text boxes of the same size in Microsoft Word. From there, I played around with the fonts, wrote the journaling, and printed it out on scrap paper to be sure I liked it. Text boxes are the best tool ever for creating titles and journaling!

Once I landed on a final color of cardstock for the journaling and title text, I printed and inked the pieces and adhered them in place.

#5 - Add embellishments. Sparingly. :)
My prefered style is very simple, so I use embellishments pretty sparingly. As luck would have it, I found a perfect set of October Afternoon travel chipboard stickers in my stash. A little ink gave the clouds  a vintage look. I tied some twine around the handle of the "destination" stamp, then added some mini-brads to the lower corner. Click on the photo to read this fun little story. :)

So there you have it -- a new page copied from an older page. Why not repeat a design you love? You might even like it better the second (or third!) time around!
jp 


08 February 2013

Feline Friday: Diggin' It!

 One recent evening I came upon this:
 

This naughty behavior came as no surprise, as Lily has always loved the napkin basket. Check out some of her past antics
HERE


HERE
and
HERE!

When she was a tiny kitten, Lily often slept in the basket (sans napkins, of course). Like some of us who think we can still squeeze into our size 4 jeans, she thinks she can still squeeze into the napkin basket...even though she's "a little on the chunky side" (said the vet tech last week).

 By the time I discovered her knee-deep in napkins, it was too late to stop her. So naturally I grabbed the camera instead!

Dig, dig, dig...

Dig, dig, dig...napkins flying out of the basket...


Dig, dig, dig... (You can see by her face that she's "in the zone"!)
Shred, shred, shred...


Meanwhile, mild-mannered Tinsel looks on in disbelief.
 
Whew! I still FITZ! 
(Notice the napkin hanging off her cheek!)

Alltho it iz not quite as comfie as I remembured...


U won't bee mad at me, mommeh, will u?