27 May 2016

Garden Cart: Keepin' It Real!

Don't you hate blogs where all the projects turn out perfectly the first time? That's sure not the case on my blog! I have plenty of fails. This project almost turned into one of them! 

In a recent post, I shared the "before" of my grill-to-garden-cart project. This cart will eventually end up on our patio and be used as a cart for my herbs and smaller patio pots.

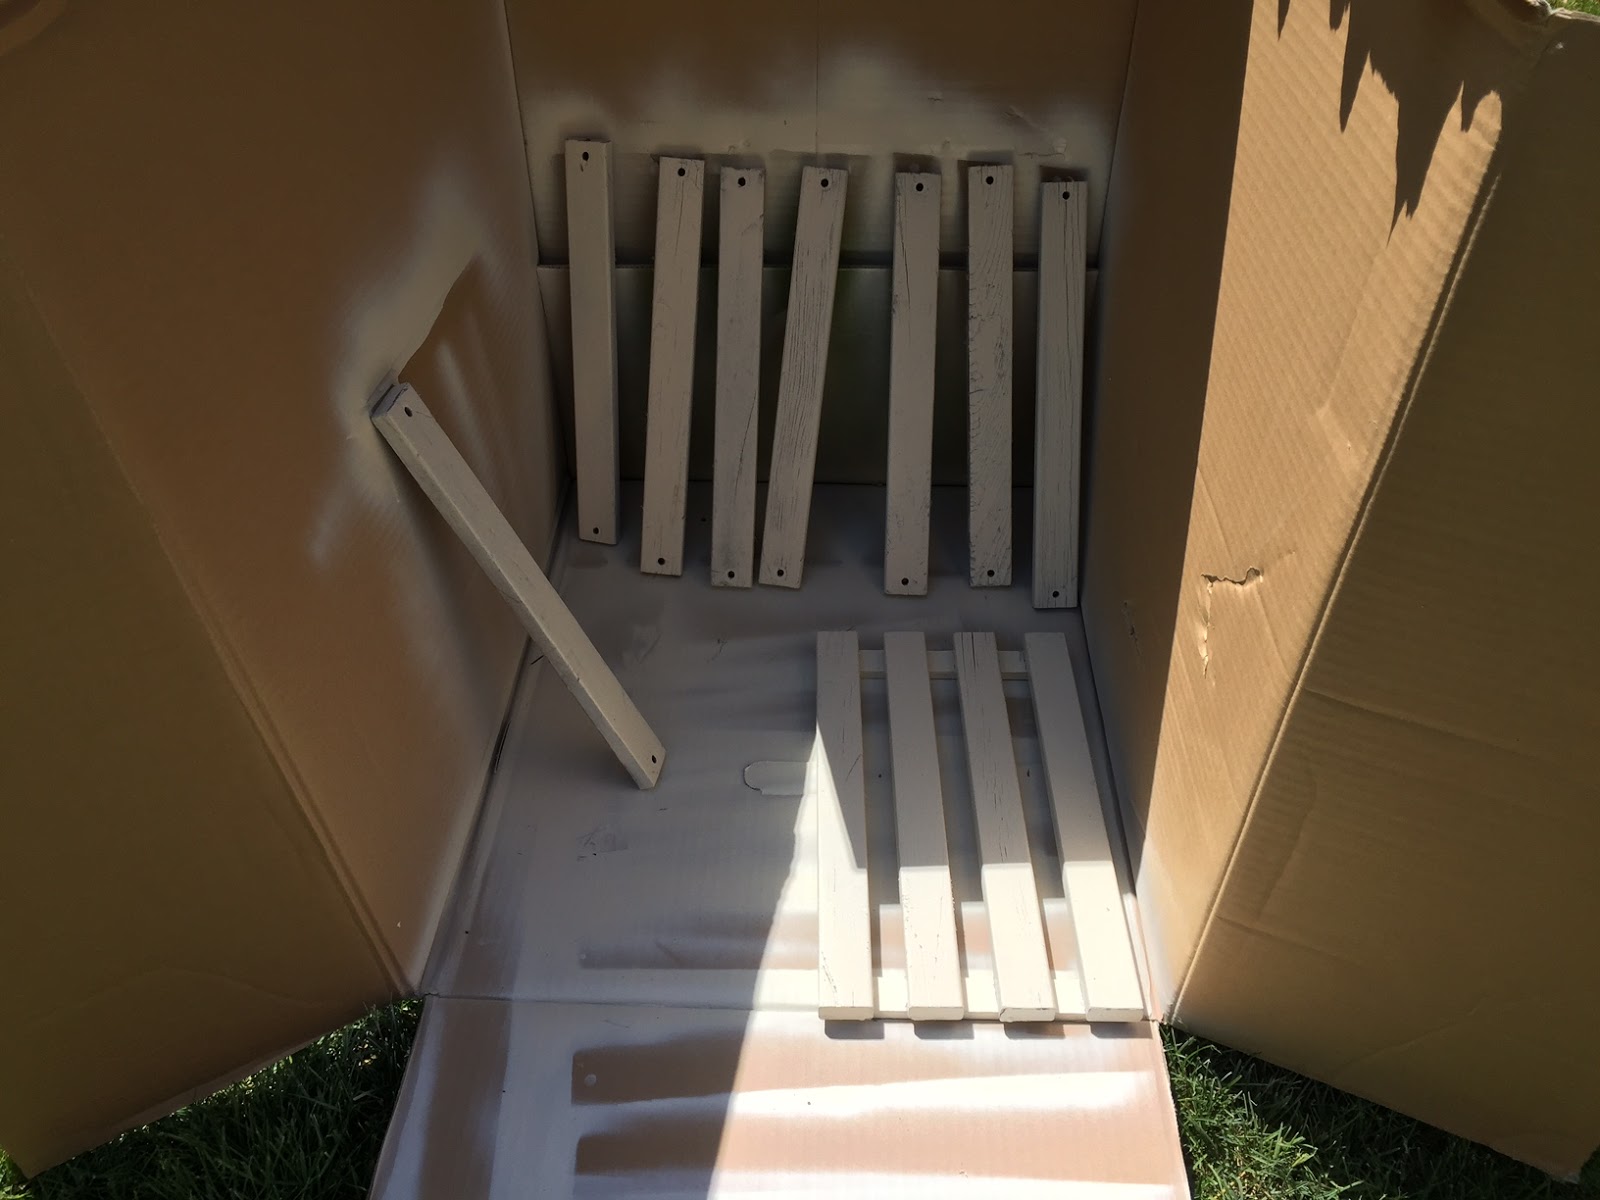
The project started out ok but quickly turned ugly, as I soon realized that spray painting the wooden slats was a very bad idea. In order to cover the irregularities in the wood, I had to hold the spray paint can in place too long, causing blobs and drips of paint. Not exactly the look I was going for!

But instead of switching gears, I stubbornly soldiered on through nearly two cans of spray paint, making a bigger mess with every coat of paint.  Sometimes I am much too slow to abandon a bad idea!

After several days of this spray painting fiasco, I finally admitted defeat. Clearly, brushing the slats was the only way to go. Too bad it took me so long to admit what a more reasonable person would probably have seen from the start!

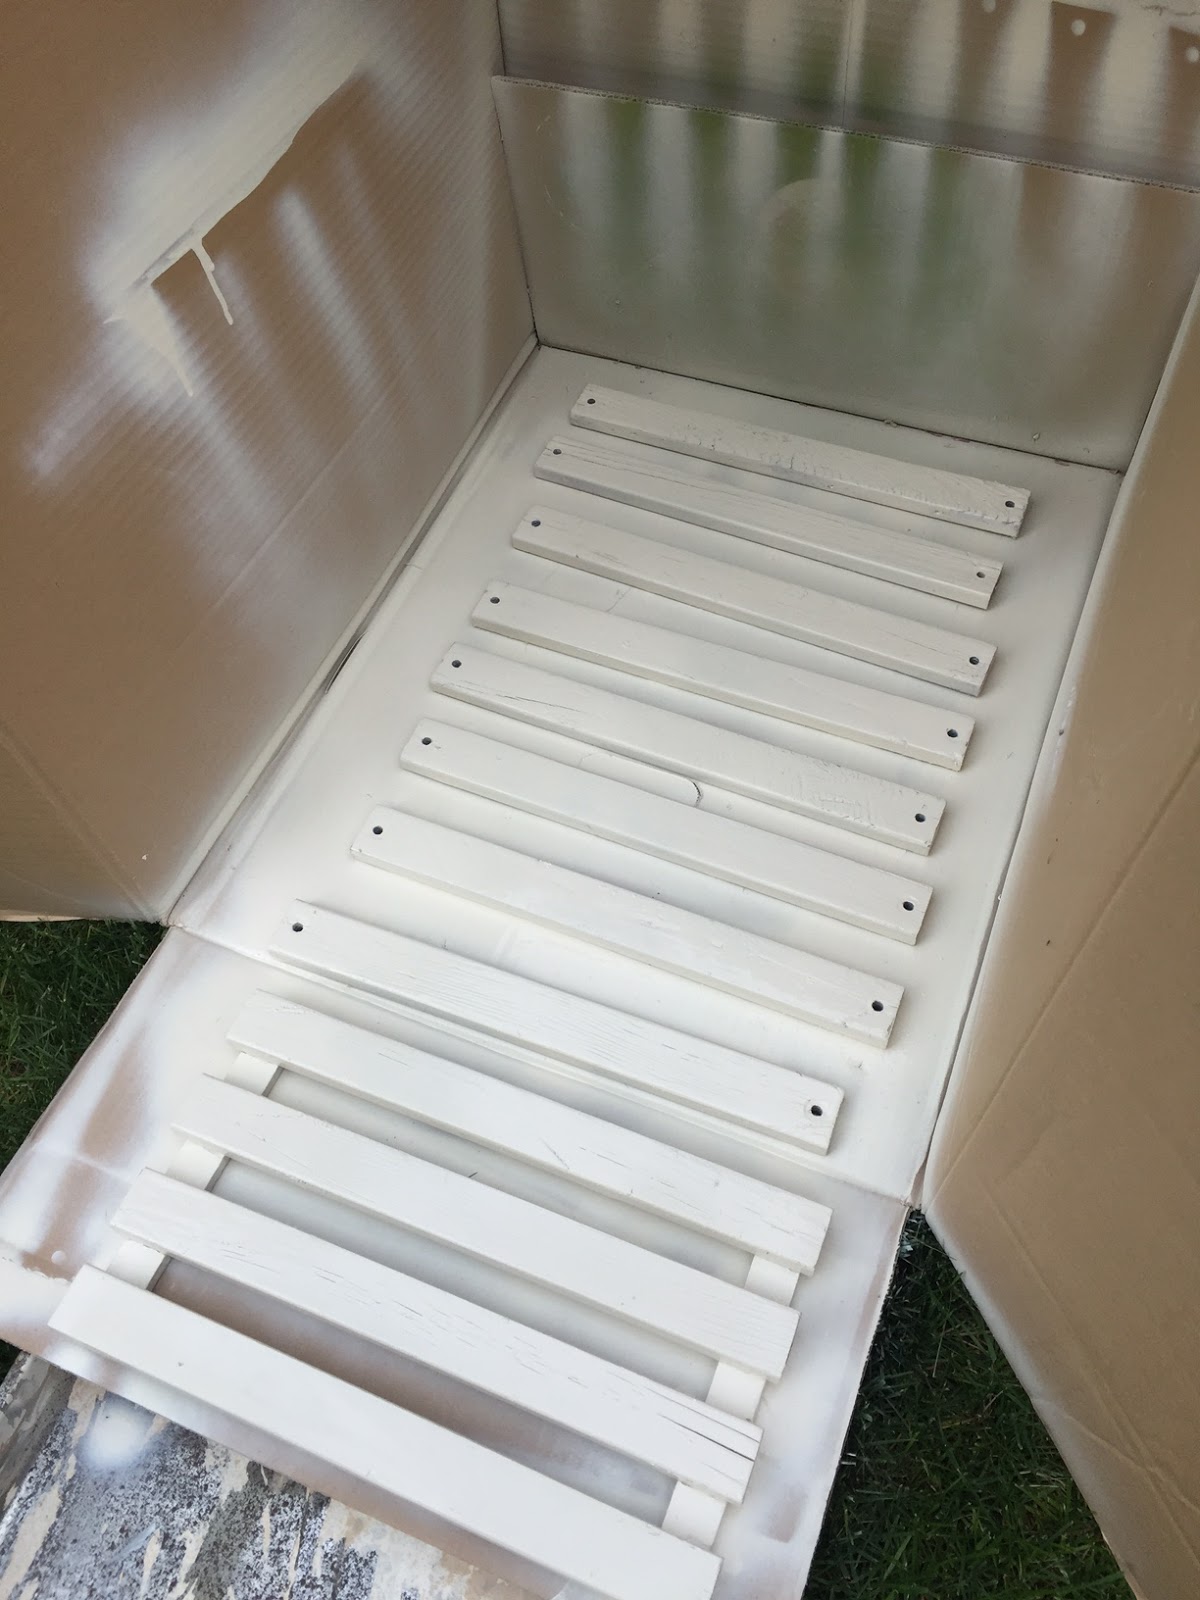
Meanwhile, I also decided that ivory was a bad color, too, since I want to de-emphasize the slats so that it looks a bit less like a grill cart. Since I was re-grouping anyway, why not change the color, too? My Plan B was to switch to a less noticeable gray paint. Spouse suggested starting with some gray primer which we had on hand.
Sure enough, the slats covered much more easily with a brush than a spray can. Happily, the primer has disguised most all of my spray painting mistakes!

If the rain ever stops around here, I will paint over all the slats with a final coat or three of gray outdoor paint.

Now the cart itself was a much easier thing to tackle. Once it was stripped of the slats, I hosed it down and let it dry.


I've given it two or three coats of black spray paint, turning it upside down to paint the undersides. This is how it looked after just one coat. Now this is the type of project that is perfect for spray paint!

After much discouragement, I finally think this grill-cart-turned-garden-cart project is going to work out after all. With luck, I hope to have it finished up yet this week!
jp


Feline Friday: Furry Helpers

I've had a super busy week preparing for classes. Good thing I've got two furry helpers! :)

Lily sits on my instructions so that they do not blow away. Thank you, Lily!

She also serves as a "screen block" so that my eyes don't get strained from looking at the bright monitor. She's right: It's much more fun to look at a furry kitty than a spreadsheet! :) Thank you, sweetheart!

  At the end of Lily's shift, Tinsel steps in to assist with any Silhouette cutting. This is her specialty! First she makes sure that I have the proper settings selected. Yep, Mom! Goodz to go!

Tinsel also monitors the cutting process to make sure everything works as it should. Thanks, Tinsel!

 And when I step away, Tinsel keeps my chair warm! Thanks, sweet girl! 

 What would I do without my two furry helpers? :)
jp


26 May 2016

State of the Succulents - and Beware the Aloe Plant!


I've now been growing (or trying to grow) succulents for over a year. In general, they're fairly easy to keep alive, but that does not mean that you can forget to water them (or forget you have them entirely) for months at a time. Oops!

  So that sad episode warranted a trip back to Home Depot for a few replacements. This new one looks similar to a jade plant but with finer leaves. I also bought a smaller one for my craft room and vow not to forget about it this time!
 

 I also repotted this planter and added another plant at the left. I still need to fill in that awkward hole at the side. If you'll recall, this is the planter I set outside on the patio last year and COOKED, so these are all newer plants.

But the big discovery this time was that aloe plants (and jade plants, too!) are poisonous to cats. I keep a mental list of no-no plants but somehow the aloe escaped me. And here's the scary thing: I've had two aloe plants in our laundry room for a year now, very accessible to both kitties. Shame on me! 

Scarily (is that a word?), I discovered this aloe fact by accident. My aloe had done so well that it needed to be repotted, so I picked up this lovely new pot at Home Depot to match our family room. I put the aloe in its new location and Lily (who NEVER has any interest in plants) promptly started playing with the tips, even putting one in her mouth. Luckily, I spotted her and looked it up. Of course, when I read that aloe plants are very dangerous for cats, I nearly fainted. I moved both of my aloe plants immediately.

As an aside, my astute daughter has an aloe plant but knew they are dangerous to kitties, so she keeps hers outdoors on her covered balcony where it gets just the right amount of sun and is not accessible to Rory, who has a keen interest in gardening! :)

There are very few places in our house that the kitties can't reach. One is the top of the dining room hutch, so that's where the aloe plants will live. I hadn't planned on keeping them there, but that's where they'll stay..safe from the little mouths of my furbabies!


20 May 2016

Feline Friday: Visiting Rory

We just returned from a very fun visit to Texas to see our daughter and, of course, Rory! I don't know how it's possible, but Rory got even cuter since I last saw her in March! What a sweet kitty. She's the PURR-fect companion for Bailey!

Rory has a very nice cat tree next to the patio door. She has excellent nature viewing through the glass!

Birds frequently pop over from the tree to sit on the railing or hop on the apartment roof. It's a great set-up for a kitty!

 Bailey sewed Rory a lovely soft pillow for the top of her cat tree so she can view nature in total comfort! :)
 

Some cats just love to be in high places and Rory is definitely one of them. While we were there, she frequently demonstrated her amazing jumping skills, leaping from the counter to the top of the kitchen cabinets with ease. I watched her gauging her jumps very carefully so that she doesn't hit her head on the ceiling!
 

 One morning when we arrived to visit, we were greeted by this. :)

 Rory scampering around in her school dress is one of the cutest things I've ever seen! Spouse thinks it's getting a bit too short for her. LOL
 

 She followed me into the kitchen and sat down to ask for a treat. Of course I gave her one...or three. Who could resist this little face?
 I'm so happy Rory found her fur-ever home with Bailey!
jp


17 May 2016

Spray Painting Fun: Pots, Mug Tree & Garden Cart

I've been doing quite a bit of spray painting lately. Watch out: If it's not moving, I might just spray paint it! :) I had a few old pots in the garage that needed freshening up, so I hit them with spray paint. I think they'll look great filled with herbs. We'll see how the paint holds up over the summer!

I also finally got around to spray painting my mom's old mug tree which was already green but had a few nicks. A fresh coat of the same color made it look like new! One of these days I'll get it set up with her white Syracuse china mugs.

My current project is this old grill cart which belonged to Spouse's parents. It had been sitting in their basement unused for many years when my mother-in-law suggested that it could be a nice garden cart for our patio. I found several "grill to garden cart" projects for inspiration on Pinterest and got to work.
 

I'll repaint the cart itself with black spray paint.

Spouse removed all the slats and sanded them to get rid of the loose paint. This was no small task!

 I decided to repaint the slats in a creamy white. In retrospect, brush painting them would have been much easier than spray painting, but I didn't realize that until I was deep into my first can of spray paint. The wood slats  absorb a lot of paint and because they have to be painted on both sides, it will take several passes to finish them.

I was getting somewhat discouraged until the slats FINALLY started to cover well!

Stay tuned for my progress on this "grill cart turned garden cart". It's going to take awhile but I think it will be worth the effort in the end!
jp


15 May 2016

Cruise - Part 2

I'm finally getting around to posting the second part of our cruise adventure! The Texas school where our daughter Bailey teaches band takes their senior band students on a cruise each year, and she asked me to go along as her roommate. Of course, I jumped at the chance to spend time with my girl, even if I risked falling overboard in the process! You can see Part 1 of this adventure HERE.

Although I did just fine on the cruise, it was also good to see plenty of safety equipment around...

...and more than enough life rafts! These rafts fit TONS of people and are fully enclosed, like a capsule. I was happy to see that this was not the Titanic!

As you can see, there were lots of people on this cruise!

But I can assure you that, other than Bailey and a small group of older ladies, very few people were knitting on this cruise. :) Wait until you see what cute thing she was knitting! More on that in a future post!

On a cruise, you can get room service any time, day or night, at no additional charge (except for the tip). Bailey mentioned that she had never had room service in the past so we ordered breakfast for one morning just to try it out. It was pretty nice not having to brave the crowds and lines!

And it was pretty, too. We decided we could get used to room service! :)

On the other mornings, we enjoyed breakfast with a lovely view of the sea!

 On Saturday morning, the ship docked at Cozumel for the day. This is a view of the ship from the shore.

The kids were scheduled to go to a private beach area for the morning through lunchtime.

There were many fun water activities, including para-sailing...

...and plenty of fruity (non-alcoholic) drinks!

There were comfy lounge chairs with plenty of shade.

We ordered lunch FROM OUR LOUNGE CHAIRS! That was a first for me! Except I did not eat, other than my fruity drink. (Why did I not eat? No idea...)

The grounds were absolutely beautiful!

There was also a lovely pool. After lunch, we headed in to town for a brief shopping trip, then it was back to the ship.
 

The kids loved the nightly karaoke on the cruise ship. I spent quite a bit of time watching karaoke -- often BAD karaoke -- while waiting for the kids to perform. The things we do! :)

One of the most fun events was the Towel Animal Folding class! These towel animals greeted us upon arrival at the workshop.

Lots of people attended, but no one was more excited than Bailey!

I did fine folding my towel animals, but Bailey EXCELLED at it! She obviously missed her calling!

Back in the room, we practiced our new skills. Or rather, Bailey practiced our new skills. :)

She made all the animals we'd learned in class, plus some new ones we had seen.

On our last morning, she made towel animals for the staff who had left them for us each day.

Going home, Bailey drove the bus on the last leg of the trip.

Did I mention that she's an excellent bus driver? Did I also mention that it is sort of an out-of-body experience to ride on a school bus driven by your daughter? :)

Gosh, it was good to get back to the apartment to see this little one! She was very happy to see her meow-my!

Rory loves the "Trouble 1" t-shirt Bailey bought for her in Cozumel. She wears it to bed almost every night!

To celebrate our safe return to dry land, Bailey made a few towel animals.

I loved going on this trip with Bailey, the students, and other directors, It was a super fun opportunity and a great few days hanging out with my girl!