04 October 2014

Photo Organization Project: Part 4

Do you ever start a project with the very best of intentions but find that you have to set it aside for awhile? Or a very long while?
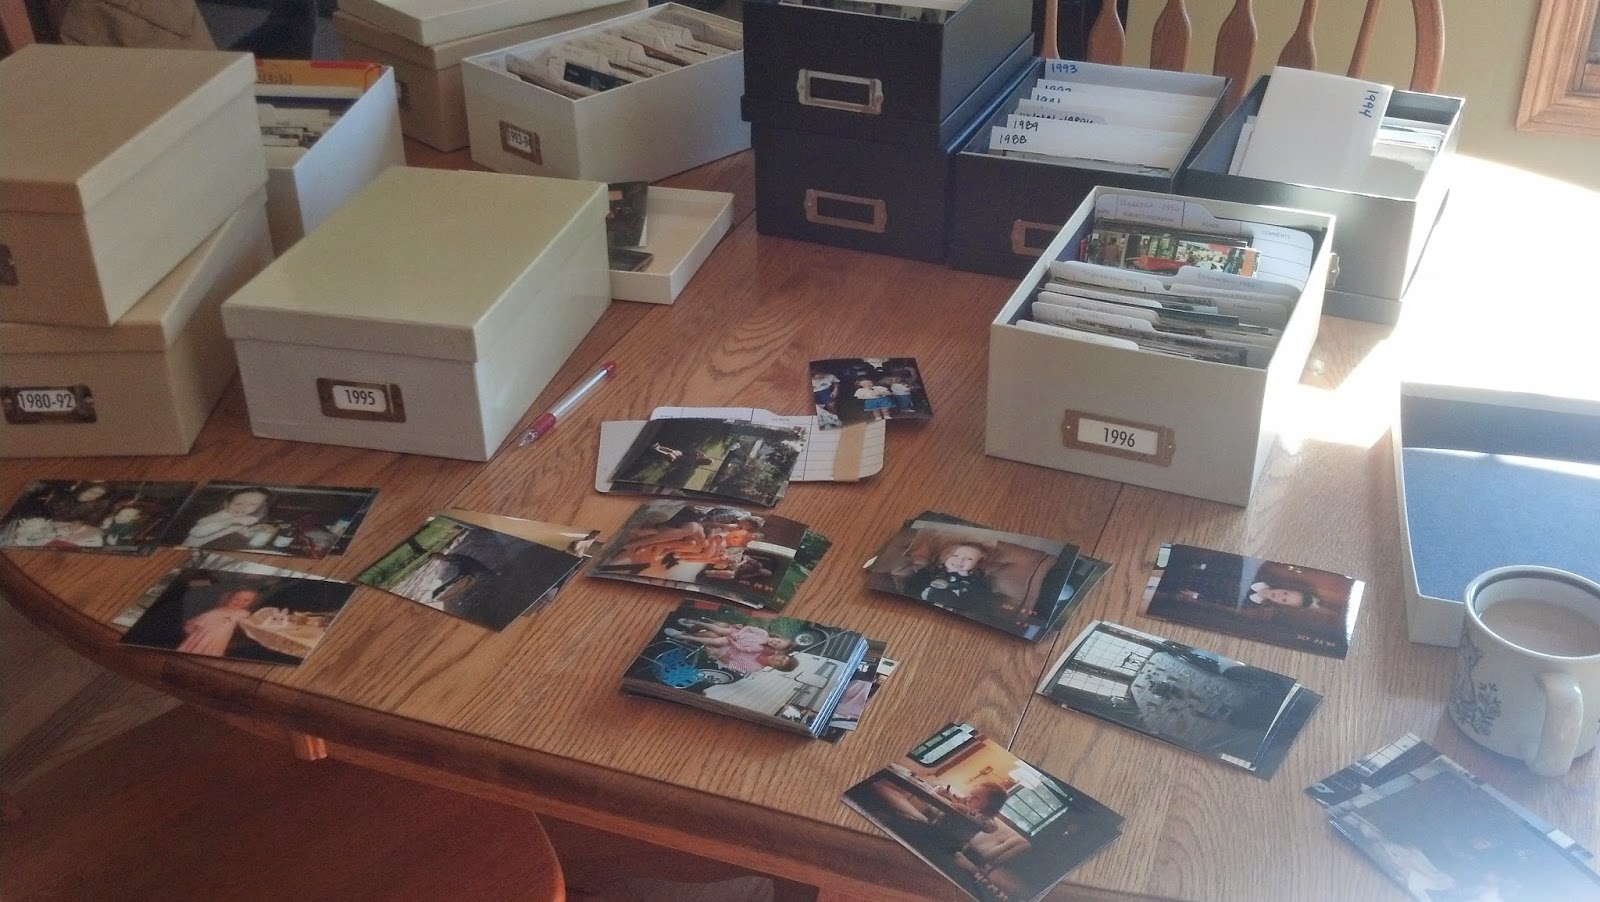
That's what happened with the massive photo organization project I started last fall after my estate sale. In a nutshell, I brought home a ton of completely unorganized photos and slides from my parents' house. I needed to integrate them into my photo boxes so I could begin to determine which ones I might like to scrapbook someday.You can see how this project started HERE.

Shortly after I started this project, my 102-year old grandma (my dad's mom) started having a variety of issues and it fell to my cousins and me to get her moved to a nursing home. That happened in February, after which I was responsible for clearing out her household items and selling her home. Grandma passed away last month, having lived a full and long life. I feel very fortunate to have spent a lot of quality time with her and hope to write more about this later.

Long story short: My life has been essentially on hold again since January of this year, so my photo organization project fell off of my radar screen for awhile. Finally a few weeks ago I was able to get back to where I left off last November. It was a good feeling!

First, I finished my very "rough sort" of photos by decade and then by year. I still have many older photos I can't specifically date, but hopefully I'll be able to get close by looking more closely at furniture, clothing, cars, and other clues in the pictures themselves. I filed undated photos separately.

As I sorted photos, I actually tossed quite a few. (Shocking, I know!) Many of the photos I brought home were from vacations my parents took in later years. I kept photos they were in but tossed all but a few scenery pictures from each trip, keeping enough to provide context. Of course, I kept all the photos of trips I took with them because I have memories of many of those experiences and may scrapbook them some day. (MAY is the operative word here!)

Next I brought out my own photo boxes which are indexed by year and month. I took a year's worth of photos from my parents' house and began to sort them by month, dropping them into my box. Again, there were some photos which I could not specifically date, so I filed them separately. Once I'm done with this part of the process, I will go back through each box and toss duplicate photos. My mom and I usually had two sets of photos printed and then exchanged them, so there are plenty of duplicates in these boxes.

I'm also in the process of sorting through our old slides and having some professionally digitized, so I'll eventually print the most important ones and add to these photo boxes.

It's a big project, but I'm hoping now that things have settled down a little bit for me, I can finally finish it. It will be a great feeling to have all of the printed photos in order so I can decide what to do with them.
Then maybe -- just maybe -- I'll be able to get back on track with my scrapbooking! :)
jp


03 October 2014

Feline Friday: Re-Training Lily

Those of you who have read my blog for awhile may remember that many years ago, I taught Lily to ring a bag of bells for her food. Lily's a very smart kitty and the training process was remarkably quick. She even went a step further -- quite on her own -- and took to ringing a possum. Yep, you read that right. Possum. You can read more about it -- and see a video -- here and here.

Lily's bell-ringing skills even led to her first (and possibly only) 15 minutes of fame, as she was once featured on the website of Bell Outlet. As you might imagine, this was one of the highlights of my life. :)

Well, I'm sorry to report that Lily's incessant bell-ringing led to Spouse occasionally taking away her bell for long periods of time. And for awhile my life was so complicated that I didn't insist on bell-ringing.

Long story short, Lily became complacent. She began to expect food without bells. She sat in front of the fridge, waiting for it to somehow open. And it usually did! As time went on, she barely touched her bag of bells. And eventually she seemed to not remember what to do with it.

In short, it was a sorry state of affairs.

 So this week I decided to refresh her memory. I placed her paw on the bag of bells, then gave her a treat. To my surprise (and relief), Lily remembered her old trick after about 15 minutes of practice. Soon she was back to jiggling her bag of bells. Confidently. Loudly.

 And now incessantly. :)
Good girl. All is right with the world.
jp

30 September 2014

Update and a Banana Tip

 Gentle blog readers:  
You may (or may not) be wondering if I have fallen off the face of the earth again. Although that sounds somewhat appealing (no banana pun intended!), I did not. Shocking as it may seem, we actually took a vacation! It was a much needed break. Of course, when one comes back from vacation, there is always a lot of catching up to do. So I've been busy doing that for the past few days.

I will share pictures from our trip in the coming days, but in the meantime, here's the best tip you'll probably ever read on my blog: 
How to slice a banana without a cutting board! 
  In fact, if you follow my instructions, the banana has its own BUILT-IN cutting board!

"WHAT??? Tell me more!"
Okay, I will! :)

1. Peel back only one "strip" of the peel. (Here's a bonus "Tip within a Tip": Always peel your banana from the BOTTOM end, not from the end with the long stem. It will peel perfectly every time!)

2. Slice the banana with a knife WHILE STILL IN ITS PEEL! 
I know...look how great this is! It is hard to contain my excitement at this step! Do you see how the peel is actually a built-in cutting board?

3. I do not have a picture of this step because I could not execute it AND take a picture at the same time! In Step #3 you'll invert your banana slices into a bowl by pushing on the peel under the slices. They'll pop right out!

 {Imagine there is a picture right here!}


4. Mix the slices into your yogurt or cereal or whatever! And yes, this is a Quaker Microwave Oatmeal Color-Changing Bowl. Don't be jealous. It is so old that it is permanently green. Any type of bowl will do for your lovely banana slices!

Now I don't know FOR SURE if I'm the first person on earth to invent this trick, but I kind of think I MIGHT be! Trust me, I eat a lot of bananas so am sort of an expert in banana peeling!

Try it! You'll get to eat your banana FASTER and have fewer dishes to wash! TA-DA!
jp

26 September 2014

Feline Friday: Miss Buttinski

This may look like an ordinary photo but I assure you it is not. This is another example of how Lily (Miss Buttinski!) infringes on poor Tinsel's territory! Usually her motivation is NOMS but this time she's purely seeking attention, which I'll admit makes this behavior a little bit adorable.

Anyway, every morning when I'm doing my make-up and hair in the bathroom, Tinsel plops down on the floor or sits on the counter. She's been doing this for years now and it virtually assures her of uninterrupted girl time with Mommy -- plus plenty of back scratches! But Lily has discovered where Tinsel goes each morning...and now she's going there, too! When Tinsel plops down on the floor, Lily does likewise. She even positions herself closest to me in an attempt to hog all of the attention!

Miss Buttinski strikes again!

19 September 2014

Feline Friday: Just Waiting


The girls can often be found sitting just outside my craft room, waiting patiently for me to finish whatever I'm working on. They've learned that this position allows them to ambush me and demand food the minute I walk out of the room. 

It's sort of like a MEATLOAF blockade. :)

16 September 2014

Newslettering

Every few months I have the very fun task of helping to put together our store newsletter. Our wonderful store owners provide content and then I put it into a ginormous Word document -- designing, editing, and formatting as we go. It's a little like giving birth. Lots and lots of effort...then finally it is done!

We just finished our latest newsletter, an 8-page holiday season edition with information about everything happening at the store from now through the end of the year.

I especially like my oversized monitor for working on the newsletter. It makes manipulating graphics and photos much easier.
Spouse gives me a hard time about having such a large screen, but it makes it easy to spot those extra spaces and missing commas!

 But when I'm working on big project like this, there's one thing even more important than a large screen: COFFEE. Lots of it! :)

Click HERE to see our latest newsletter!

14 September 2014

Kind of a Fun Thing

A couple of months ago, I got the wild idea (okay, not all that wild) to get a fire pit. After a little looking around, we found a decent sized cauldron-type thing for our patio. I still have visions of cooking in a Dutch oven, but for now I'm settling for s'mores.

  It had been quite awhile since I'd had a s'more. Pretty good!


And just sitting by the fire doing nothing? I kind of like that, too!
What is this thing they call "relaxing"? I might actually enjoy it! :)
jp


12 September 2014

Feline Friday: Lily's Busy Week

  Gee, Lily...What have you accomplished this week?

First there was this....
 
 ...followed by this...

 ...and don't forget the day you hoarded your puffballs! Check that one off your to-do list!
 

Then there was a bit more of this...

 Wow, you've had a busy week, Lily! You deserve a nap. :)
 

08 September 2014

Silhouetting for Classes

In the past few weeks I've been prepping for several classes. Having taught for many years, I've pretty much had my routine down...that is until I bought my Silhouette! With my August classes, I started incorporating Silhouette cuts into my class projects. Of course, I still love and use my Big Shot for many of the pieces I use on my cards. The Silhouette just provides me with more options!

Because of the Silhouette cutting, I've had to add a few steps to my normal class prep routine. The first thing I need to do is format my cut files and save them an SD card so that I can take them to Memory Bound and do the cutting on our store machine. 

This process has worked very well, especially now that my friend Katie suggested using two cutting mats. This is a little like using two cookie sheets when you're baking. While one batch of cookies cools, you can put a second batch in the oven. Using two cutting mats allows me to "scrape" off my cuts from the first mat while sending the second mat through the machine. And once the machine starts cutting, I can keep working on other parts of my kits. Minimal time wasted!

I love the little coffee cup...

 ...with steam! For someone who is used to doing Big Shot die cutting one or two at a time, it is so exciting to be able to cut an entire SHEET of pieces with the push of a button.


 For this class, I also cut mason jars with outlines and lids. This is a very fun and versatile cut file. 

  You can see the cup and jar on the completed cards.

I'm so happy I bought the Silhouette. It gives me many additional design options and, with a little more tweaking to my routine, I hope it will help me be more efficient, too!
jp

07 September 2014

More Fun with Spray Paint

 Last week I spray painted three more things in our house. Given enough time and money, I could perhaps paint every surface in Rustoleum's Oil-Rubbed Bronze. I love it that much!
The main target of my spray painting was this tray. I found a large stack of these trays in my parents' basement. I think my mom acquired them from her aunt, but I had never seen them used so had no emotional attachment to them. They're actually pretty handy to have around the house so I kept a couple but gave away a few to a friend and sold the rest in my Brass Armadillo case. 

I decided to paint the center of the tray and leave the edges exposed, because the green is just about the right color to use on my bar cart. I taped off the edges, leaving the middle open.

I took the operation out to the back yard. It was a fairly windy day, not ideal for spray painting. I may have painted some trees in oil-rubbed bronze. Still, it covered very easily with no sanding.

While I was at it, I spray painted two frames. 

 They turned out great!

After two coats, I let the tray dry for a couple of hours then brought it back inside for the unveiling.

I was a little nervous about how the tape would pull off, but it came off perfectly, leaving no peeled or irregular edges. My "Plan B" was to go back and paint the edges if I didn't like the results.

Lily watched from a safe distance while I pulled off the blue tape.

And this is how it turned out! The green is just the color I needed on the swanky bar cart.

It matches the round antique tray I picked up awhile back. 

 Now...what else can I spray paint?

05 September 2014

Feline Friday: Napkin Bandit Strikes Again!

Last night I walked into the family room and plopped down on the couch to watch the news. After a few minutes, I heard a soft scratching sound coming from the kitchen. It sounded a bit like Tinsel (who was front-declawed when we adopted her) "sharpening" on the scratching post. But it continued for a very long time and, with Lily on the premises, one must always investigate unusual noises.

 Sure enough, I found Lily STANDING in the napkin basket, digging at high speed -- so fast that some napkins were on the table next to it. I could see that the napkins were a total loss, so I grabbed my phone and caught the Napkin Bandit in action.

Although this one is blurry, you can see that the Napkin Bandit is completely in THE ZONE, doing what Napkin Bandits do best!

DIG DIG DIG 
But for what possible reason? To remove the napkins so she can sit in the basket? The Napkin Bandit's motives remain a mystery!
 
 And with that, the Napkin Bandit's work was done! Nothing left but a pile of shredded napkins...and her "signature" tail caught in the photo.
 
 In spite of the destruction she leaves behind, I love our little Napkin Bandit. :)

03 September 2014

Bar Cart-Part 5: Done!

 
Well, I'm sort of back from my blog hiatus. Life has been complicated lately. Thanks for hanging with me!

Today I want to share the results of our recent bar cart project. Notice I wrote "our" and not "my"? As I started lining the shelves, Spouse dove in and decided to assist. He has a knack for wallpapering and felt right at home with the shelf liner!

So here is the BEFORE and the AFTER. Definitely a big improvement!

The bar cart turned out very nicely, but I'm not thrilled with the end result because the pattern is far more white than I'd envisioned. Options for retro-looking shelf liner are terribly limited. I'll live with it for awhile but may change it if I can find a pattern I like better.

Even though I don't completely love the new look, I do love the fact that this cart has history. It first belonged to my grandma (Mom's mom) who used it as a serving cart for our Sunday lunches. When she passed away, my dad somehow commandeered it for his garage, and that is where I found it last summer. I love that the cart has a connection to both of my parents, and now it has a completely new life.

Okay, back to the process we used:

Applying the paper was easier than I anticipated, perhaps because Spouse and I worked together on the project. (And yes, we are still speaking!) First we traced around the shelf on the back side of the shelf liner.

Next I cut on the lines.

To apply the paper, we peeled back half of the paper liner and cut it off. That way we weren't working with a large sheet of sticky-backed paper at once. We began at one end of the tray and applied the paper carefully, using my brayer to roll out any air bubbles. Finally, we trimmed up the edges with an X-Acto blade.

Lily supervised us closely.

Here it is set up as more of a breakfast/coffee cart with dishes that belonged to my mom. I can see using it for lots of different occasions. The great thing is that it rolls around easily so it could move to different rooms depending on how it is being used.

Meanwhile we've been collecting some vintage barware pieces so that it can be set up as a Mad Men era bar cart, too. When I have everything assembled, I'll share a picture.

Now on to the second 3-shelf cart I salvaged out of my dad's shop, which is destined for my craft room!
jp