28 January 2013

Update: Recipe Organization Project

 Over the past few weeks, I've been trying to tackle the recipe clutter in our kitchen. I realize that when you look at the photos in this post, you may be completely underwhelmed with the results of my efforts, but believe me -- I've really made a dent in the recipe clutter. I'm not done yet, but I feel pretty good about my progress so far!

After assessing the situation (see my original post here), I first decided to relocate my recipe books to a cupboard where they'd be more easily accessible. They're now housed in a cupboard under our kitchen island where I don't have to climb on a chair to reach them. Makes sense, huh?

I have WAY too many recipe books, so I looked through them all and (believe it or not) set aside an entire box to donate to our local Planned Parenthood Book Sale. (If memory serves me, I bought some of them at the sale in the first place!) I could probably get rid of a few more, but many of the books I kept have sentimental value (in addition to good recipes!) so for the time being, they're staying. In the new cupboard, I have two shelves instead of one which makes them much more accessible. Heck, I might even USE them now! :)


Many years ago, I went to a library sale and bought some metal magazine files. Over the years, we've used them for a few different purposes. Now I've put one file to work organizing the small recipe pamphlets that go with various kitchen appliances.


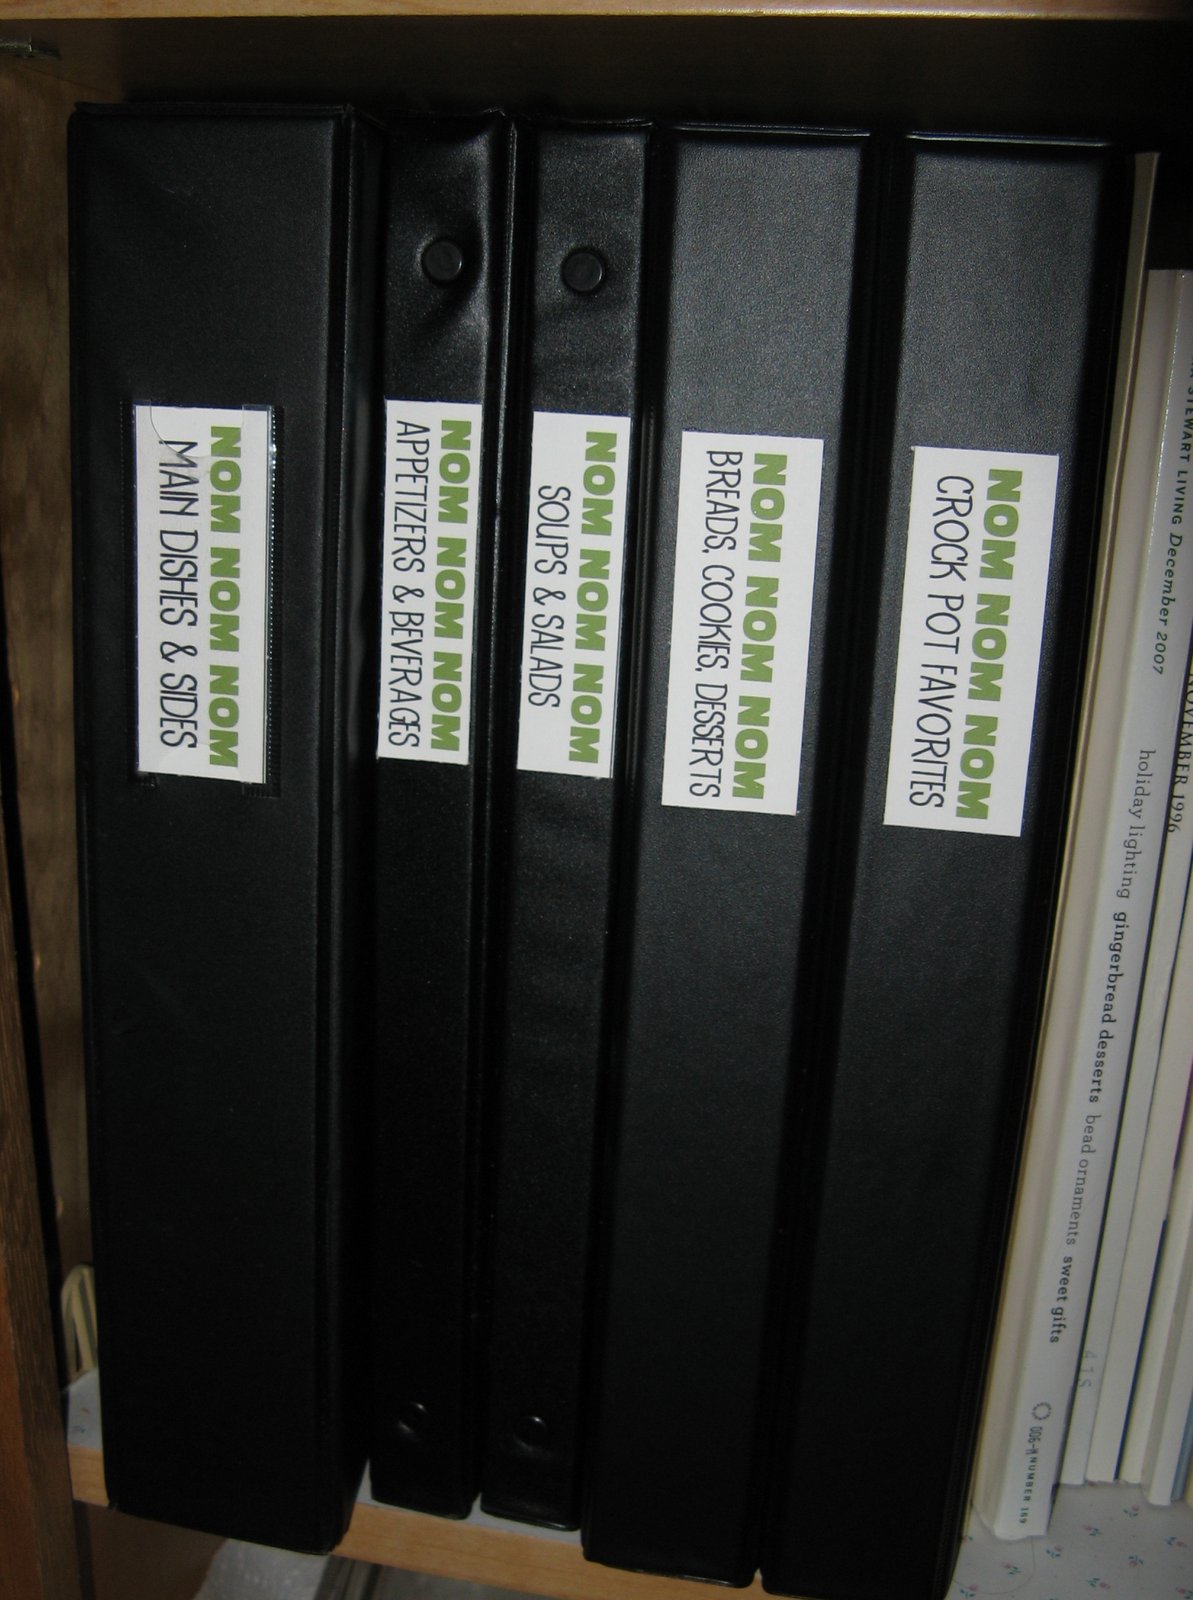
But the best part is this: My 3-ring recipe binders. I had been using a single binder with 8.5x11 sheet protectors for all the recipes I find online or tear out of magazines, but it was too full to accommodate the piles of recipes I've accumulated in recent years. Since I like this system, I decided to expand it to include multiple binders. I split up the recipes from the original binder into several, adding in all of the new recipes I'd kept but never filed. Now I can find recipes easily and have room to add to each category.
 The insides of the binders are very simple: Just 8.5x11 sheet protectors with full page or partial page recipes slipped inside. No frills -- just practical, accessible recipes.

The next phase of this project will be to take apart my recipe boxes and move the cards into divided sleeves which will fit into these binders. Stay tuned! 
  jp

P.S. Yes, my binders are labeled "NOM NOM NOM". That tells you that I'm a serious cook. HA!


27 January 2013

From Floral to Valentine's Day

In recent weeks, I've been making a few seasonal samples for Memory Bound. As such, I've kept my eye on some of the new Valentine's Day lines for color inspiration. This season, I've noticed a couple of lines which incorporate coral (instead of pink) along with teal. Not being a fan of pink anyway, this makes me very happy! As it turns out, I'd been given some paper to work with with just those colors, so the timing was perfect!

My challenge for this project was that the paper I started with (unfortunately I forgot to take a photo of it!) was not specifically for Valentine's Day. I'm totally fine with that, as I'm not really a "themed" person -- I tend to buy products that are not specific to any one season or topic.  

So to make this into a Valentine's Day layout, I first found a Valentine's Day print to go with it, to sort of NUDGE it in that direction! I chose the teal Bo Bunny heart paper shown in this photo below. Here, you can see my messy table as I was pulling together the color palette for this project:

I decided to incorporate the Mini-8 Punch on this layout, as it makes nice little elements to tuck behind photo mats. Here's the right-hand page coming together before I inked it all up. If you're working with disparate elements, inking can be one way of tying them all together.

I cut and embossed several flowers for my layout. You can see how the colors become deeper with a bit of inking. Tim Holtz Distress Ink in Vintage Photo did the trick.

And here's the completed layout. You can see the inspiration paper I started with along the top of the layout. It's fun to start with a paper that is not necessarily themed, then transform and update it with the addition of just a few seasonal elements!

Happy crafting!
jp

25 January 2013

Feline Friday: Hiding Spots

 Tinsel and Lily are always on the lookout for new hiding spots. I sometimes have to search and search to find them.

Tinsel especially likes these boxes!

But Lily prefers a cushier spot! :)

 Happy Feline Friday, everyone!
jp

22 January 2013

January Project: Conquer Recipe Clutter

The New Year always ignites my desire to ORGANIZE and this year is no different. I'd really like 2013 to be the year that I FINALLY conquer the clutter in this house. It seems that all I do is organize the clutter then just add to it. I don't actually GET RID of much. That needs to change this year!

Any organization guru will tell you to start small with one closet, drawer, or shelf, so I've chosen this cupboard which houses my MESS of recipe books. First, I'll be paring them down to a more reasonable number, since these days I seem to use very few of them anyway. In addition to these books, I have a couple of recipe card files which need to be tackled and converted into a better system. 

And do you see that stack of papers? It's a pile of recipes I've printed out from websites or torn out of magazines. I've now sorted through it and kept only the recipes I think I will actually try. Awhile back I started storing my printed recipes in a 3-ring binder and it's been working quite well, so I plan to expand that system to include all of those printed recipes.

 Stay tuned for more information on this project. I've got a stack of page protectors and 3-ring binders ready to go! The completed system may not be fancy, but I hope it's practical and helps to tame the recipe clutter around this place!
jp

18 January 2013

Feline Friday: Slow to Learn!

Awhile back, we had an incident in which Lily jumped into the dryer and we shut the door on her, not realizing she was in there. Thank goodness the dryer was not running, because we had left the house and she was enclosed in the dryer for a good long time. You can read about her little adventure (and our subsequent panic attack) HERE.

Fast forward to today: Even after that big scare, we still have to watch for Lily in the dryer. Like many kitties, she loves warm towels, so she's always on the lookout for them. In fact, just this week I found her back in the dryer just settling in for an afternoon siesta!

No, no, no, Lily! This is not a good place for a nap!

15 January 2013

Recipe: Curried Pork with Vindaloo


In the past few years, I've come to love Indian food. As it happens, there are some excellent Indian restaurants in Bloomington which we have frequented on our trips to visit Bailey at Indiana University. We also have a few good restaurants closer to home and, as I've become more familiar with Indian food, I've tried making some Indian recipes on my own. I have to say that the aroma of Indian food simmering on the stove is just about the best thing ever. I'll admit to stepping out of the house and back in several times while making dinner -- just to take in that wonderful aroma! :)

Over winter break, Bailey and I stopped by our local Penzey's Spices shop and happened upon a recipe for Curried Pork with Vindaloo. We picked up a small container of Penzey's Vindaloo seasoning (which smells incredible!) along with the recipe and made it that night. This was the first time Bailey (a very picky eater) had tried an Indian dish and she gave it rave reviews, so much that I made it a second time over break when her boyfriend visited. This is not an overly spicy recipe, but go easy on the Vindaloo seasoning if you're apprehensive about heat.
 

 Curried Pork with Vindaloo (Penzey's Spices)
 Ingredients
1 lb boneless pork tenderloin cut into ½" to 1" cubes
2-3 Tb. Vindaloo Seasoning (available at Penzey's)
¼  cup malt or cidar vinegar
1 tsp. kosher flake salt
2 TB. canola oil or ghee
1 onion, chopped
4 cloves fresh garlic or 1 tsp. minced garlic
⅔ cup unsweetened coconut milk (a light one with less fat works -- find this in the Asian foods or baking aisle)
       sour cream (optional)

Directions
Mix together the vindaloo, malt vinegar and salt into a paste and set aside.  In a large pot, heat the oil or ghee over medium-high heat. Add the onions and garlic (if using fresh garlic) and lightly brown. Add the vindaloo paste and stir for about 3-5 minutes. A lot of the vinegar will evaporate, thickening and stiffening the paste, which flavors the oil. Add the meat, stirring to cover it with the paste and searing it for about 2 minutes. Add the coconut milk and garlic (if using dried garlic) and stir to deglaze the pot. Reduce the heat to a low simmer and stir occasionally until the meat is cooked and tender, about 7-10 minutes. 
 

Serve over jasmine or brown rice. Cut heat with sour cream, if necessary. (Sour cream is excellent on this dish! In an Indian restaurant, it would be served with a yogurt sauce called raita. Sour cream is a good substitute!)


11 January 2013

Feline Friday: Puffballs lost and FOUND!

Lily has been obsessed with puffballs for years now. She carries them around in her teeth, chases them wildly, and even catches them like baseballs. (If you don't believe that last part, here's a link to her video!) 

From time to time, we've had to replenish her supply, as they tend to disappear in nooks and crannies around the house. In fact, Lily has lost so many puffballs that back in 2010, Santa brought her a bag of 100. Santa was sure that such a large bag would last a long, long time. After all, how could Lily possibly LOSE 100 puffballs?

Fast forward to 2012: IT IS POSSIBLE TO LOSE 100 PUFFBALLS. Out of the 100 puffballs in that bag, only a couple were still in her toy box. 

Then one day over Christmas break, Bailey found Lily feverishly trying to reach something under the oven. We pulled out the heavy oven drawer and sure enough....it was PUFFBALL BINGO!!! 

Lily is now back in Puffball Heaven. As for me, I guess I should clean under the oven more often, at least for Lily's sake! :)

09 January 2013

Organization: Packing Up Christmas

 I've been picking away at the five Christmas trees, taking down ornaments and boxing up the trees for next year. I've also been continuing on my quest to finish organizing all of my ornaments, a task which I started last Christmas. Last year, Bailey bought me some Snapware ornament boxes at Target which are much better than my old ornament boxes. I bought a few more at the end of the season but still didn't have enough for the ridiculous number of ornaments I've accumulated. Unfortunately, Target didn't carry the boxes this year but I found them online here. They went on sale after Christmas, and by ordering a LOT of boxes, I qualified for free shipping!

The old boxes (plaid, shown at right) have divided layers which must be lifted out to reach the ornaments at the bottom (see the post from last year, linked above). Of course, in the process of lifting them, everything spills. The new Snapware boxes are much sturdier and have completely separate layers, and you can snap together as many as you'd like.They hold a LOT of ornaments!
  
We bought this mixed set of ornaments at Target this year. Unfortunately, they're going to take quite a bit of space to store, but they looked great on the tree!

The new ornament boxes arrived...YAY! This made my "get organized" self very happy!


I wish the dividers were made of plastic instead of cardboard, but they're still very sturdy and do the trick.

 My first concern was to safely store my grandma's antique ornaments. I have original boxes for some of them, but the others were just in a large tissue-lined tub and a flimsy shirt box. I was able to fit ALL of those ornaments into just two layers of the new boxes.

Next I'll tackle the gold ornaments I use for one of the small trees. Storing the ornaments by theme will make it really easy to decorate the trees next year. Just pull out the labeled box and decorate! 

Sorting and re-organizing the ornaments is a BIG job, but I know I'll be very happy when it's done. The new boxes should take less space to store, and I know they'll provide much sturdier storage for my treasures.
 jp


04 January 2013

Feline Friday: Lily Snores


 Man, it's tough keeping the hours of a college student. Poor Lily's sleep schedule was completely disrupted when Bailey was home -- she was up until all hours! One night while sleeping on Bailey's bed, Lily was snoring even more loudly than usual, so Bailey caught this audio with her iPhone. Turn up your volume! :)
 Miss Lily catching some ZzzZZzzzzz!