Over the years as I've worked on different sorts of projects, I've learned that I'm very much a PROCESS person. This is especially evident when I plan classes. I think about the best way to do things to ensure a successful outcome, then I try to either continue or improve upon those steps each time.
But I'm still trying to determine the best PROCESS for this massive
scrapbooking project I've been working on. It's so easy to get bogged
down and not make progress. That can lead to discouragement and NO
PROGRESS, which is where things sat for far too long.
My typical process is to finish a page before moving on to the next one. That means planning it out, adhering all the photos, and adding embellishments and journaling before turning to the next set of photos. But this way forces you to switch between various types of tasks and (I think) can slow a person down.
So this time, I decided to try something different. Rather than finish each page before moving on, I decided to fill all the sleeves loosely with photos (basically to plan out the album), then go back and finish each page in a second step. I find that I work most efficiently if I do one type of task at once rather than switch back and forth between different kinds of tasks. So theoretically, this way should be faster. We shall see!
So I emptied the box of photos and filled the pocket pages and sleeves
with them. The good thing is that this allows you to see where all the photos will fit and in which size/style of page.
It's nice (but misleading!) to see this empty box. By no means is the album done!
If you've used pocket pages, you understand that it can be almost ridiculously complicated to figure out how to fit your horizontal and vertical photos into various configurations of sleeves. It sounds easy but it sometimes strains your brain as you try to fit same size photos front to back in the proper order! For this reason, it was helpful to just focus on this task until all the pages were very roughly planned out.
But obviously just shoving photos into page protectors doesn't finish the job. This pile of pictures just tells me that I'll be making couple of traditional scrapbook pages for this event.
So I started back at the beginning of the album and added titles, embellishments, and a little bit of journaling, going page by page. Some photos ended up on a traditional 12x12 page...
...while others ended up on 8.5x11 pages. I added a few embellishments here and there.
Some pages have very little journaling.
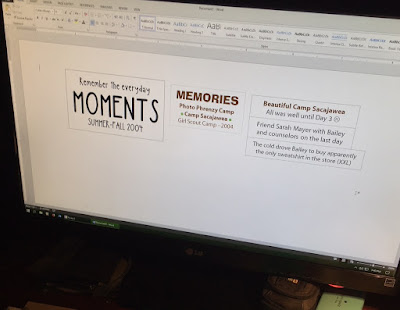
Some have more. To speed up this part of the process, I formatted text for several pages at once...
...then printed and cut apart the pieces. I definitely think it's more efficient to handle journaling this way, rather than a single page at a time!
Once the embellishments and journaling were added, I called these pages done and slipped them into the album sleeves, then moved on to the next unfinished page. Things were going along pretty well...
...until I remembered the big file of memorabilia I still need to add to this album. YIKES!
I'm not sure if this method is going to work for me. But if it will make things move more quickly then I'm willing to give it a try. We'll see how long it takes to wrap up this album. Time is ticking away and many more photos await!
jp


No comments:
Post a Comment