In the past year, I've become a big fan of stamp and die sets! I first bought the Hero Arts/Sizzix sets and have more recently purchased some by Taylored Expressions. As you can see in this post (written by Bailey last summer), the Hero Arts/Sizzix dies are open on the back, making it very easy to center them around a stamped image and cut it out using the Big Shot. The Taylored Expressions dies are "solid" on the back, meaning that you can't see through the back of them, so it takes a couple of additional steps to use them. In today's post, I'll show you how to do it, step by step!
Considering my great love for owls, I could not resist this adorable owl stamp and die set. The owls are cute (I'm picky about owl faces! No creepy owls!) and the greetings are great for cards.
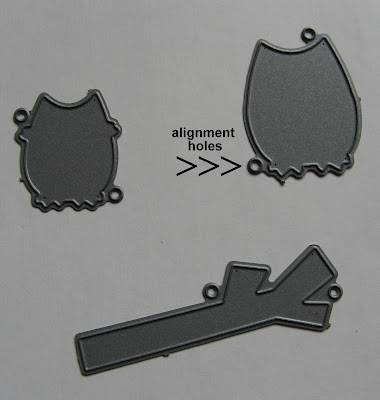
As you can see, the backs of these dies are solid and each one comes with an "alignment hole". I'm glad I read that on the Taylored Expressions website, or I would have cut them off!!! When you first open these dies, you have to snap them (or cut them) apart.

Next, you'll need to make a template by cutting your die on a piece of scrap cardstock. This is an extra step which is not required for dies which are open on the back. In a minute, you'll see why this is necessary. I used a piece of brown cardstock and ran the die through my Big Shot on Tab 2 of the Multi-Purpose Platform.

Next, stamp your image on cardstock. (If you plan to color it with Copics, be sure to use Memento ink and Neenah cardstock! I learned that from my friend Katie in her Copic Marker Basic class at Memory Bound!) I stamped my image onto white cardstock.

Now align your template around the stamped image. See those holes? Using a very fine-tipped pen, draw around each one. Taylor recommends making a "ring" versus coloring in the entire hole so that it's easier later to align the die.
So now we have the stamped image with the holes outlined.

Now you'll see why we needed to do those extra steps! Position your die (ridge side toward the stamped image) by placing the alignment holes around the outlined rings. When properly positioned, the rings should not be visible through the holes on the die. Secure the die to the cardstock with a Post-It note or removable tape so it does not shift when you run it through the Big Shot.


No comments:
Post a Comment