31 December 2021

Feline Friday

 Sometime over the past weekend, it occurred to me that I completely MISSED last week's Feline Friday post! I can't remember that happening in a very, very long time. I totally spaced it off because our daughter and fiance were visiting for Christmas and there was just WAY TOO MUCH fun happening!

It had been two full years since they'd been home and let me tell you, that is MUCH, MUCH too long. Of course, we've seen them during that time but there's just something about having your child home that does a mama's heart good.

So Santa made an extra long stop at our house this year and he even brought a few goodies for Lily!  Her stocking reads "nice" on one side and "naughty" on the other. Obviously, Santa believes she has been a nice girl!

She was happy to see that Santa left her two cans of delicious pate food AND an extra large bag of Temptations! She promptly sat down on her stocking so that nobody else would take those very special treats!

 
As a side note, notice how Lily's stocking is adorned with pom poms! Our stockings received pom pom enhancements this year and, from the looks of things, I'll be making pom poms for quite some time based on the amount of yarn I purchased! :)
 
Hope your Christmas was Merry and your New Year is bright!

Janet and Lily


17 December 2021

Feline Friday


Can we all take a moment and celebrate the extreme cuteness of Lily's feets? When she sits like a little lady, the white part almost lines up purr-fectly! She's a treasure!

What special feature does your kitty have? Take a picture (or 10!) of it!

Happy Feline Friday!
Janet

13 December 2021

Pom Pom Garland for Christmas

Awhile back, maybe two or even three years ago, I bought four sizes of Clover pom pom makers at JoAnn. At the time, I was inspired to make all kinds of pom pom crafts. And Bailey had started knitting up a storm so I decided to buy her a set, too, because knitted caps and such look cute with pom poms. 


 Fast forward to this year: I FINALLY got around to making a pom pom garland! I can't even remember what I initially wanted to make with my pom pom makers, but this project ended up being just the ticket! It was easy to make and, even though I was skeptical at many points along the way, I love how it turned out. I think it could be used for various holidays throughout the year.

Because I knew we would be having a long drive to Texas for Thanksgiving, I decided that I'd make pom poms as we drove along. Unlike reading or staring at my phone, this seemed like something I could do to feel productive whilst still carrying on conversation. And other than the yarn fibers which made Spouse sneeze, it was a good task to do in the car!


 I had no idea how many pom poms I'd need for my garland plus I thought I'd make a few tassels, too...LONG STORY SHORT, I ended up buying WAY TOO MUCH YARN! But the skeins were really inexpensive and I figure I'll be able to use them up over time.

I did learn that you need a certain weight (thickness?) of yarn to make a decent pom pom. Thin yarn makes feeble-looking pom poms. At JoAnn, most of the yarn is a Size 4 (indicated on the package), so that's what I bought. This size worked great.

So we headed off to Texas, me with my ginormous yarn skeins on the floor next to me. Luckily, the skeins were already wound to pull from the center. If you pull yarn from the outside, the skein will be tumbling all over the place.

I know you can make your own pom pom template with cardboard but seriously, these pom pom makers are just the best! Take a look at a video HERE

I started out with the medium size pom pom maker and made quite a number of white and cream pom poms before we even hit Missouri!


 In no time at all, I was producing pom poms right and left!


 After I made a few medium size pom poms, I made the same number of small ones. The smaller ones were super fast to create. 

Before you use your pom poms, you'll want to trim off the bits of yarn that are a little longer than the others, just to give a neater appearance.


Once we were back home, it was time to create my garland. To string the pom poms, I used a craft floss (I could have used yarn since I have plenty!) and a darning needle. It was easy to string them onto the floss and just move them to the proper position. I ended up having to make several more to fill up my garland.


Of course, I couldn't stop at just ONE garland. I wanted to add a second one with felt balls, also purchased at JoAnn. I strung them onto the same floss.


 Eventually I had enough to make a long chain. Again, the balls can be easily moved along and positioned where you want them without much slippage.

 I decided to position my felt ball garland first. I tacked up the two outside ends with painter's tape, then made shorter loops in the center, counting to be sure I had the same number of felt balls in each loop.


 Next, I positioned the pom pom garland by taping the ends in a similar way to the top of the mantel. Instead of four loops, I decided on three. This step was a little fiddly as I had to get the correct number of pom poms in each loop and make sure they were spaced evenly. 

For the garland, I think using a thicker thread or yarn might have been better because those larger pom poms are a bit heavy and they tend to distort the loops a little. But in the end, I just left it as is.


To cover up all the tape holding the operation in place, I added a garland across the mantel. I hadn't completely thought all of this through so had to scramble and dig around to come up with enough greenery to make a decent garland! This one is actually made with branches from an old artificial tree we got rid of a couple of years ago. I kept some of the branches (and the top!) to use for decorating. I added in a few berries and pinecones to jazz it up.

 I'm glad I finally got around to using the pom pom makers. The pom pom garland was a fun way to do something a little different with my Christmas decor. Now to come up with a few more pom pom projects to use up all of my yarn!


10 December 2021

Feline Friday

 Well, so much for posting more frequently! This has been a busy week, trying to get a few holiday things done and working on a couple of card projects for Memory Bound.

Lily has had a busy week, too, starting with LAUNDRY DAY!

After the Dryer Incident a few years ago, you'd think she'd steer clear of the laundry room. But NOPE! Lily has some kind of radar detection for warm laundry. It draws her in like a zombie.


Fortunately, I know she's inexplicably attracted to the dryer so I always keep an eye on her when it's laundry day. I let her take a peek inside and quickly re-direct her to other SAFER activities! Make good choices, Lily!

Happy Feline Friday, friends!


03 December 2021

Feline Friday with Rory

We are back from a lovely Thanksgiving visit to Texas! We enjoyed time with family, ate way too much delicious food, and got to hang out with Cousin Rory.

Rory is about 7 years old now (hard to believe!) and is living her very best life! She has a wonderful home, paw-rents who adore her, and plenty of wildlife to observe.

Rory has a lovely bench in front of the window with a purr-fect view of the flower garden and any butterflies, bees, or bunnies that may pop in for a snack.


She keeps a watchful eye out for dogs being walked and gets especially fiesty if a neighbor cat drops by to peer in the window. She's not exactly welcoming! 😃


The tall grasses are a great place for bunnies to nest. On this day, she had a stare-down with a bunny just taking a rest under the shade of the grass.


Nothing escapes Rory's watchful eye!

Unless, of course, those eyes are quietly closing for an afternoon nap!

 
 Here's hoping our friends all had a safe and happy Thanksgiving!


26 November 2021

Feline Friday


Just for fun, I put Tinsel's old collar and engraved heart on Lily. Gosh, I miss our sweet sissy. She was such good company for the both of us.

I think Lily looks especially cute with a collar. If she would just agree to it, she could absolutely have her own but sadly, she's not a fan!

24 November 2021

Tulip Time!


For Mother's Day, Bailey sent me a gift card to a local garden center. I decided to use it to purchase tulip bulbs. It's been YEARS since I've planted tulips, and I've never planted them at this house. Give Jay's Dutch heritage and our connection to Pella, Iowa where we met, it seems that we should have a few tulips in the yard!

A few months ago, we had the landscaping in front of our house re-done, leaving a few open areas which are perfect for tulips. With that location in mind, I went off to the garden store earlier this fall.

As it turned out, they were running a sale on tulip bulbs so I used the gift card to purchase not one but TWO bags (that's 50 tulip bulbs...yikes!) and a bag of bulb fertilizer. I already had a bulb digger so I was ready to go!


It took a few days but I finally got all the tulip bulbs planted! I used metal garden tags to mark the spots where I put the clumps so I will know where to expect some activity in the spring.


 Here's hoping that I planted them correctly AND they make it through the long, cold winter!


 I'm already excited for spring! Thanks, Bailey!😊


21 November 2021

More Christmas Card Stash-Buster Cards

As I've come to the end of some of my (hoarded) Christmas stash, I've made a few "one-off" cards. That means there is only one of them! 

In years past, ALL of my Christmas cards were one-off cards but that is just crazy-making. Nowadays, I'll repeat designs even if some of the materials are different. I'll do that until I reach the end of a collection, then I'll make a "one-off" card. Such cards are also great stash-busters.

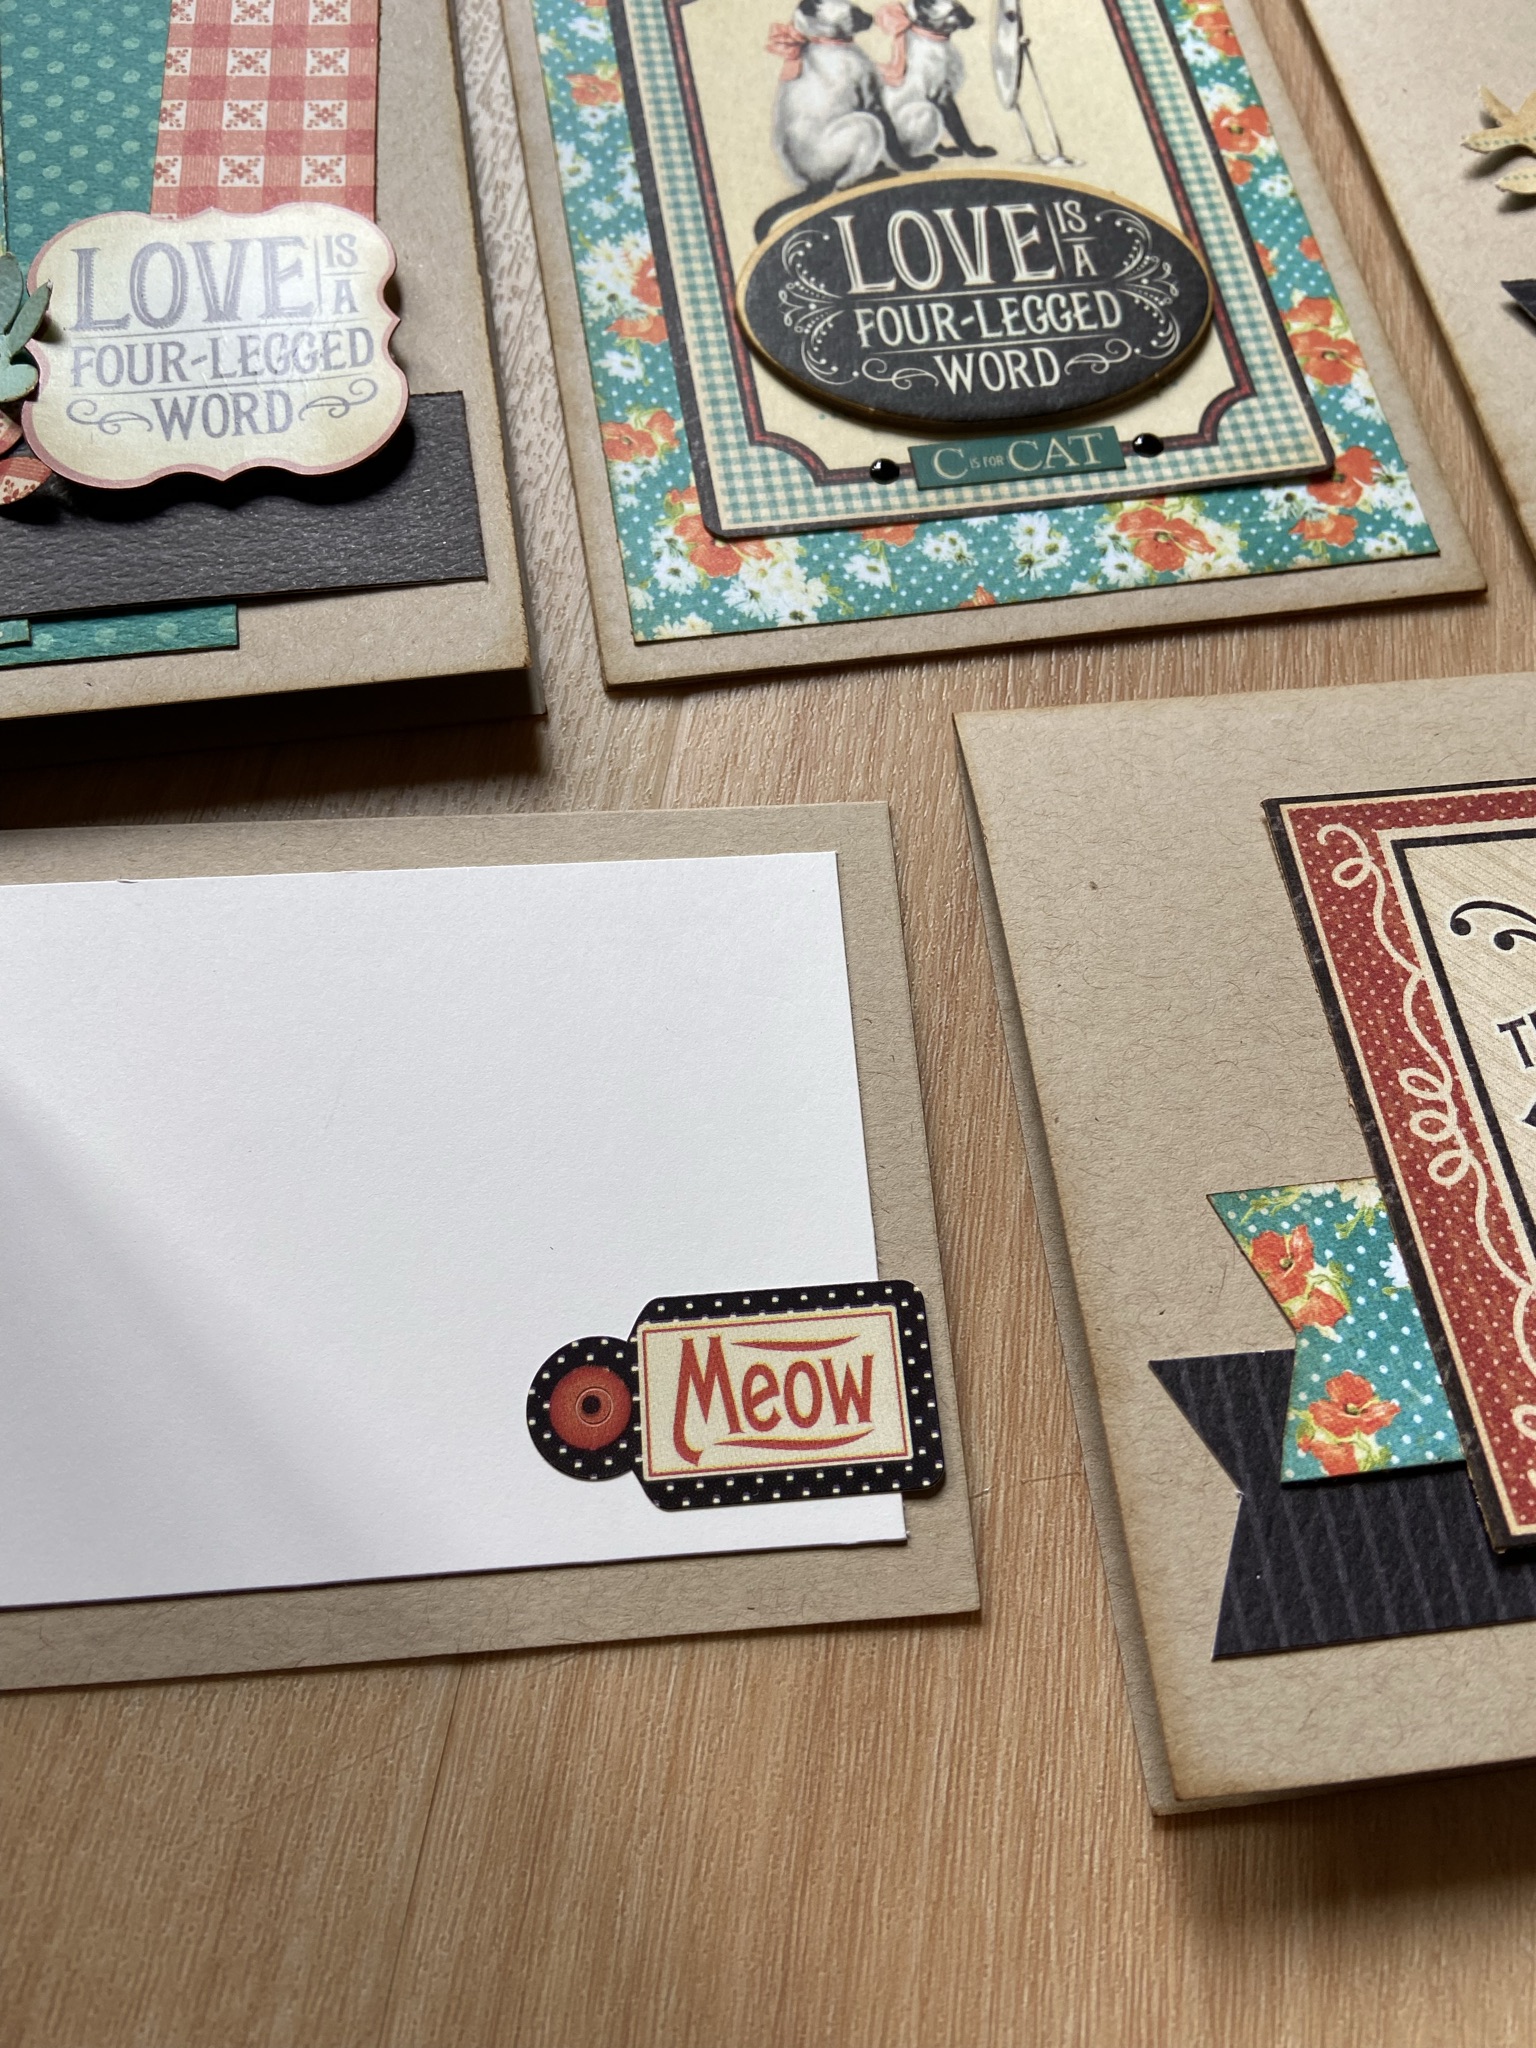
Here are some examples from this fall's Christmas card lollapalooza, which is just a fancy word for the mess happening right now in my craft room:

 This first card is not a new design but it worked well to use up the tiny (and I do mean TINY!) bits from this paper collection. And believe it or not, I think I MIGHT be able to eke out another notecard or two from what I now have left. At some point, I'm going to have to quit with these leftovers but I just love them so much!

This card used up an October Afternoon elf and two strips of my hoarded Authentique papers. Sadly, this is another company that I think is now out of business, so I can hardly stand to use these papers! I will probably have to keep a small stash just to look at from time to time. *sigh*

My long-time scrapbooking friends will remember Ki Memories, one of my all-time favorite companies, also long out of business. Somehow I still have stashes of Ki paper which occasionally work for cards. The inspiration for this card was the snowman. When cleaning out some embellishments, I ran across his hat, body, and scarf separately. I glued them together, vowing that he'd find his way to a card this year!


At the bottom of my die cut bin I found several large circular pieces (I think they are also hoarded October Afternoon bits). I arranged three coordinating bits in a zig-zag formation on my card front, then added in Santa, a greeting, and some glittered greenery. This zig-zag design is one I know I'll use again for different themes.

The red and green chipboard stockings were the inspiration for this card. I don't even remember where they came from, but they've waited a very long time to be used on a card! As I dug through my stash, I found a grinch-style die cut tree that matched perfectly. After that, it was just a matter of finding some paper to coordinate, and this card pretty much made itself.


Having made these and several other "one-off" cards, I'd suggest starting with the focal point and not the paper -- in this case, the stockings, Santa, snowman, elf, etc. For me, it seems easier to find paper to coordinate with those items than it is to find focal point pieces to match papers. And keep in mind, the paper you use does not even need to be Christmas themed, as long as the colors and patterns coordinate. Many of the papers I used, especially for envelope liners, are not designed for holidays. 

Here's to more stash-busters...so we can make room for new and beautiful goodies!

Thanks for stopping by today!
Janet

19 November 2021

Feline Friday

 With the colder weather, Lily is spending more time swaddled in old baby blankets. When she hears me come down to the kitchen, she saunters over to greet me and hopefully get a snack -- often still sporting the blanket!


 Her tail swings side to side, the blanket sweeping with it and sometimes dropping off. But in this case, the blanket held fast!

And Lily enjoyed her snack, still cozy from her nap!

 Once again, I think Lily has things figured out!

Happy Feline Friday!
Stay cozy, my friends!

17 November 2021

Handmade Christmas Cards: Use That Stash!

 I freely admit that I'm usually quite late to start my personal Christmas cards. A lot of that has to do with the Christmas card classes and kits I design for Memory Bound. Those big projects tend to occupy a lot of my time during the fall months when one would normally work on Christmas cards.


Instead of rushing around at the last minute, this year I decided to try something different. I've been working on my cards for several months now off and on as the mood strikes. This has turned out to be a very good process for me and now I have 45+ cards already done. Since I'm still on a roll I'll just keep going, and any extra cards I don't need will be saved for next year.

 One thing that has helped me be more productive this fall is setting up a little "station" with my Christmas card stash. I bought a new line from Stamperia this year (like I needed more Christmas stuff...HA!) and filled one of my mom's old glass fridge containers with the chunky die cuts. In the other one I placed some larger pieces I've had for years. I love some of them so much that I don't know if I'll every be able to use them, but step one is having them handy! In the small bowls I placed text pieces I've made and cut apart and smaller die cut pieces. My glitter, Nuvo Drops, and sparkle brush also fit nicely on the tray.


 I have a small enamelware tin which came from Mom's kitchen filled with extra die cuts and punched pieces. I will often make a few of these from scraps of cardstock to have on hand for cards. It's really nice to be able to dig around and find just what you need.


So with this set-up, whenever I feel like making a card I have everything I need to get started.

I started putting the completed cards and lined envelopes into one of my many Longaberger baskets. As the year has progressed, I had to break out a bigger basket to hold them all! It's nice to have a visual reminder of my progress.

In addition to making cards with newer products, I'm really making a concerted effort this year to use up some older stash. One of my favorite companies (now sadly out of business) was October Afternoon. I have a lot of their products that I just can't bring myself to use...especially for cards that will be given away. But I finally decided I COULD use some of the papers in this old 8x8 pad.

In looking through my stash of die cuts, I found a lot of kraft tags, so I decided to come up with a design to use a few of them up. I started with a panel of patterned paper from the pad, then added a cream die cut stitched rectangle and tag. Beyond that foundation, each of these cards varies a bit based on the cut-apart artwork I used on the front.

I still have plenty of these papers left so I may make a few more October Afternoon cards from my stash. I also have a lots of kraft tags left so I know I'll be using this design again! It's a good foundation for any card for any occasion.


Here's to finally using up that stash!
Thanks for stopping by!
Janet


15 November 2021

Cat Cards from Scraps

I've been going through my paper stash and pulling out the bits and pieces that would make good cards. I recently ran across what was left of the older Graphic 45 collection, "Raining Cats and Dogs". I had just a few paper strips, chipboard pieces, stickers, and cut-aparts and decided to make up a few cards to have on hand for my cat-loving friends. I love the colors in this collection! 

Now that I think of it, the floral paper was the only one original to this paper line. I added in the orange check and blue dot from my stash. Even though pickin's were slim, it doesn't take much to make a perfectly acceptable card!


For two of the cards I used the same "strip card" design I posted previously, supplementing it with punched flowers and greenery. 

 I used 3x4 cut-aparts on two cards and finished up a sheet of stickers with a notecard. When I get down to just a few small pieces, I switch to a smaller card base. Works great!


I added stickers to the insides of some cards. This is a practical way to use up little bits of this and that.


 It's always a fun challenge to see how many cards I can make from scraps. Now on to the next batch of odds and ends from my stash!

Thanks for stopping by today!
jp