Awhile back, I posted about the updates we've been making to our house in the laundry room and guest bathroom. Those changes were welcome and, especially in the laundry room, long overdue.

But the biggest change we've made was to the kitchen. Back in June, we had our cabinets, woodwork, and walls painted. We knew it was way too much to even consider doing ourselves so we hired it done. This process was a little more disruptive than I'd anticipated but I love how everything turned out. If you're considering doing a similar kitchen project, read on!
This is a BEFORE picture of the kitchen with our golden oak cabinets and olive walls. A few years back, we replaced the original white counter tops with black Formica solid surface which we decided to keep. In addition, we've been replacing our all-white appliances with stainless steel. The goals for this project were:
1) Paint the cabinets and woodwork
2) Paint the walls
3) Replace a few windows with rotted sills
4) Add a backsplash

Here is the AFTER with the changes done. It's hard to overstate how much lighter and brighter the kitchen is with these changes.

To prepare for a kitchen update like this one, it was necessary to unload all the cabinets. This is no small task, especially when they are as ridiculously full as ours. But it made for a good opportunity to sort through stuff and I vowed to put back ONLY the items that we need in the space. Everything else was donated or stored.
Lily and I worked on this task for a couple of days.


Everything that came out of the cupboards went into the dining room for sorting. For the most part, our cabinets are filled with dishes, pots and pans, and utensils. Once everything was out of the cupboards I covered it all over with sheets in anticipation of the dust -- and also just to conceal the mess!

Meanwhile, we picked out backsplash tile to match our cabinet paint color. Since our contractor was available, we had him go ahead and install it. I have wanted a backsplash for years but had been hesitant to take the plunge. I absolutely love how it turned out and wish we had done it years ago!

Next, the painters came to set up for the project. I guess I was mentally unprepared for the amount of kraft paper and plastic that would be installed. This part of the project took a solid three days! During this time, the crew also removed all the cabinet doors and drawers to take them to the shop to be painted.

Lily was a good "snoop-ervisor" throughout this project. In spite of the fact that cats tend to get stressed when their routine is upset, she did quite well with the kitchen being torn up for a bit. She loved being able to go into cabinets at will!


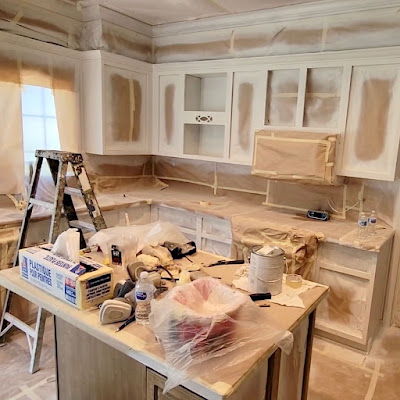
Once the taping was done, the crew sprayed the cabinets in place. We had a darker color (same as the upstairs bathroom vanity) sprayed onto the island. I initially wanted to do all the lower cabinets in that same color and I still think that would have been nice.

After the cabinets were done, it took another week or so to get the doors back from the shop. Meanwhile I sorted through everything and tried to "curate" the items I put back into the cupboards. I will say that sorting process was long overdue.

The walls remained olive for awhile before we could get the painters scheduled again. I really loved how the olive color looked with the new cabinet color.

But alas, it was time for a change. The walls were painted with a neutral taupe, the same as in the laundry room and upstairs bathroom. Although I loved the olive color, the taupe is much more restful.
I never would have predicted we'd undertake this kind of kitchen update but I'm really glad we did. I have really enjoyed our "new" old kitchen!

jp
4 comments:
Loved the before, but I really love the after! The hardest projects are done, bathrooms and kitchens. Looks beautiful!
Thank you so much, Mary! You are right -- the kitchen and bathrooms are definitely the biggest projects. I am glad they are done!! Thanks for stopping by. :)
Absolutely gorgeous!! Lots of upheaval and I’m sure very hard to go through, but SO worth it in the end!!
Thank you so much, Kimberly Marie! I'm really glad we went ahead and did this big project. I learned a lot in the process and am happy with how it turned out. Hope you are staying warm! Thanks for stopping by!
Post a Comment