06 February 2013

Recipe: Maggie's 5-Hour Stew

The past few weeks have been super busy for me. The good news is that, not unlike a ground hog, I've finally emerged from the deep hole I've been in for quite some time. Thanks to my friend Sharon, I'm back to making my all-encompassing lists, which gives me a sense of control and progress. (I've always been a list-maker. How and why did I get away from it?)

At any rate, my friend Maggie mentioned last week that she was planning to cook 5-Hour Stew, a favorite dish she's been making for years. Being in a stressed state, I was definitely in the mood for comfort food so my ears perked right up. I was also intrigued by the name. It's like a crock pot recipe, but made in the oven instead. 

  I was so fretful that day that I forgot to get the recipe from Maggie, but I found it easily on Food.com. I love the fact that there are ONLY 2 STEPS in the instructions, along with the "No Peeking!" part at the end, which Maggie told me is very important. In my recipe binder, it will be called Maggie's 5-Hour Stew!

Oven 5-Hour Beef Stew (from Food.com)

1-2 lb stew meat (Maggie suggested using chuck roast, so I followed her instructions!)
4 potatoes, peeled and quartered
2 medium onions, peeled and sliced (white or yellow)
2 cups carrots (I used the mini carrots)
2 garlic cloves, minced
2 tablespoons tapioca
1 tablespoon Worcestershire sauce
1 teaspoon sugar
1 teaspoon salt
1 teaspoon pepper 

 1 (10 1/2 ounce) can tomato soup (I substituted tomato paste with 1/2 can of water)
1 3/4 cups water

Directions (Look! only 2 steps!)
1. Combine all above ingredients into a large baking dish; cover with aluminum foil.
2. Bake for 5 hours at 250 degrees-- NO PEEKING!


* * * * * *
 Now I'm going to give you a "play by play" (that's my new basketball term!) describing my experience with this recipe!

Once I assembled all of the ingredients, I was happy this was NOT a crock pot recipe. There is NO WAY all of this would fit in my 3.5 quart crock pot. I began to have concerns about it fitting in my casserole dish, too, but I forged ahead anyway!
I cut up the onions and peeled the potatoes. I will go to almost any length to avoid peeling potatoes but I dutifully did as the recipe required. As I chopped, I began to think that the "5-Hour" part referred to prep time! No, I'm kidding. If you are remotely competent in the kitchen, the prep should take about 15 minutes.

In retrospect, I should have cut up the veggies in much smaller pieces. No one's mouth is THIS large!!!
 

Even worse was cutting up the meat! I do not like to cut up meat. Sure, I could have bought the already-cut-up stew meat listed in the recipe, but Maggie recommended buying a small chuck roast because it would taste better...and I think she's right about that. She also suggested cutting it up with my kitchen shears, but of course I only have Cutterbee scissors :) so I had to use a knife. Which brings me to another issue which may be of interest to any criminals reading my blog...there are NO SHARP KNIVES IN THIS HOUSE. After trying FOUR knives, I ended up using a serrated bread knife, which I'm pretty sure is all kinds of wrong.

Now I did feel somewhat proud of myself at this point. Here's why: I bought a roast which was double the size I needed, then froze half of the pieces so I can make the dish a second time. I even labeled the freezer bag. Go, me!

 Okay, there is no picture for this next step, because that's when trouble ensued. I put all of the cut-up veggies in my casserole dish (I have no idea how big it is -- maybe 9x11?) and it was almost overflowing before I added the meat! I had to take out quite a few of the onions to make room. So now I also have a bag of frozen onions for next time. Go, me? 

  Of course, I had failed to think about how I would possibly stir everything together with the "sauce" after the casserole dish was so full, so I mixed the sauce components in a dish thinking I'd just pour it over the meat and veggies. I think that worked ok...not great, but ok. 

 Note that I made one substitution with the recipe: Instead of tomato soup, I used tomato paste with 1/2 can of water, as suggested by a Real Cook in the recipe comment section on Food.com. Don't get me started about tomato soup. It gives me the willies just thinking about it! YUCK!

  So yeah, I realize this is probably NOT how the dish is supposed to look before it goes into the oven. It was so full that there was no room to stir but, in a somewhat cavalier move, I decided I would not fret about it. I hoped that it would all sort of meld together in the magic oven.


Still, I decided to put a baking tray under the casserole dish, should an unfortunate overflow occur. Not that the oven is squeaky clean, by any means. But I do want to avoid flames.


I had to leave the 5-Hour Stew in the oven a little longer than 5 hours, due to the fact that I somehow left the oven door slightly ajar for the first hour or so of cooking. HOW DOES ONE EVEN DO THAT? Well, I had moved a shelf and apparently it blocked the door. So I added another 30 minutes to make up for lost time.

 And this is the finished product. Admittedly, my food photography leaves a LOT to be desired, but the 5.5-Hour Stew was really quite good!

Keep in mind that it IS actually stew, as opposed to pot roast with veggies. With that fact more clearly in mind, next time I will cut everything up in much smaller pieces and set the table with bowls instead of plates! I might also add green peppers for a bit of color, as well as a titch more salt and garlic. Otherwise, it's definitely a keeper recipe!
 

If you're looking for a comfort food recipe -- AND you've got a sharp knife and a big casserole dish -- then this is the recipe for you!

jp

05 February 2013

Happy Things

I've been a bit down in the dumps lately, having had a stressful fall and holiday season, then finding myself falling behind with a number of my commitments. But I'm slowly emerging and getting back on track. With that in mind, here are a few things that have made me HAPPY lately!

Almost nothing makes me happier than PROGRESS on my to-do list. I finally accomplished a biggie: I dismantled my Dickens Village and put it all away...along with all the other Christmas decorations which were in various piles in the basement. This was no small undertaking, as I always take the opportunity to re-organize as I go. Now that it's FEBRUARY (HA!) it feels good to have Christmas packed away. Hey, there's almost time to get out a few Valentine's Day decorations!

Another thing that makes me HAPPY is Thai food, especially spicy basil. I love it so much that I am reluctant to order anything else! We enjoyed a trip to one of the many good Thai restaurants around town last weekend.

Here's another bit of HAPPINESS -- actually 200 bits: My 200 October Afternoon buttons from Peachy Cheap arrived last week! I love these buttons because they are solid (not clear) and many of them have little details like raised edges or patterns. I rarely buy from Peachy Cheap, but I could not resist this button deal!

Another thing making me HAPPY is that I finally made a scrapbook page, after a way-too-long hiatus. One of my goals is to get back on track with my personal scrapbooking, so here's to progress! This page features a cell phone picture of my daughter with a saxophone around her neck. Being a percussionist, it's really strange (but wonderful!) to see her learning wind instruments. This page is about the "new horizons" she's exploring at IU's Jacobs School of Music.

We had another small snow event last week, and it happened to be on a day that I was home working on projects in my craft room. I absolutely LOVE crafting on days when it's rainy or snowy. This view from my craft room window made me very HAPPY!

And here's another thing which makes me extremely HAPPY: Our nighttime deer visitors! Every few nights sometime between 10:30pm and 2am, three or more deer saunter through our neighborhood. Sometimes they stop and lie down in our yard. It's such a treat to see these beautiful animals! On this particular night, there were SEVEN deer, and I rushed to grab a picture with my phone as they crossed the street. The photo turned out completely black, but after I lightened it in Picasa, you can see them! It sort of looks like one of those sketchy "crime buster" type photos but I can assure you, these deer were on their best behavior!

Here's to less stress and many more HAPPY moments in the weeks to come!
jp


01 February 2013

Feline Friday: A Bad Day Made Better

 Warning: This post may contain TOO MUCH INFORMATION! :)

Being an overly attentive cat mama, I notice things about the kitties that would probably slip by others. Actually, I notice pretty much everything. But one night this week, I spotted Lily doing something quite unladylike that would catch just about anybody's attention: Scooting across the floor.

Now maybe you've seen a dog scoot. It's not nice behavior, and it's a pretty sure signal that something has gone awry in the lower end. It's somewhat unusual behavior in cats, especially female cats, but Lily has been doing it off and on for about a year now. 

I know the culprit. 
(Close your eyes if you don't want to read the answer.)
Clogged anal glands.

And I know the cure.
Expression. 
And I don't mean artistic. :)

So the next day, off to the vet we went. Lily didn't complain once on the way across town. Not so much as a meow. I took that to mean that she was feeling a bit uncomfortable "down there" and welcomed the assistance :)


When we arrived, she most definitely recognized the place. Yep, she's been here for this procedure three times in the past few months. 

Our Lily is not a cooperative patient and must be sedated anytime she goes to the vet, regardless of the reason. If I were a vet, I'd most certainly sedate her, too -- especially for this procedure! And this time, we really got our money's worth: In addition to "the usual", she also had a complete "gland flushing" for good measure. While she was sedated, she even had her nails trimmed!

So with squeaky clean glands and neatly trimmed nails, what started out as a bad day started looking a little brighter. And later, when she planted herself on my lap for the evening, a good belly rub made it even better!
  

28 January 2013

Update: Recipe Organization Project

 Over the past few weeks, I've been trying to tackle the recipe clutter in our kitchen. I realize that when you look at the photos in this post, you may be completely underwhelmed with the results of my efforts, but believe me -- I've really made a dent in the recipe clutter. I'm not done yet, but I feel pretty good about my progress so far!

After assessing the situation (see my original post here), I first decided to relocate my recipe books to a cupboard where they'd be more easily accessible. They're now housed in a cupboard under our kitchen island where I don't have to climb on a chair to reach them. Makes sense, huh?

I have WAY too many recipe books, so I looked through them all and (believe it or not) set aside an entire box to donate to our local Planned Parenthood Book Sale. (If memory serves me, I bought some of them at the sale in the first place!) I could probably get rid of a few more, but many of the books I kept have sentimental value (in addition to good recipes!) so for the time being, they're staying. In the new cupboard, I have two shelves instead of one which makes them much more accessible. Heck, I might even USE them now! :)


Many years ago, I went to a library sale and bought some metal magazine files. Over the years, we've used them for a few different purposes. Now I've put one file to work organizing the small recipe pamphlets that go with various kitchen appliances.


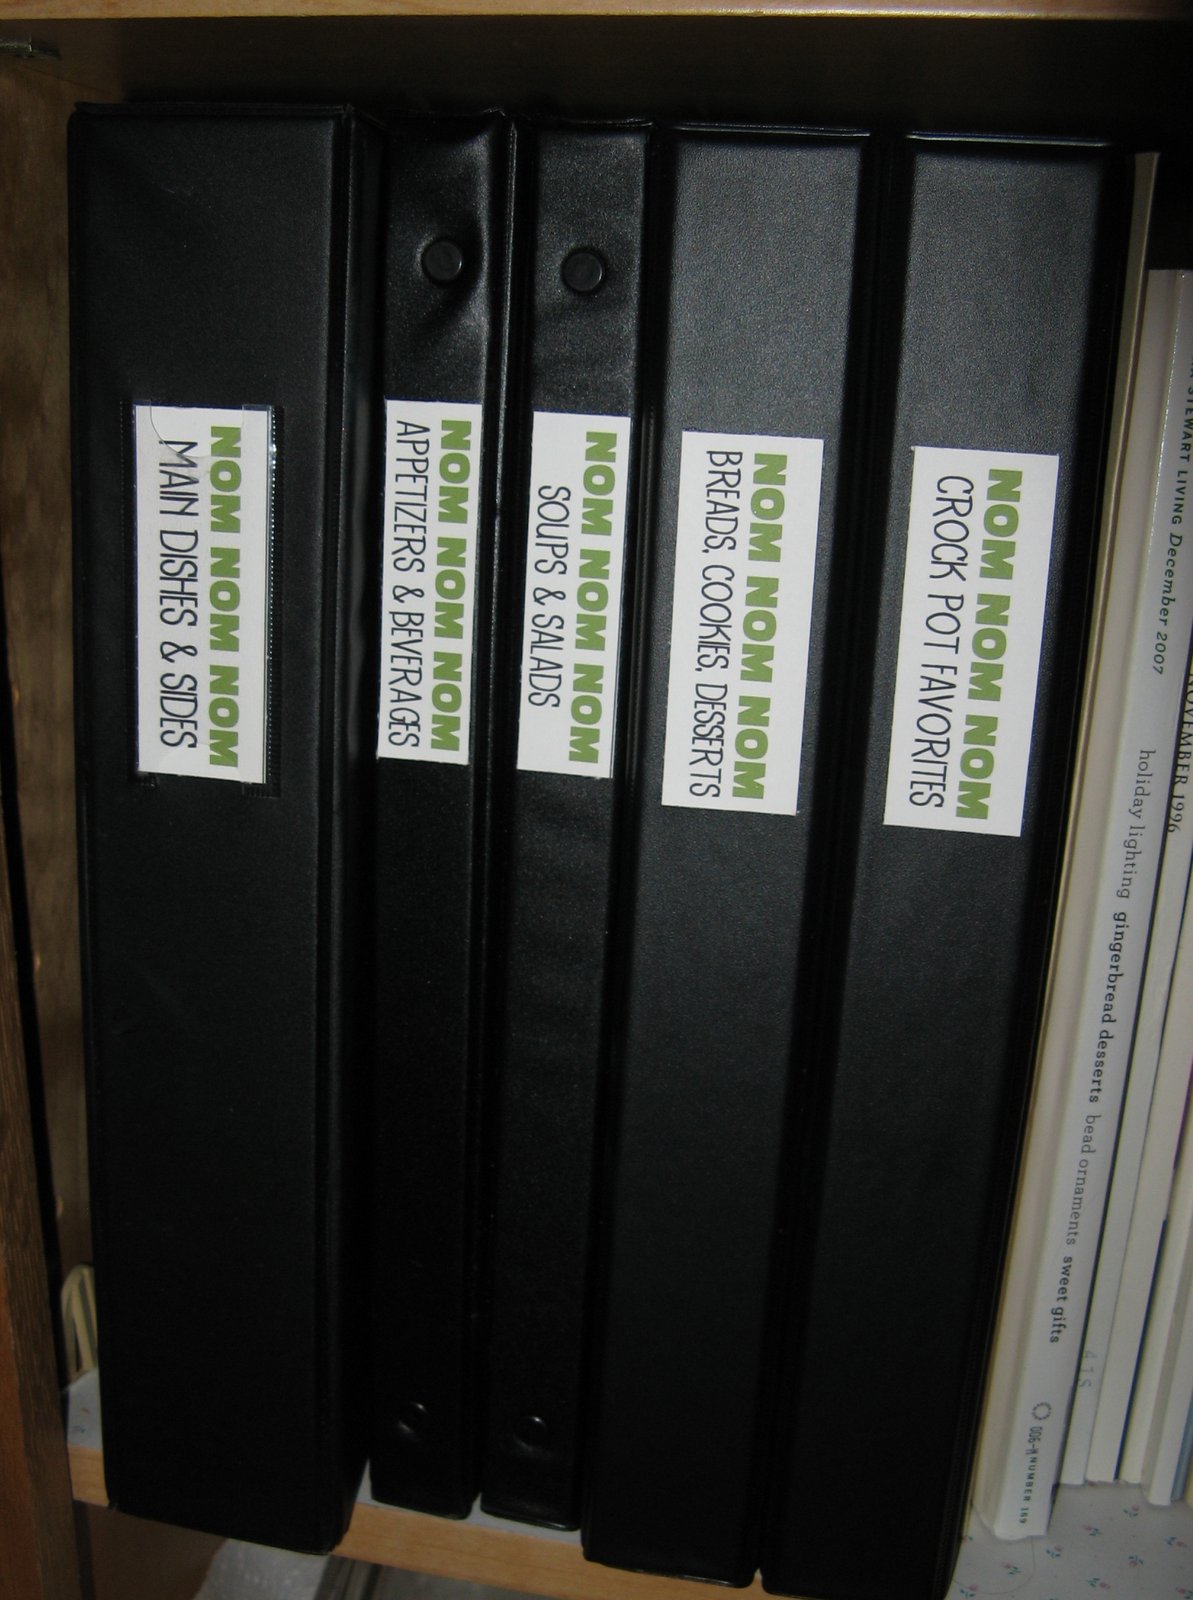
But the best part is this: My 3-ring recipe binders. I had been using a single binder with 8.5x11 sheet protectors for all the recipes I find online or tear out of magazines, but it was too full to accommodate the piles of recipes I've accumulated in recent years. Since I like this system, I decided to expand it to include multiple binders. I split up the recipes from the original binder into several, adding in all of the new recipes I'd kept but never filed. Now I can find recipes easily and have room to add to each category.
 The insides of the binders are very simple: Just 8.5x11 sheet protectors with full page or partial page recipes slipped inside. No frills -- just practical, accessible recipes.

The next phase of this project will be to take apart my recipe boxes and move the cards into divided sleeves which will fit into these binders. Stay tuned! 
  jp

P.S. Yes, my binders are labeled "NOM NOM NOM". That tells you that I'm a serious cook. HA!


27 January 2013

From Floral to Valentine's Day

In recent weeks, I've been making a few seasonal samples for Memory Bound. As such, I've kept my eye on some of the new Valentine's Day lines for color inspiration. This season, I've noticed a couple of lines which incorporate coral (instead of pink) along with teal. Not being a fan of pink anyway, this makes me very happy! As it turns out, I'd been given some paper to work with with just those colors, so the timing was perfect!

My challenge for this project was that the paper I started with (unfortunately I forgot to take a photo of it!) was not specifically for Valentine's Day. I'm totally fine with that, as I'm not really a "themed" person -- I tend to buy products that are not specific to any one season or topic.  

So to make this into a Valentine's Day layout, I first found a Valentine's Day print to go with it, to sort of NUDGE it in that direction! I chose the teal Bo Bunny heart paper shown in this photo below. Here, you can see my messy table as I was pulling together the color palette for this project:

I decided to incorporate the Mini-8 Punch on this layout, as it makes nice little elements to tuck behind photo mats. Here's the right-hand page coming together before I inked it all up. If you're working with disparate elements, inking can be one way of tying them all together.

I cut and embossed several flowers for my layout. You can see how the colors become deeper with a bit of inking. Tim Holtz Distress Ink in Vintage Photo did the trick.

And here's the completed layout. You can see the inspiration paper I started with along the top of the layout. It's fun to start with a paper that is not necessarily themed, then transform and update it with the addition of just a few seasonal elements!

Happy crafting!
jp

25 January 2013

Feline Friday: Hiding Spots

 Tinsel and Lily are always on the lookout for new hiding spots. I sometimes have to search and search to find them.

Tinsel especially likes these boxes!

But Lily prefers a cushier spot! :)

 Happy Feline Friday, everyone!
jp

22 January 2013

January Project: Conquer Recipe Clutter

The New Year always ignites my desire to ORGANIZE and this year is no different. I'd really like 2013 to be the year that I FINALLY conquer the clutter in this house. It seems that all I do is organize the clutter then just add to it. I don't actually GET RID of much. That needs to change this year!

Any organization guru will tell you to start small with one closet, drawer, or shelf, so I've chosen this cupboard which houses my MESS of recipe books. First, I'll be paring them down to a more reasonable number, since these days I seem to use very few of them anyway. In addition to these books, I have a couple of recipe card files which need to be tackled and converted into a better system. 

And do you see that stack of papers? It's a pile of recipes I've printed out from websites or torn out of magazines. I've now sorted through it and kept only the recipes I think I will actually try. Awhile back I started storing my printed recipes in a 3-ring binder and it's been working quite well, so I plan to expand that system to include all of those printed recipes.

 Stay tuned for more information on this project. I've got a stack of page protectors and 3-ring binders ready to go! The completed system may not be fancy, but I hope it's practical and helps to tame the recipe clutter around this place!
jp

18 January 2013

Feline Friday: Slow to Learn!

Awhile back, we had an incident in which Lily jumped into the dryer and we shut the door on her, not realizing she was in there. Thank goodness the dryer was not running, because we had left the house and she was enclosed in the dryer for a good long time. You can read about her little adventure (and our subsequent panic attack) HERE.

Fast forward to today: Even after that big scare, we still have to watch for Lily in the dryer. Like many kitties, she loves warm towels, so she's always on the lookout for them. In fact, just this week I found her back in the dryer just settling in for an afternoon siesta!

No, no, no, Lily! This is not a good place for a nap!

15 January 2013

Recipe: Curried Pork with Vindaloo


In the past few years, I've come to love Indian food. As it happens, there are some excellent Indian restaurants in Bloomington which we have frequented on our trips to visit Bailey at Indiana University. We also have a few good restaurants closer to home and, as I've become more familiar with Indian food, I've tried making some Indian recipes on my own. I have to say that the aroma of Indian food simmering on the stove is just about the best thing ever. I'll admit to stepping out of the house and back in several times while making dinner -- just to take in that wonderful aroma! :)

Over winter break, Bailey and I stopped by our local Penzey's Spices shop and happened upon a recipe for Curried Pork with Vindaloo. We picked up a small container of Penzey's Vindaloo seasoning (which smells incredible!) along with the recipe and made it that night. This was the first time Bailey (a very picky eater) had tried an Indian dish and she gave it rave reviews, so much that I made it a second time over break when her boyfriend visited. This is not an overly spicy recipe, but go easy on the Vindaloo seasoning if you're apprehensive about heat.
 

 Curried Pork with Vindaloo (Penzey's Spices)
 Ingredients
1 lb boneless pork tenderloin cut into ½" to 1" cubes
2-3 Tb. Vindaloo Seasoning (available at Penzey's)
¼  cup malt or cidar vinegar
1 tsp. kosher flake salt
2 TB. canola oil or ghee
1 onion, chopped
4 cloves fresh garlic or 1 tsp. minced garlic
⅔ cup unsweetened coconut milk (a light one with less fat works -- find this in the Asian foods or baking aisle)
       sour cream (optional)

Directions
Mix together the vindaloo, malt vinegar and salt into a paste and set aside.  In a large pot, heat the oil or ghee over medium-high heat. Add the onions and garlic (if using fresh garlic) and lightly brown. Add the vindaloo paste and stir for about 3-5 minutes. A lot of the vinegar will evaporate, thickening and stiffening the paste, which flavors the oil. Add the meat, stirring to cover it with the paste and searing it for about 2 minutes. Add the coconut milk and garlic (if using dried garlic) and stir to deglaze the pot. Reduce the heat to a low simmer and stir occasionally until the meat is cooked and tender, about 7-10 minutes. 
 

Serve over jasmine or brown rice. Cut heat with sour cream, if necessary. (Sour cream is excellent on this dish! In an Indian restaurant, it would be served with a yogurt sauce called raita. Sour cream is a good substitute!)


11 January 2013

Feline Friday: Puffballs lost and FOUND!

Lily has been obsessed with puffballs for years now. She carries them around in her teeth, chases them wildly, and even catches them like baseballs. (If you don't believe that last part, here's a link to her video!) 

From time to time, we've had to replenish her supply, as they tend to disappear in nooks and crannies around the house. In fact, Lily has lost so many puffballs that back in 2010, Santa brought her a bag of 100. Santa was sure that such a large bag would last a long, long time. After all, how could Lily possibly LOSE 100 puffballs?

Fast forward to 2012: IT IS POSSIBLE TO LOSE 100 PUFFBALLS. Out of the 100 puffballs in that bag, only a couple were still in her toy box. 

Then one day over Christmas break, Bailey found Lily feverishly trying to reach something under the oven. We pulled out the heavy oven drawer and sure enough....it was PUFFBALL BINGO!!! 

Lily is now back in Puffball Heaven. As for me, I guess I should clean under the oven more often, at least for Lily's sake! :)

09 January 2013

Organization: Packing Up Christmas

 I've been picking away at the five Christmas trees, taking down ornaments and boxing up the trees for next year. I've also been continuing on my quest to finish organizing all of my ornaments, a task which I started last Christmas. Last year, Bailey bought me some Snapware ornament boxes at Target which are much better than my old ornament boxes. I bought a few more at the end of the season but still didn't have enough for the ridiculous number of ornaments I've accumulated. Unfortunately, Target didn't carry the boxes this year but I found them online here. They went on sale after Christmas, and by ordering a LOT of boxes, I qualified for free shipping!

The old boxes (plaid, shown at right) have divided layers which must be lifted out to reach the ornaments at the bottom (see the post from last year, linked above). Of course, in the process of lifting them, everything spills. The new Snapware boxes are much sturdier and have completely separate layers, and you can snap together as many as you'd like.They hold a LOT of ornaments!
  
We bought this mixed set of ornaments at Target this year. Unfortunately, they're going to take quite a bit of space to store, but they looked great on the tree!

The new ornament boxes arrived...YAY! This made my "get organized" self very happy!


I wish the dividers were made of plastic instead of cardboard, but they're still very sturdy and do the trick.

 My first concern was to safely store my grandma's antique ornaments. I have original boxes for some of them, but the others were just in a large tissue-lined tub and a flimsy shirt box. I was able to fit ALL of those ornaments into just two layers of the new boxes.

Next I'll tackle the gold ornaments I use for one of the small trees. Storing the ornaments by theme will make it really easy to decorate the trees next year. Just pull out the labeled box and decorate! 

Sorting and re-organizing the ornaments is a BIG job, but I know I'll be very happy when it's done. The new boxes should take less space to store, and I know they'll provide much sturdier storage for my treasures.
 jp