Showing posts with label Crafts. Show all posts

13 December 2021

Pom Pom Garland for Christmas

Awhile back, maybe two or even three years ago, I bought four sizes of Clover pom pom makers at JoAnn. At the time, I was inspired to make all kinds of pom pom crafts. And Bailey had started knitting up a storm so I decided to buy her a set, too, because knitted caps and such look cute with pom poms. 


 Fast forward to this year: I FINALLY got around to making a pom pom garland! I can't even remember what I initially wanted to make with my pom pom makers, but this project ended up being just the ticket! It was easy to make and, even though I was skeptical at many points along the way, I love how it turned out. I think it could be used for various holidays throughout the year.

Because I knew we would be having a long drive to Texas for Thanksgiving, I decided that I'd make pom poms as we drove along. Unlike reading or staring at my phone, this seemed like something I could do to feel productive whilst still carrying on conversation. And other than the yarn fibers which made Spouse sneeze, it was a good task to do in the car!


 I had no idea how many pom poms I'd need for my garland plus I thought I'd make a few tassels, too...LONG STORY SHORT, I ended up buying WAY TOO MUCH YARN! But the skeins were really inexpensive and I figure I'll be able to use them up over time.

I did learn that you need a certain weight (thickness?) of yarn to make a decent pom pom. Thin yarn makes feeble-looking pom poms. At JoAnn, most of the yarn is a Size 4 (indicated on the package), so that's what I bought. This size worked great.

So we headed off to Texas, me with my ginormous yarn skeins on the floor next to me. Luckily, the skeins were already wound to pull from the center. If you pull yarn from the outside, the skein will be tumbling all over the place.

I know you can make your own pom pom template with cardboard but seriously, these pom pom makers are just the best! Take a look at a video HERE

I started out with the medium size pom pom maker and made quite a number of white and cream pom poms before we even hit Missouri!


 In no time at all, I was producing pom poms right and left!


 After I made a few medium size pom poms, I made the same number of small ones. The smaller ones were super fast to create. 

Before you use your pom poms, you'll want to trim off the bits of yarn that are a little longer than the others, just to give a neater appearance.


Once we were back home, it was time to create my garland. To string the pom poms, I used a craft floss (I could have used yarn since I have plenty!) and a darning needle. It was easy to string them onto the floss and just move them to the proper position. I ended up having to make several more to fill up my garland.


Of course, I couldn't stop at just ONE garland. I wanted to add a second one with felt balls, also purchased at JoAnn. I strung them onto the same floss.


 Eventually I had enough to make a long chain. Again, the balls can be easily moved along and positioned where you want them without much slippage.

 I decided to position my felt ball garland first. I tacked up the two outside ends with painter's tape, then made shorter loops in the center, counting to be sure I had the same number of felt balls in each loop.


 Next, I positioned the pom pom garland by taping the ends in a similar way to the top of the mantel. Instead of four loops, I decided on three. This step was a little fiddly as I had to get the correct number of pom poms in each loop and make sure they were spaced evenly. 

For the garland, I think using a thicker thread or yarn might have been better because those larger pom poms are a bit heavy and they tend to distort the loops a little. But in the end, I just left it as is.


To cover up all the tape holding the operation in place, I added a garland across the mantel. I hadn't completely thought all of this through so had to scramble and dig around to come up with enough greenery to make a decent garland! This one is actually made with branches from an old artificial tree we got rid of a couple of years ago. I kept some of the branches (and the top!) to use for decorating. I added in a few berries and pinecones to jazz it up.

 I'm glad I finally got around to using the pom pom makers. The pom pom garland was a fun way to do something a little different with my Christmas decor. Now to come up with a few more pom pom projects to use up all of my yarn!


02 August 2020

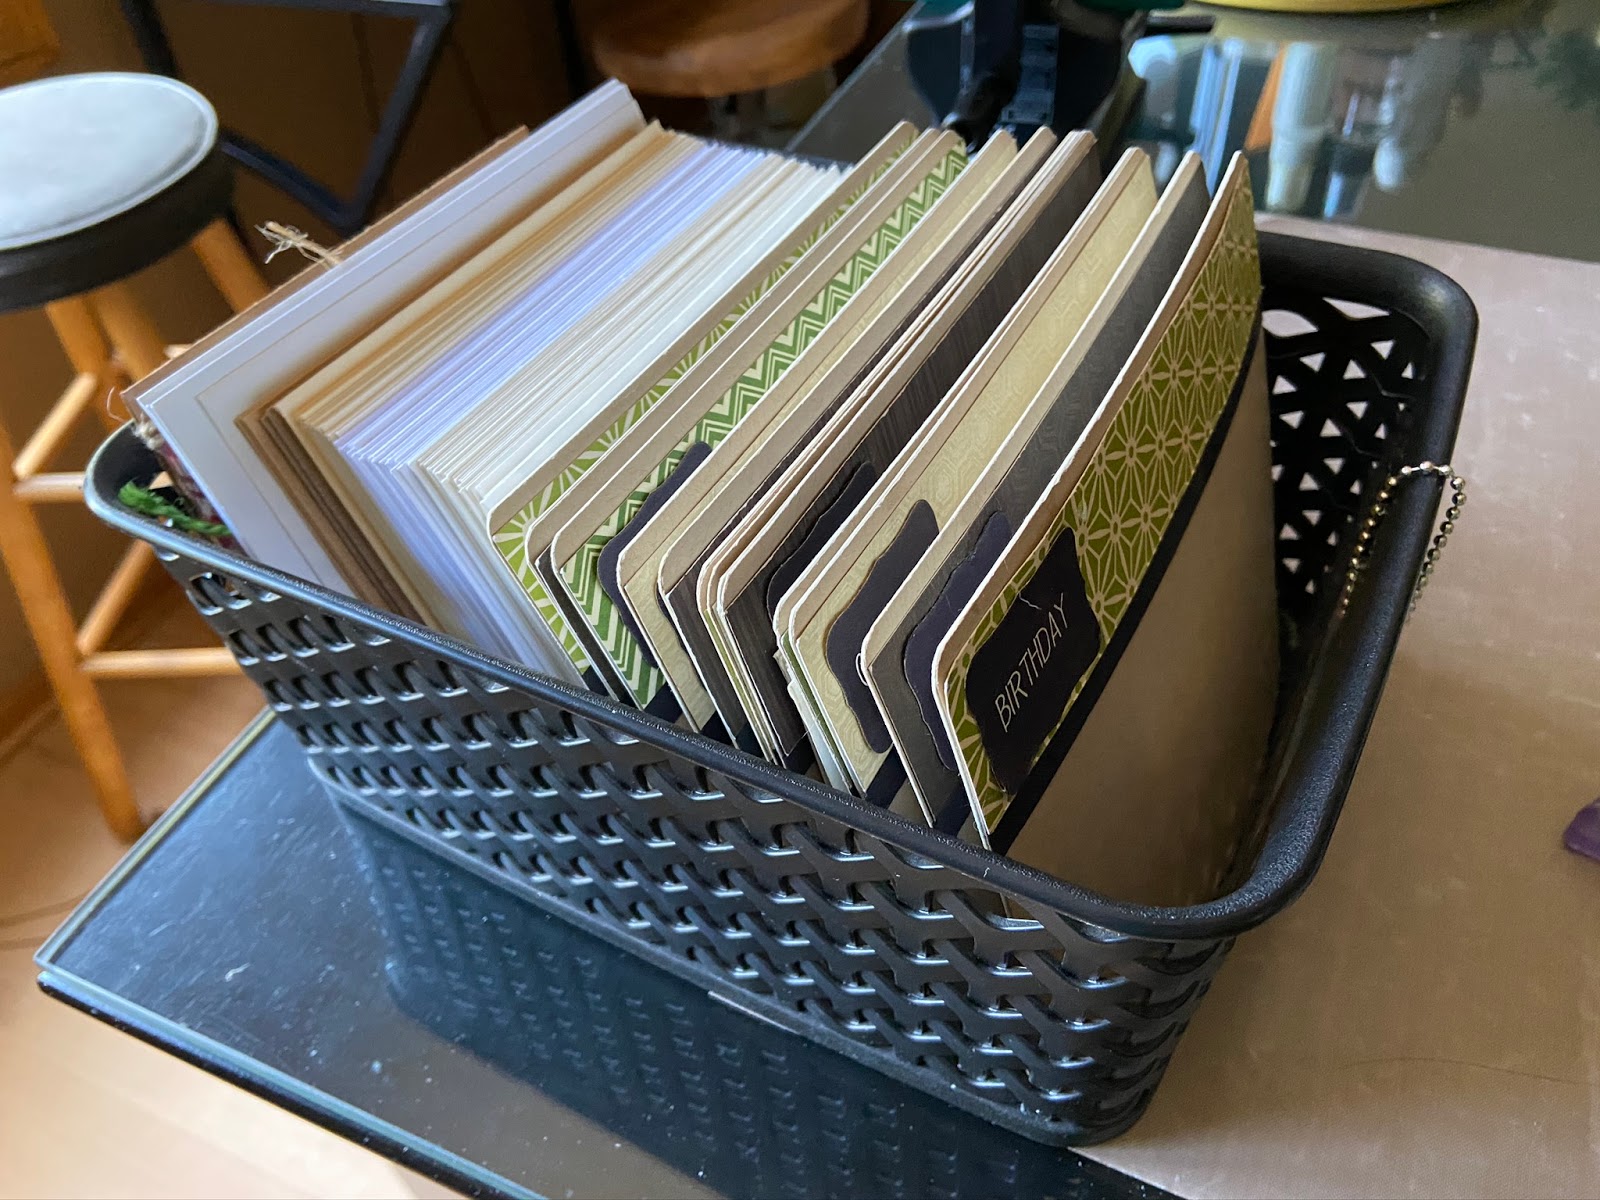
The Card-Maker's Card Basket...

Perhaps you've heard the old saying, "The cobbler's children have no shoes." Well, the same could be said for this card-maker's card basket. It has no cards...just envelopes!


Have I stopped making cards? Nope, not in the least. In fact, since this pandemic situation started in March, I have designed and made 14 different sets of card kits for the store where I teach. One of these days, I'll share some photos of them. Suffice it to say that I've been making a TON of cards...just not for me! LOL

When I took a look at my card basket and realized there were no cards in it -- or at least none that I would want to send -- I knew I needed to spend a little time fillling it back up. 


 I don't send a lot of cards these days but I do occasionally need cards for sympathy, friendship, thank you, or similar occasions. So I spent a little time this weekend making a few cards from scraps.

In all, I made 9 or 10 cards for various occasions and I really need to make several more. I used a couple of different designs that I find work for most any occasion, leaving the insides blank so that I can customize them for particular situations that might arise.

These four cards were made with an old Graphic 45 collection featuring cats and dogs. Someone gave me a few pieces from this line and I've kept it to use for cards. For these two cards, I used the back sides of some of the papers. You'd never guess this line features our four-legged friends! I find with Graphic 45 papers in particular, the back sides are often just as useful as the fronts.


 I love the "C is for Cat" piece on these 2 cards from the same paper collection. I actually had a poster with that same artwork on the wall of my dorm room during my freshman year. These cards could be used as a "hello" or get well card for my cat-loving friends.


Now my card basket looks a little fuller and I won't find myself running out to buy a grocery store card or making one at the last minute. Truth be told, it was fun to make a few cards of my own and use up some older product. I really need to take more time for personal card-making in the future!


21 August 2016

Fall Banner

I've just passed the two-year mark with my case at the antique mall. Overall, it's been up and down, but things have been looking up since I started spending more time on "merchandising" my space. When I first opened my case, I was still in post estate sale shell-shocked mode, just trying to sell stuff without any thought of making my case look more inviting. 

After asking for some constructive criticism from the mall manager, I realized (light bulb moment...DUH!) that as a "dealer" in a mall, I'm competing with every other dealer for attention, and anything I can do to make my space look good will cause shoppers to at least stop and take a look. 

So I've been spending much more time staging items by color and adding seasonal elements to show how various treasures can fit into your home decor.
I've also learned that you need to "re-set" your case seasonally, but in advance -- when people are shopping for that next season! You'd think this would have dawned on me since I teach so many seasonal classes at Memory Bound but when I first opened my case, my mind was a muddled mess and I wasn't connecting A to B!

Now that I have a little more clarity of thought (LITTLE being the operative word!) I've got dates marked in my planner for seasonal case re-sets. Soon I'll re-set the case for fall with a simple banner and some dollar store flowers. It's amazing how much better the case looks these days, and it's resulting in improved sales. 

Here's hoping that positive trend continues! :)
jp

29 March 2016

Recent Paper Crafting Projects

  Since coming home from Texas, I've been working on several class-related projects -- so many that I was almost late sending a box of Easter treats to Bailey! I sure miss the days when she was home and could enjoy an Easter basket and a small Easter egg hunt. For the last few years, I've had to embrace mailing her an "Easter box" -- the next best thing!

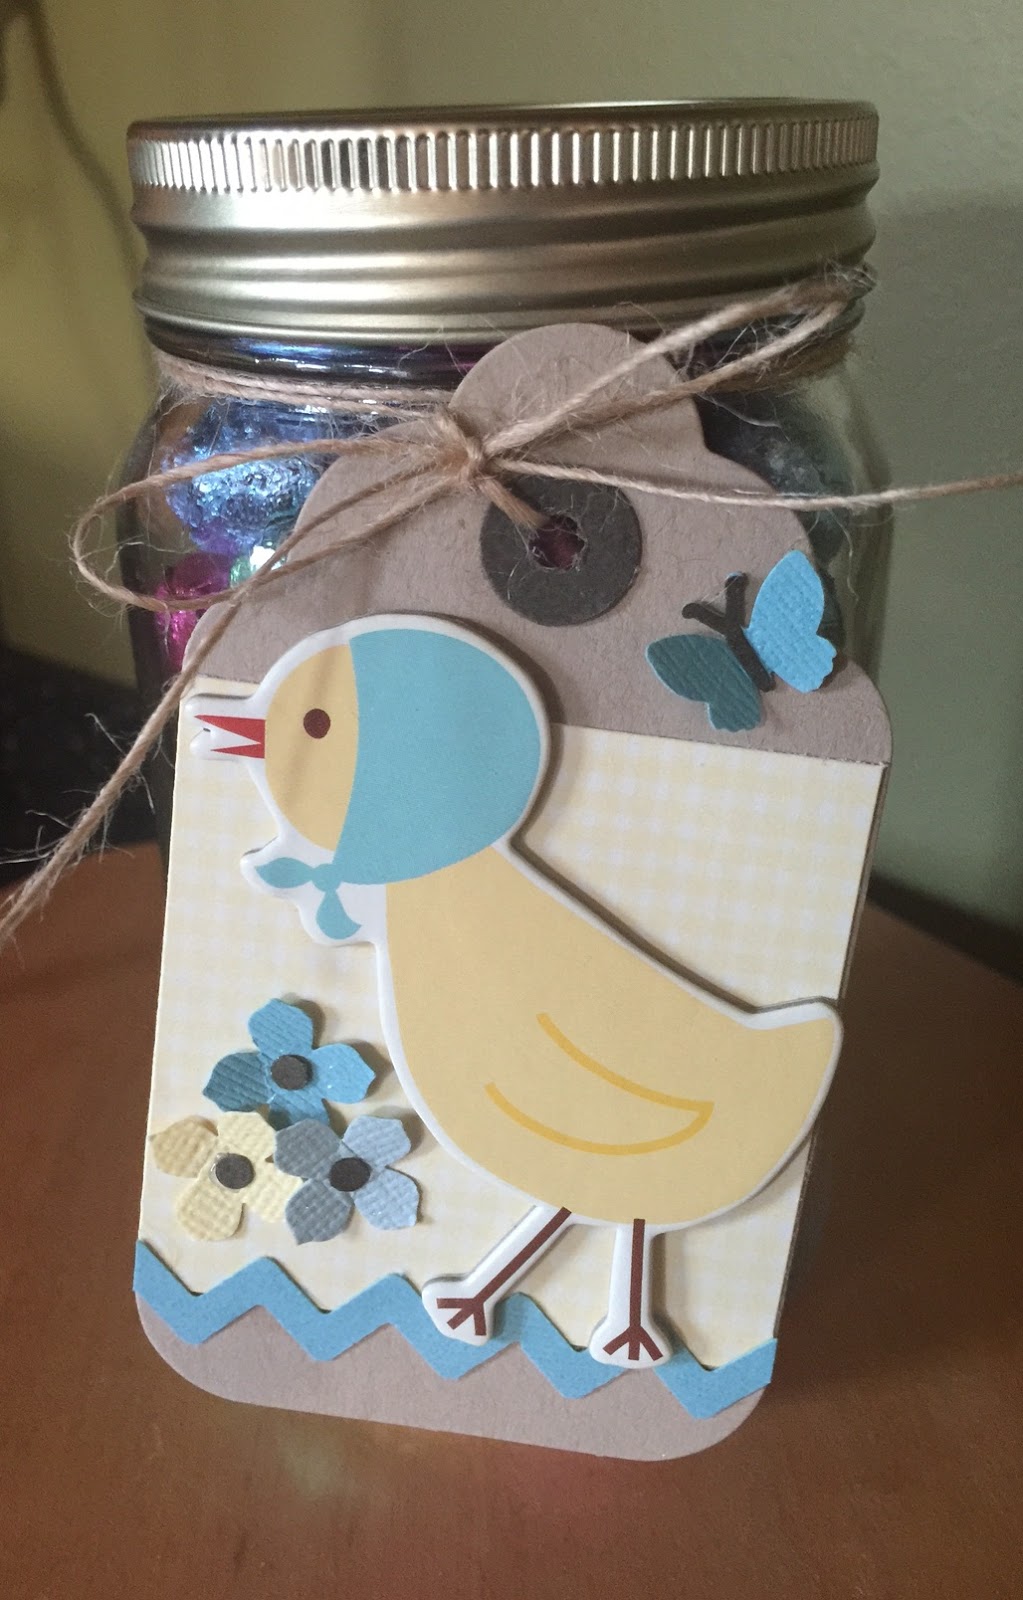
In this year's box, I included plenty of treats plus a jar with chocolate eggs and a little spring tag. I also sent along some Temptations for Rory and a separate tag so that the jar can later be filled with kitty treats. (Although in retrospect, that would be a LOT of treats!)

After die cutting the tags, I completed them with odds and ends I had in my stash. Fun and easy!
 

Over the weekend, I also made a banner for my case at the antique mall to go along with my recent efforts to spruce it up a bit. (More on that in another post!)

I purchased the chipboard banner pieces separately at Memory Bound. We carry them in packages but it's nice to be able to buy the components individually so you can get the number you need. Based on the width of my case, this is just about the longest word I can spell!

I covered the chipboard pieces with one of my favorite  -- now discontinued! -- cardstock colors, Sea Salt. Then I die cut scalloped ovals for each banner piece to brighten them up a bit.

 I cut the large letters at Memory Bound then embossed them with my Big Shot and adhered them with foam tape for dimension. Then I got out my scraps and punched flowers and butterflies to match the overall color themes I see in my case. Finally, I strung the banner pieces together with thick jute. This project took just a couple of hours!

 I'm planning to make a banner for each season to help pull my display together. It definitely brightens up the case a bit and hopefully will help draw customers my way!

  LOTS OF CUSTOMERS, please! :)

04 November 2015

Christmas Carol Canvas Project

For the past few weeks, I've been working on several holiday projects for the store where I teach. I recently finished up a fun "canvas" type project using this sheet of Christmas carol paper. 

Let's face it...this paper is a bit unusual! I honestly wondered what to do with it. I considered several types of projects -- ornaments, a mini album, etc. -- but all of them were focused on cutting up the paper or changing its original form. After studying the paper for a bit, I decided that I really liked the colors...so why not embrace the design? So I came up with a plan for a canvas project featuring the paper rather than disguising it.

I started with a 12x12 canvas. I used Matte Medium to adhere a sheet of 12x12 black cardstock to the canvas, then I weighted it down until it was completely dry.

I trimmed down the Christmas paper a bit so that the black cardstock would show around the edges. I inked it and adhered it in place with Matte Medium.

I wanted my die cut deer to be positioned at the top of a snowy hill. So I cut some scrap paper to determine the height and angle of the slope. 

Once I had my slope designed, I cut it from cardstock. I wanted the entire slope to be embossed, but of course the size of the embossing folder meant that I would have to do the embossing in segments. I found that it worked fine with this particular folder to emboss the strip one-third or so at a time. The random snowflake pattern makes it look like the embossing is continuous.

I envisioned a bit of gray "shadow" to show at the top, so I positioned and cut gray cardstock to fit behind the slope. After inking, I adhered it to the bottom of the canvas.

Then came the part that I HOPED would work as I imagined it! Luckily, our store had cardstock in the exact coral-y red as the numbers on the paper, so I used it to die cut several poinsettias to pull out that color. I chose two shades of green to die cut evergreen sprigs and poinsettia leaves, then I die cut a few snowflakes from cream cardstock. 

I covered the snowflakes in Diamond Dust glitter and let them dry, then I embossed a couple of the poinsettias for contrast. Finally I glued everything in place, using foam tape behind some elements for dimension.

I had a lot of fun putting this project together! I love it when the vague idea I have in my head actually works like I imagined it! :)
jp


07 January 2015

Canvas Fun!

Boy, do I have a LOT of work to get back on track in 2015! My poor neglected blog is just one of the things I intend to shore up. Over winter break, my daughter pointed out to me how I keep promising post more often...but fail to follow through. I know, I know, and I do have really good excuses. But my blog is important to me, and I haven't been giving it the priority it deserves on my list! This year, I resolve to do better.

So back to the topic of today's post! Bailey suggested that we go to a wine and canvas class over break. They're hugely popular around here! Due to our schedule, we ended up taking an "all ages" class with no wine, but we decided that was probably a good thing! Wine might have adversely affected the quality of our work! :)

As you can see by this picture, the studio has held lots of painting classes. These are just a few of the many class paintings on display.

Here we are before the class, all ready to go. Although I'm looking a little crazed...

Our class project was called "Snowy Owl", and is shown in the photo below. We decided that the eyes and eyebrows could make or break this project. Get them wrong, and your friendly owl could easily become evil! So I decided to tone down the eyebrows and Bailey left the rings off of her eyes. Otherwise, we tried to follow the sample as best we could!

I will say that the good thing about acrylic paint is that you can easily correct mistakes. And I certainly corrected a lot of them throughout the class!

The first step was to squirt paint on paper plates. That went pretty well! Then the instructor had us paint the canvas gray. You can see that my sky (at left) was quite a bit lighter than the sample...not intentionally! Bailey's sky looked much better than mine.

Next we painted the tree at the left with the branch for the owl to sit on. After that, we had to figure out where the eyes would go so that there was room for the owl. That was quite stressful for me! We painted the eyes with a big round sponge on a handle.

Here is my owl before I added his totally weird looking feet! He looks like an egg balancing on a stick!

Oh, here you can see the big sponge we used for the eyes! Intimidating! And look at my messy paper plate! We tried to share colors but Bailey told me I was too messy for her!
Another scary part came when we added feathers to the wings shown below. YIKES! And the tummy area of the owl was also difficult for me. At one point my owl looked like he was wearing a bib. I painted over it several times! And look at my weird toes gripping the branch! I will say that it is difficult to paint when you are laughing so hard!

The scariest part of all was adding the rings around the eyes with permanent paint pen. I decided I wasn't handy enough with a paint brush to paint the rings, but the pen was not easy to handle on the canvas surface either. My rings ended up too small, but there was no going back at that point!

Here's Bailey painting the sides of her canvas.

And her project turned out great! We decided that hers is more of a "nighttime owl" and mine is more of a "snowy owl" canvas. Her small white dots look like stars, and my large white blobs look like...well, large white blobs. :)

It was a very fun afternoon, and we left with two finished projects! Bailey plans to hang her canvas in her new apartment. I just shipped it to her today!

27 December 2014

Christmas Craftiness

  We have had a great time with Bailey home for 10 days! We managed to fit quite a bit of craftiness into her break. Bailey suggested we go to a canvas class, which was super fun. I will share more pictures of that afternoon in another post. Here we are with our completed owl canvases!

Bailey also finished up her first knitted teddy bear! This was quite an accomplishment. She's been dabbling in knitting for a few years now but in the past few months has had a bit more time to delve into it more seriously. Wilson the bear is adorable! 

She is also teaching herself to crochet. This is a super cute crocheted coaster which I plan to hang on the Christmas tree. :) Bailey certainly didn't get her skills from her mother, but her great grandmother was an excellent crocheter (is that a word?). Grandma would be very proud!

 I'm not a painter or a knitter -- that much is clear! Paper seems to be my medium of choice! I made a few Christmas cards very late in the game, a few of which are shown here.

Then I made some thank you cards using the same design.

 I decorated several envelopes for gift cards...

 ...and I could not resist fancying up my candy canes for the Christmas dinner table.

Here's hoping for much more crafty time in the new year!