26 March 2013

Recipe: "Homemade" Chicken Broth

 Although I may be organized in some aspects of my life, the kitchen is NOT one of them. I struggle with meal planning. The pantry is not well-stocked, and the fridge is usually full of odds and ends that could easily be found in a chef's "mystery basket" on Chopped.

But there is one time when even I feel organized and somewhat "domestic" in the kitchen: It's when I make my "homemade" chicken broth! I use the word "homemade" somewhat loosely here, and you'll see why. But whatever you call it, it's much tastier than store-bought broth and I like to think it's better for you, too. At a minimum, it's economical and allows you to get the most from your rotisserie chicken!  And I always feel somewhat smug when I saunter to the freezer and pull out a few containers to use in soup or stew! Let me walk you through my process.

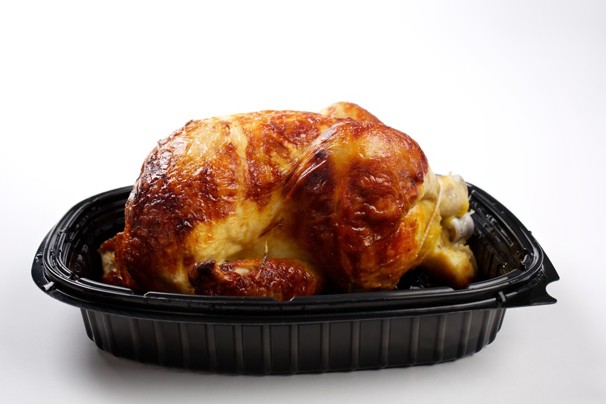
My "homemade" broth is made from rotisserie chicken, which I often use in soup or casseroles. I'm sure you've seen these chickens at your local grocery store. In the basement of my dad's house, there's a very large rotisserie oven which used to belong to my mom. One of these days, I might take it home so I can make my own rotisserie chickens, but for now I just buy them when I need them.

 The first step is to cut off the meat (which actually works better when the chicken is still slightly warm), and use it in whatever recipe I happen to be making at the time.

Next, I place the carcass in a large stock pot, cover it with water, and toss in some vegetables -- usually onions and carrots. Since the rotisserie chicken is already seasoned with salt and pepper, there's no need to add anything else. 

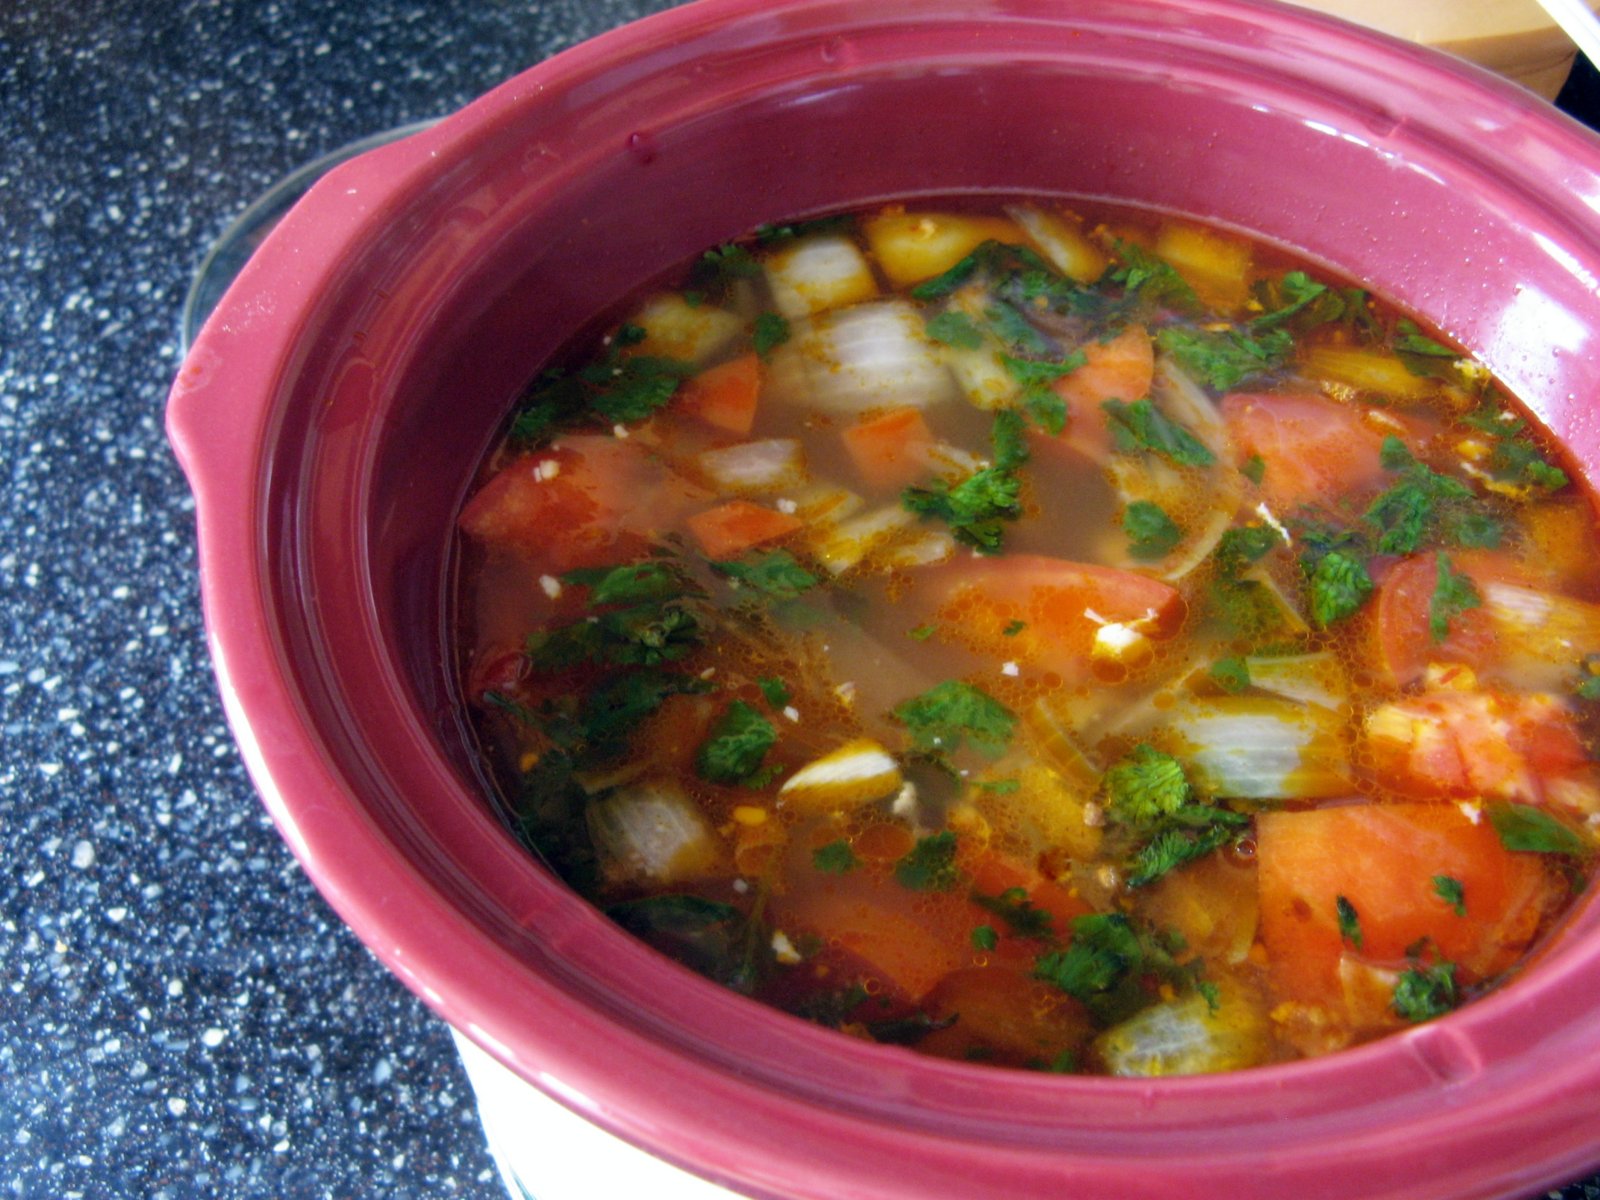
This picture below is not from my kitchen, but it will give you the idea. I bring the pot to a boil then let it simmer for at least a couple of hours, depending on how much time I have.

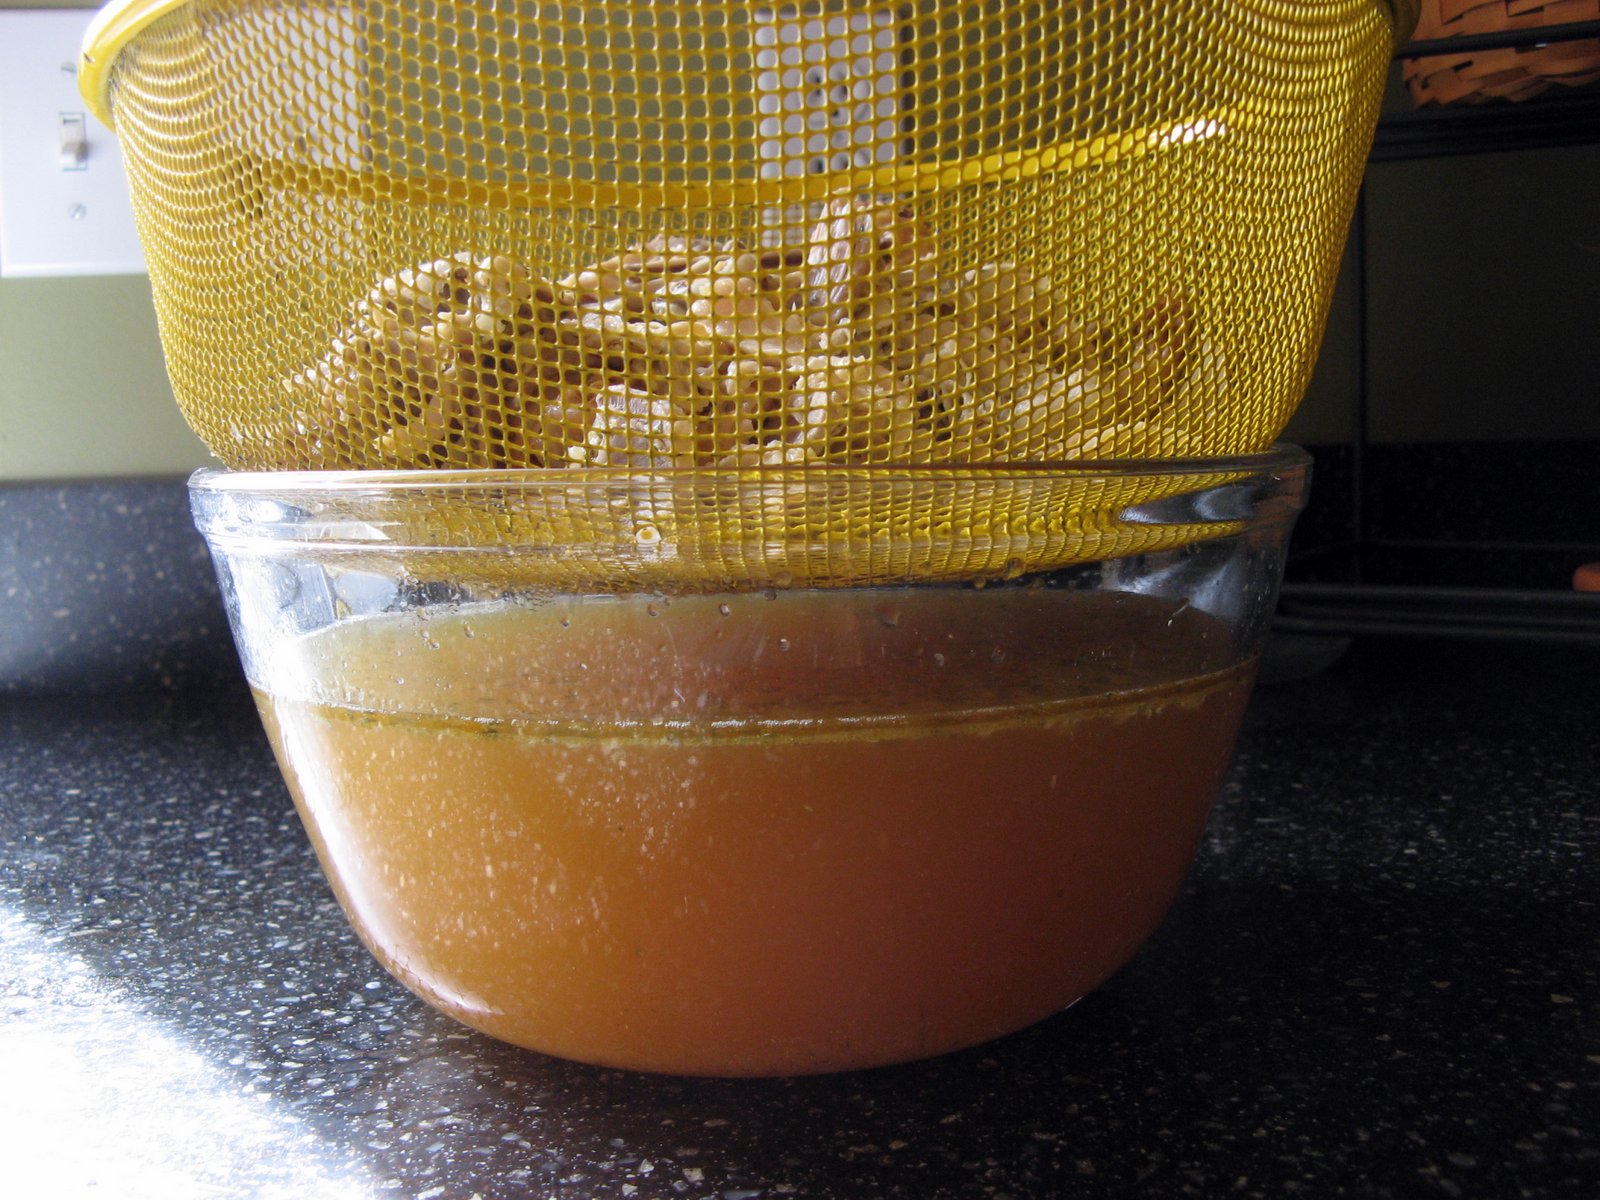
After a couple of hours, the carcass pretty much falls apart in the pot and the liquid reduces somewhat. I strain the contents into a large bowl then let it cool.
 

 After the broth cools, I skim any fat from the top and ladle it into two-cup containers for freezing. I can usually fill three or four containers each time I make broth.
 

If you've never made your own broth, you should give it a try! It really couldn't be easier, and you'll feel very proud of yourself the next time you make a recipe that calls for this ingredient!

 Take that, Swanson's! :)
jp

22 March 2013

Feline Friday: Lily in da Hood

Although it's certainly hard to top the excitement of last week's scarf fashions post, Lily is back at it today with three more casual looks for your Feline Friday enjoyment! 

Rapper Lily:

Little Red Riding Hood Lily:

George Washington Lily:

Lily proves once again that you can have fun -- and fashion -- on a budget!
jp

19 March 2013

Is this March Madness?

 Some strange things have been happening around here, things I would never have expected from me. It is March, and there is such a thing as March Madness, you know. Brace yourselves:

1) I've become a basketball fan! Now don't get too excited because I'm ONLY a fan of the Indiana Hoosiers. Oh, I hear there are other teams out there. Even professional teams. But nope, I only care about the Hoosiers -- and, to a tiny degree, the teams they face in competition. Of course, now that they're a #1 seed in the NCAA Tournament, I'm prepping myself for a nerve-wracking next few weeks. I never in a million years thought I'd be anything close to a sports fan, but now I even have the Sportacular app on my phone.

I actually started following IU basketball in earnest last season, so now I can spew basketball factoids to anyone who might listen. In fact, my new-found interest in the Hoosiers probably deserves a post all its own, so watch for that one soon.
 

 2) I've started running. Well, jogging on the treadmill. I had been thinking about running for awhile, just as a means of amping up my workout, so when some friends encouraged me to try C25K, I thought...why not? I downloaded the app onto my phone and started running the very next day. Of course, I had to do it late at night when no one was at the gym, in case I fell off the treadmill.

Things went very well until about two weeks into the program when I started having significant pain in my knees. Some friends advised me to invest in decent running shoes, so off I went. And shoes are indeed an investment -- holy cow! But after running in them for just a couple of days, my knee pain completely disappeared. I no longer had to take Advil before heading to the gym, and I really started enjoying my jogging program. After a few days of not falling off the treadmill, I found that I could even run when there were other people in the gym!
  

Unfortunately, just as I started Week 5, the hardest week in the 9-week C25K program, I encountered a problem. After completing the 8-minute running intervals, my ankles were REALLY sore and swollen. I've had tendonitis in an ankle in the past (caused by overdoing it on the leg press) so this wasn't completely new, but it certainly wasn't much fun. 

I took a few days off, then went back at it and successfully finished the 20-minute run without much discomfort...until afterward. Of course, that probably wasn't the wisest thing to do. Now this is what my feet look like:
  

I'm obviously going to have to slow down the pace of my training program. Considering that I had not run SINCE 4TH GRADE (and even then, it was only TWICE that I can remember), I could probably use a bit more time to build up those running muscles, huh? Watch for more posts on this running thing, as I have a lot more to say about it.

Meanwhile, Bailey was home for spring break. It came and went so quickly that I can hardly believe it. It was great having her home, and it marked a milestone for ME as she drove (with a friend) on her own 8.5 hours both ways. Of course, this was no big deal to her but I nearly had to be sedated. Once she was safely home, we had a wonderful time just hanging out and doing mostly nothing. And Lily enjoyed riding around on Bailey's back each day.
 

Between basketball, running, and spring break, I've also had several class projects to develop. In fact, I have SIX different card classes coming up over the next three months! Each class will be offered twice so (getting out the calculator...) that makes 12 CLASSES to prepare. I'm co-teaching two of the classes with my friend Katie. It's super-fun to work with her, and I think our students have enjoyed it, too!

 With all these card classes in the works, my craft space has looked like this (actually much worse) for the past couple of weeks.
 
 But I've finally finished all of my projects and now can set about making class kits. That in itself is going to keep me hopping for the foreseeable future.

Here's to more crazy goings-on in the month of March. My message to you is this: Don't ever say NEVER...because you NEVER know if you'll like something until you try it.

Unless it is Velveeta cheese. That I will NEVER try.
 jp

15 March 2013

Feline Friday: Lily Scarfs it Up

 Have you noticed that scarves are wildly popular these days? According to Style Bistro, "scarves are the must-have winter fashion accessory. They're warm and comfortable and add a touch of flair to any ensemble."

But how DO you wear a scarf with flair? Lily decided to take on this challenge, offering two practical ways to wear today's latest fashion accessory with style!

For her first look, Lily wrapped her scarf tightly around her forehead and then back around her neck. This style works particularly well if your ears happen to be on top of your head. Lily characterizes this look as "mysteerius".

For her second look, Lily drew inspiration from the model at the lower left, lightly draping the scarf to frame her ears and whiskers. Lily looks equally ready for a "fancie dinner" or an "Afrikan saffarie".

We hope you have enjoyed today's fashion post as much as Lily enjoyed modeling for you! :)
jp 

11 March 2013

Recipe: Slow Cooker Lemon Garlic Chicken

 Okay, does it seem like this is turning into a recipe blog? I assure you, it is not and never will be such. I have enough trouble in the kitchen that no one should look to me for culinary advice! Having said that, however, when I find a recipe that 1) is yummy and 2) is simple enough for me to make, then I think it's worth sharing!

When I organized my recipes recently, I ran across this particular one which I had saved but never tried until this week. It's definitely a keeper and smells absolutely heavenly while cooking. You could enjoy it over rice or pasta.

  Slow Cooker Lemon Garlic Chicken 
Allrecipes.com 

Ingredients:
1 teaspoon dried oregano
1/2 teaspoon salt
1/4 teaspoon ground black pepper
2 pounds skinless, boneless chicken breast halves
2 tablespoons butter
1/4 cup water (I'd add a little more water or broth next time to better cover the chicken)
3 tablespoons fresh lemon juice
2 cloves garlic, minced
1 teaspoon chicken bouillon granules
1 teaspoon chopped fresh parsley 

Directions: 
In a bowl, mix the oregano, salt, and pepper. Rub the mixture into chicken. Melt the butter in a skillet over medium heat. Brown chicken in butter for 3 to 5 minutes on each side. Place chicken in a slow cooker.

In the same skillet, mix the water, lemon juice, garlic, and bouillon. Bring the mixture to boil. Pour over the chicken in the slow cooker.

Cover, and cook on high for 3 hours, or Low for 6 hours. Add the parsley to the slow cooker 15 to 30 minutes before the end of the cook time. (Oops, I just now realized I added the parsley 6 hours too soon. Oh, well. It worked just fine!)
 

08 March 2013

Feline Friday


 It's only taken six years for Tinsel to learn to tolerate Lily -- and she still smacks Lily on the head once in awhile for good measure. But seeing the two of them ALMOST touching at nap time warms my heart!

05 March 2013

Recipe: Tortilla Soup


 There's nothing like a crock pot full of tortilla soup on a cold winter day. I'm surprised I haven't shared this comfort food recipe before now. It's one of our favorites...and it comes with a story!

 This soup recipe calls for one chipotle in adobo sauce. Do you know what that is? It's a smoked jalapeno, so it packs a bit of heat. The first time I made this soup I had never used chipotle peppers and mis-read the recipe, adding not just one, but ONE CAN of chipotle peppers in adobo sauce! This was one of the worst mistakes I've ever made in the kitchen (and I've made a lot of them). Holy smokes! I'm all for spicy food, but this was a level of heat perhaps never experienced by anyone still alive.

Luckily, I realized my error before dinner time. Not knowing what to do, I jumped on the internet for emergency remedies to this dire situation. I tried diluting the soup with more chicken broth...adding sour cream...brown sugar...even peanut butter, as desperate times called for desperate measures! Spouse loves spicy food, so he was a good sport about it and we eventually managed to *sip* most of it while downing glass after glass of water. But it took a very long time, since my efforts to dilute it created GALLONS of tortilla soup! :)

Now that I know all about chipotle peppers in adobo sauce, I add between one and three peppers when I make this recipe and just freeze the remaining peppers for later. You can leave them out altogether if you don't care for spicy food. Don't let my ineptitude in the kitchen keep you from making this wonderful soup...with or without the chipotle peppers!

* * * * *
Tortilla Soup 
Food Network Kitchens


Ingredients
2 tablespoons vegetable oil
1 medium onion, chopped
2 cloves garlic, sliced
1 chipotle in adobo sauce, minced (1 pepper -- not 1 can!)
1 tablespoon chili powder
2 teaspoons kosher salt
6 cups chicken broth, low-sodium canned
1 cup corn kernels, fresh or frozen and thawed
1 ripe tomato, chopped
1 cup shredded cooked chicken (rotisserie chicken works great)
1/2 cup cilantro leaves
1/4 cup freshly squeezed lime juice (about 2 limes)
About a dozen corn tortilla chips, broken a bit
Lime wedges, optional
Sour cream (my own addition -- quite yummy!)

Directions
Heat the oil in a medium saucepan over medium heat. Add the onion, garlic, chipotle, chili powder, and salt and cook until the onion softens, about 5 minutes. Add the chicken broth, bring to a boil, reduce the heat slightly, and simmer, uncovered, for 10 minutes. Add the corn and cook for 5 minutes more.
Pull the saucepan from the heat and stir in the tomato, chicken, cilantro, and lime juice. Divide the tortilla chips among 4 warmed bowls, ladle the soup on top, and serve with lime wedges, if desired.

Note: I simply combine all the ingredients and bring the soup to a boil on the stove, then put it in the crock pot on low for the afternoon.

  A spoonful of sour cream is an excellent topper for this soup! You'll need a LOT of it if you add the whole can of chipotle peppers! :)

02 March 2013

Recipe: Greek Pasta with Shrimp, Garbanzo Beans, & Lemon (Which I Forgot)

 Spouse was out of town recently, which gives me license to cook a few things he doesn't like! He doesn't care for fish or shrimp so they're usually at the top of my list. This time I tried a new recipe from a freebie magazine published by HyVee, a local grocery store. It turned out great, but I'm sure it would have been even better if I'd remembered to buy a lemon. I'm no pro in the kitchen, but even I know that if it's listed in the recipe name, it's probably an important ingredient!

This is what the pasta looked like before I added the spinach. I used the "soften" focus on my photo so you wouldn't notice the mess I'd made all over the stove. :)

Greek Pasta with Shrimp, Garbanzo Beans, and Lemon

8 ounces dry bow-tie pasta (it's so cute!)
1/4 cup extra virgin olive oil
Oregano leaves from 8 fresh sprigs
Thyme leaves from 8 fresh sprigs
5 cloves garlic, sliced
1 pound fresh shrimp, peeled and de-veined
1 15 ounce can garbanzo beans, drained
1 large handful baby spinach
Kosher salt and cracked black pepper, to taste
Plain Greek or regular yogurt (optional, for serving)
Zest and wedges from 1 lemon, optional for serving

Prepare pasta according to package directions. Drain and rinse; set aside. Heat a large Dutch oven over medium-high heat. Add oil, herbs, and garlic and saute 15 to 30 seconds. Add shrimp; saute 1-2 minutes or until shrimp just turn pink. Fold in beans and pasta; heat through. Remove from heat and fold in spinach. Season to taste with salt and pepper.

Turn out onto a large platter to serve. If desired (YES, PLEASE!!), top with dollops (can't decide if I like that word...) of yogurt, olive oil, and freshly grated lemon zest and wedges. (Oops, no lemon for me...but it was still great!)

Too bad Spouse missed out on such a yummy new recipe! And it's even sadder that I have to wait until his next trip to make it again!
jp


01 March 2013

Feline Friday: Lily's Big Climb

 Early one morning this week, I heard some unusual sounds coming from the kitchen. With Lily in the house, one must ALWAYS investigate odd noises. 

As I rounded the corner, I could see that Lily (who is not a good climber) had pulled open the pantry door and was on her tip toes on a ROLLING CART, quite precariously reaching for Tinsel's food dish which she knows is kept on a high shelf. (Lily is a very smart and observant kitty -- especially where food is concerned!)

Of course, I ran for the camera to document this most unusual feat!
 

There it is! The mother lode!

I tried to supress my giggles, watching in disbelief as Lily squeezed herself onto the shelf and began gobbling Tinsel's food as fast as she could. I let her swallow a few bites as a reward for her daredevil efforts before gently lifting her back down to earth.
 
Congratulations, Lily, on successfully scaling the pantry cupboards! Obviously, Tinsel's food is now on a much higher shelf!  
jp

26 February 2013

Organization: Card Basket

 After I finished updating my craft room last summer, there were still a few outstanding tasks to be completed, including a storage system for handmade cards. I had designated a couple of the canvas bins (shown below) for cards, so I wanted a container that could fit into one of them but also sit out and coordinate with my decor.
 

I used to keep my handmade cards in a lunch-box type container but soon found it to be too small for my growing inventory. I was drawn to the larger size of the wonderful IRIS box we sell at Memory Bound, but it's too big to fit into the canvas bin. 

 I finally decided on either a basket or galvanized tin container, so I headed off to Target to see what I could find. In addition to my size constraints, the container also needed to have straight (not angled) sides to accommodate cards as well as a smooth finish to prevent damage.

After considering my (fairly limited) options, I chose a black plastic woven basket which was wide enough to accommodate A2 envelopes (the size of card I usually make) and short enough to fit in the bin. Success!

My first task was to create some simple dividers for the basket. I cut pieces of white chipboard slightly narrower than the width of the basket and a little taller than an envelope. Call me crazy, but I want the dividers to conceal the cards while they're in the basket, for the simple reason that the cards may not match my color scheme. I know, I know... :)


Because the dividers will be visible, I chose to cover them with kraft cardstock to match my space. Then I added a strip of patterned paper to the top of each divider. I used the same paper I've used in other areas of the room (to cover my ribbon jars, for instance), to keep everything coordinated!


Next I started to think about the labels for the dividers. I should have given this part more thought because I ended up going back three times to make more labels! I ended up with 12 categories -- birthday, blank, congrats, friendship, get well, good luck, hello, holiday, sympathy, thanks, thinking of you, and wedding. We'll see if those are the RIGHT categories, or if I still need more!

Next, I set out to create a black label for each of the dividers to tie the different papers together and match the labels I've created for other storage in the room. I decided to use the smallest die from my new Spellbinders set. After testing it out for size, it fit perfectly!

With the size determined, I created text boxes in Word for the labels, a little larger than the die. I used the same font I've used for my other storage labels, then filled the boxes with black color and switched the font color to white. (Click on the photo for a closer look.)

I printed the text on cream cardstock so that the white font color would look cream...again, to match the space!

Then I cut each label using the Big Shot. May I pause for a moment to say how much I LOVE my Big Shot and my Spellbinders dies?
 The labels turned out pretty cute, if I do say so myself!

And here are a few of the completed dividers!


I think I'm really going to like my new card basket, so much that I have yet to put it in the canvas bin. Looks like I need to get busy filling it up. :)
jp

25 February 2013

Step by Step: Hybrid Page with Word

 As much appreciation as I have for digital scrapbooking, I don't think I'll ever become a digital scrapbooker. I enjoy the tactile world of paper too much to abandon it for a screen! Having said that, I'm firmly entrenched in my own version of "hybrid" scrapbooking (using a computer to create certain elements of a page). The difference between me and other hybrid scrapbookers is that I haven't invested in Photoshop or other "real" digital tools: I use only Picasa and Microsoft Word. In today's post, I'll share with you how I approach a typical page using Word as a design tool. (Click on any of the photos -- especially the screen shots -- for a closer look.)

1. Arrange Photos for Printing
I don't usually print photos at home but when I do, I typically copy/paste them into a Word document and print several at a time on an 8.5x11 sheet of photo paper. Depending on the size of the photos, this is usually less wasteful than printing via Picasa. For instance, to print a single 5x7 photo for my page in Picasa would have resulted in all of this wasted paper:

Instead, I copied and pasted the photo into a Word document, then adjusted the size to 5x7. I set the "wrapping" to square so that several other photos could be added to the 8.5x11 page prior to printing. In this case, I had 2 smaller photos to print, too, so I decided to create my own "collage":

2. Design Layout
Instead of just printing the photos, I often take things a step further and use Word as a "mock-up" tool for layout design. 

As you can see here, I've created a true-to-size "canvas" to work on by simply changing the size of my page to 12x12. This makes it easier to see how the completed design will look. I moved the pictures around until I liked the arrangement, then I linked them via the "group" function so they wouldn't slide out of place. Using Word as a design tool is a great way to plan pages!

Given the size of the photos, I had to fill that awkward little space below the 5x7 picture. I created a small text box and "filled" it with purple to occupy the space, thinking I'd cut some patterned paper for that area once I printed the photos. 

Next I started playing around with how/where to place my title and journaling, again using text boxes to create a mock-up of how everything might fit together:

I don't have 12x12 photo paper (it's available...I'm just too cheap to buy it!) so once I was ready to print, I switched the page size back to 8.5x11 and removed the mock-up title/journaling pieces, saving them to another document so I'd have the correct size to work with.

3. Print Photos
Meanwhile, I decided to leave the purple text box in place and print it out with the photos as a design element. Here's the photo document ready to print:

This is my beloved Canon wide-format printer. It does a great job with photos and allows me to print on 12x12 paper, which I do a LOT. Unfortunately this model is no longer made, so it will be a sad day when I have to replace it or can no longer get ink!

 Here's the photo collage printed out and ready to cut:
 

4.  Design Title and Journaling
 With the top portion of the layout done, I was ready to focus on the title and journaling. I looked through my sticker and chipboard letters but couldn't find anything I liked, so I decided to die cut the title. Due to the font size, I knew immediately that my initial plan for the title and journaling would not work, so I cut a piece of scrap paper in the size I'd originally planned then started playing around with the space. Title at the right, sub-title under it, and journaling at the left:

 I measured the spaces on my paper mock-up and then created text boxes with those same dimensions in a 12x12 Word document:
 

 I created a separate text box for the journaling so that I could give it a dot border. It's easy to do this via the "line style" function:

 5. Print Title and Journaling
I typed my journaling in the text box, then created a separate text box for my sub-title which I decided to print on photo paper. I printed it on scrap paper first:

6. Adhere!
 Once I had everything finalized, I printed the piece on yellow cardstock and cut it to fit. I placed all the elements on the page without adhering them, just to be sure:
 

Then I decided to add a large square mat of light purple paper behind it all for a little added depth. Here's the completed page:

If you've never used Word for layout design, I encourage you to give it a try. I think you'll find that it's a surprisingly powerful (and economical!) tool for scrapbookers!
jp