13 November 2021

Guest Bathroom Makeover

 As I mentioned in last week's post, we've been doing some updating to our house. Since this past spring, we've refreshed the laundry room, kitchen, and upstairs bath. 

The upstairs guest bathroom was a smaller project that, I think, resulted in a big improvement! While we had painted the walls, and updated the faucets, hardware, and light fixture a few years ago, (10 years ago, to be exact) the bathroom now felt dark and out-of-date. The oak cabinet, laminate countertop, and builder-grade sinks were the main culprits. 

 Guest bathroom: BEFORE


 Ideally, we would have torn out and replaced the old square tile floor but that would have added quite a bit of time and cost to the project. Instead, we opted to have the oak cabinet, walls, and woodwork repainted. To save money and simplify things, we used the same color on the cabinet as the kitchen island and same wall and woodwork colors, too. In addition, we replaced the countertop and sinks but kept the light fixture, hardware, and faucets. We used the same countertop as in the laundry room which simplified the project and probably saved money.


  The first update was replacing the countertop and sinks. Changing to an undermounted rectangular sink was an instant update. I'm really glad we decided to do that instead of keep the old sinks, which I considered for about one minute before I regained my senses. (They went on to a new life at the Habitat for Humanity ReStore.)

Inspector Lily approved! I love this new countertop. It's easy to keep clean and looks so much fresher than the old laminate.


Next came the cabinet painting. Since we were also having our kitchen cabinets painted, the guys took the doors for both rooms to their shop for painting and sprayed the cabinet bases in place. 
 
I have learned that the prep for in-house spraying takes longer than the painting itself! It's important to cover everything in plastic and/or paper and tape it carefully. Here you can see the set-up and painting in progress. Inspector Lily took a quick peek to be sure everyone was on task!

 There was a delay of a few days while we waited for the doors to come back from the shop but already I could see a huge difference! The oak cabinet took the paint beautifully.

  Initially, I thought we could paint the cabinet ourselves -- and we probably could have -- but since we had already engaged the painters for the other projects, this seemed like an easy add-on. I'm so glad we just had them do everything because they definitely did a much better job than we could have!


 When the doors arrived, I was even happier! 

Here you can see how the old wall color clashed with the cabinets. If you'd been on the fence about painting the walls, this would have changed your mind!


We had the painters paint the bathroom walls and woodwork in the same colors as the kitchen. When you're doing a project like this, you can save money by limiting the number of paint colors. Whenever the painters have to clean out their sprayer to change colors, it costs money. We worked from one paint strip to keep it simple and cut costs as much as possible.

  Guest bathroom: AFTER

 I absolutely love how the bathroom turned out! Sure, it would have been better to replace the floor, but it's in good shape and doesn't look all that bad now that the rest of the room has been updated.

Once the painting was done, I found a new shower curtain at Target to replace the old darker one.

I was suprised at what a big difference it made to replace it. Lighter and brighter is the trend now, and I guess I can see why!


Here you can see the darker towels and rug...
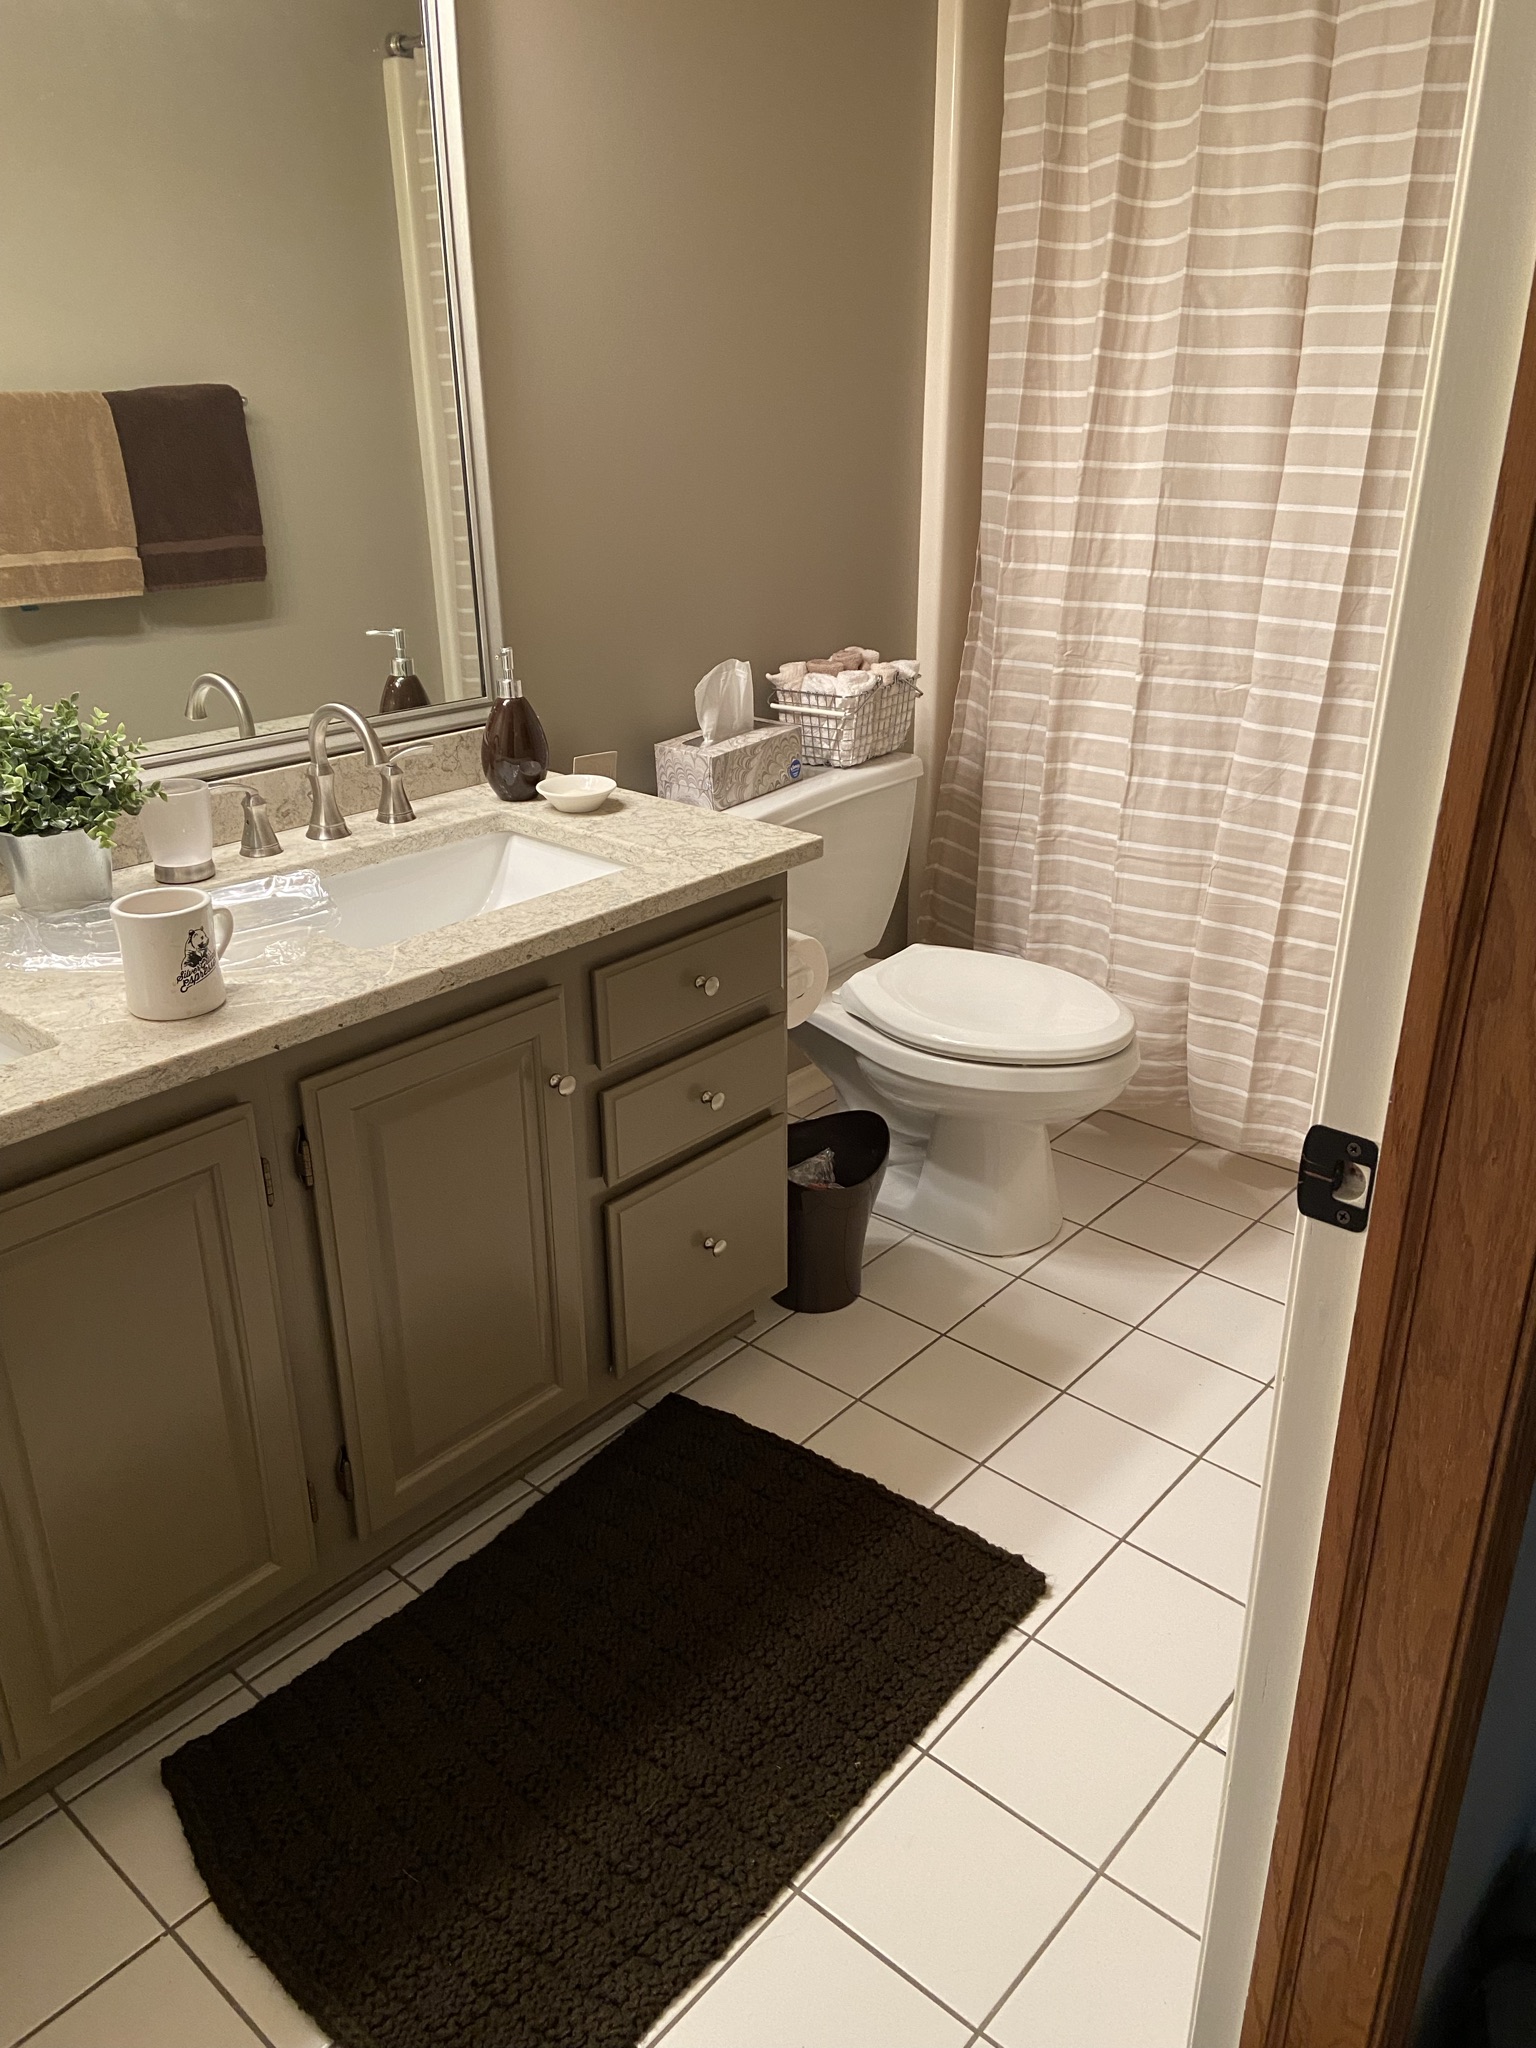
...which I replaced with lighter ones.

At my daughter's recommendation, I also picked out a new wall hanging from iCanvas to bring in a little green. My mom's old milk glass planter with an IKEA plant finished the space.

It's kind of amazing to me how much fresher this room looks now. It's a much nicer space for guests now and when we eventually sell the house, hopefully the bathroom will be an asset instead of a liability!


Thanks for stopping by! If you're planning a home update, I hope you will be encouraged by these project photos to just get started. In an upcoming post, I'll share pictures of our kitchen update. I'm so happy with the changes we've made!


12 November 2021

Feline Friday

 Lily's got that "Is it Friday yet?" look about her!


The good news is that YES, Lily...It's Friday!

FELINE FRIDAY, that is!

05 November 2021

Feline Friday

 One of the Memory Bound gals made "Elves on the Shelves" using photos of all of the staff. These adorable elves are posed all around the store!


 Yours truly failed to provide a selfie for this project, opting to send a picture of Lily instead. 😸

Now Lily has shown up as an Elf on the Shelf!
How purr-fect!


03 November 2021

Christmas Cards from Scraps


After Christmas last year, since we were still on lock-down, I decided to continue making Christmas cards. Every time I had a few minutes, I tried to make at least two or three. I continued doing this through the spring and before I knew it, I had a 24 or so cards ready to go for this year. The fact that I'm making my own Christmas cards before December 1 is quite remarkable. And I'll admit that it's a good feeling!

Before starting on my Christmas cards again this fall, I decided to clean out my box of holiday papers. It is quite amazing the amount of stuff I've accumulated over the years. Considering how I enjoy making cards from scraps, I have the potential in this box to make several hundred Christmas cards...way more than I'd ever need!

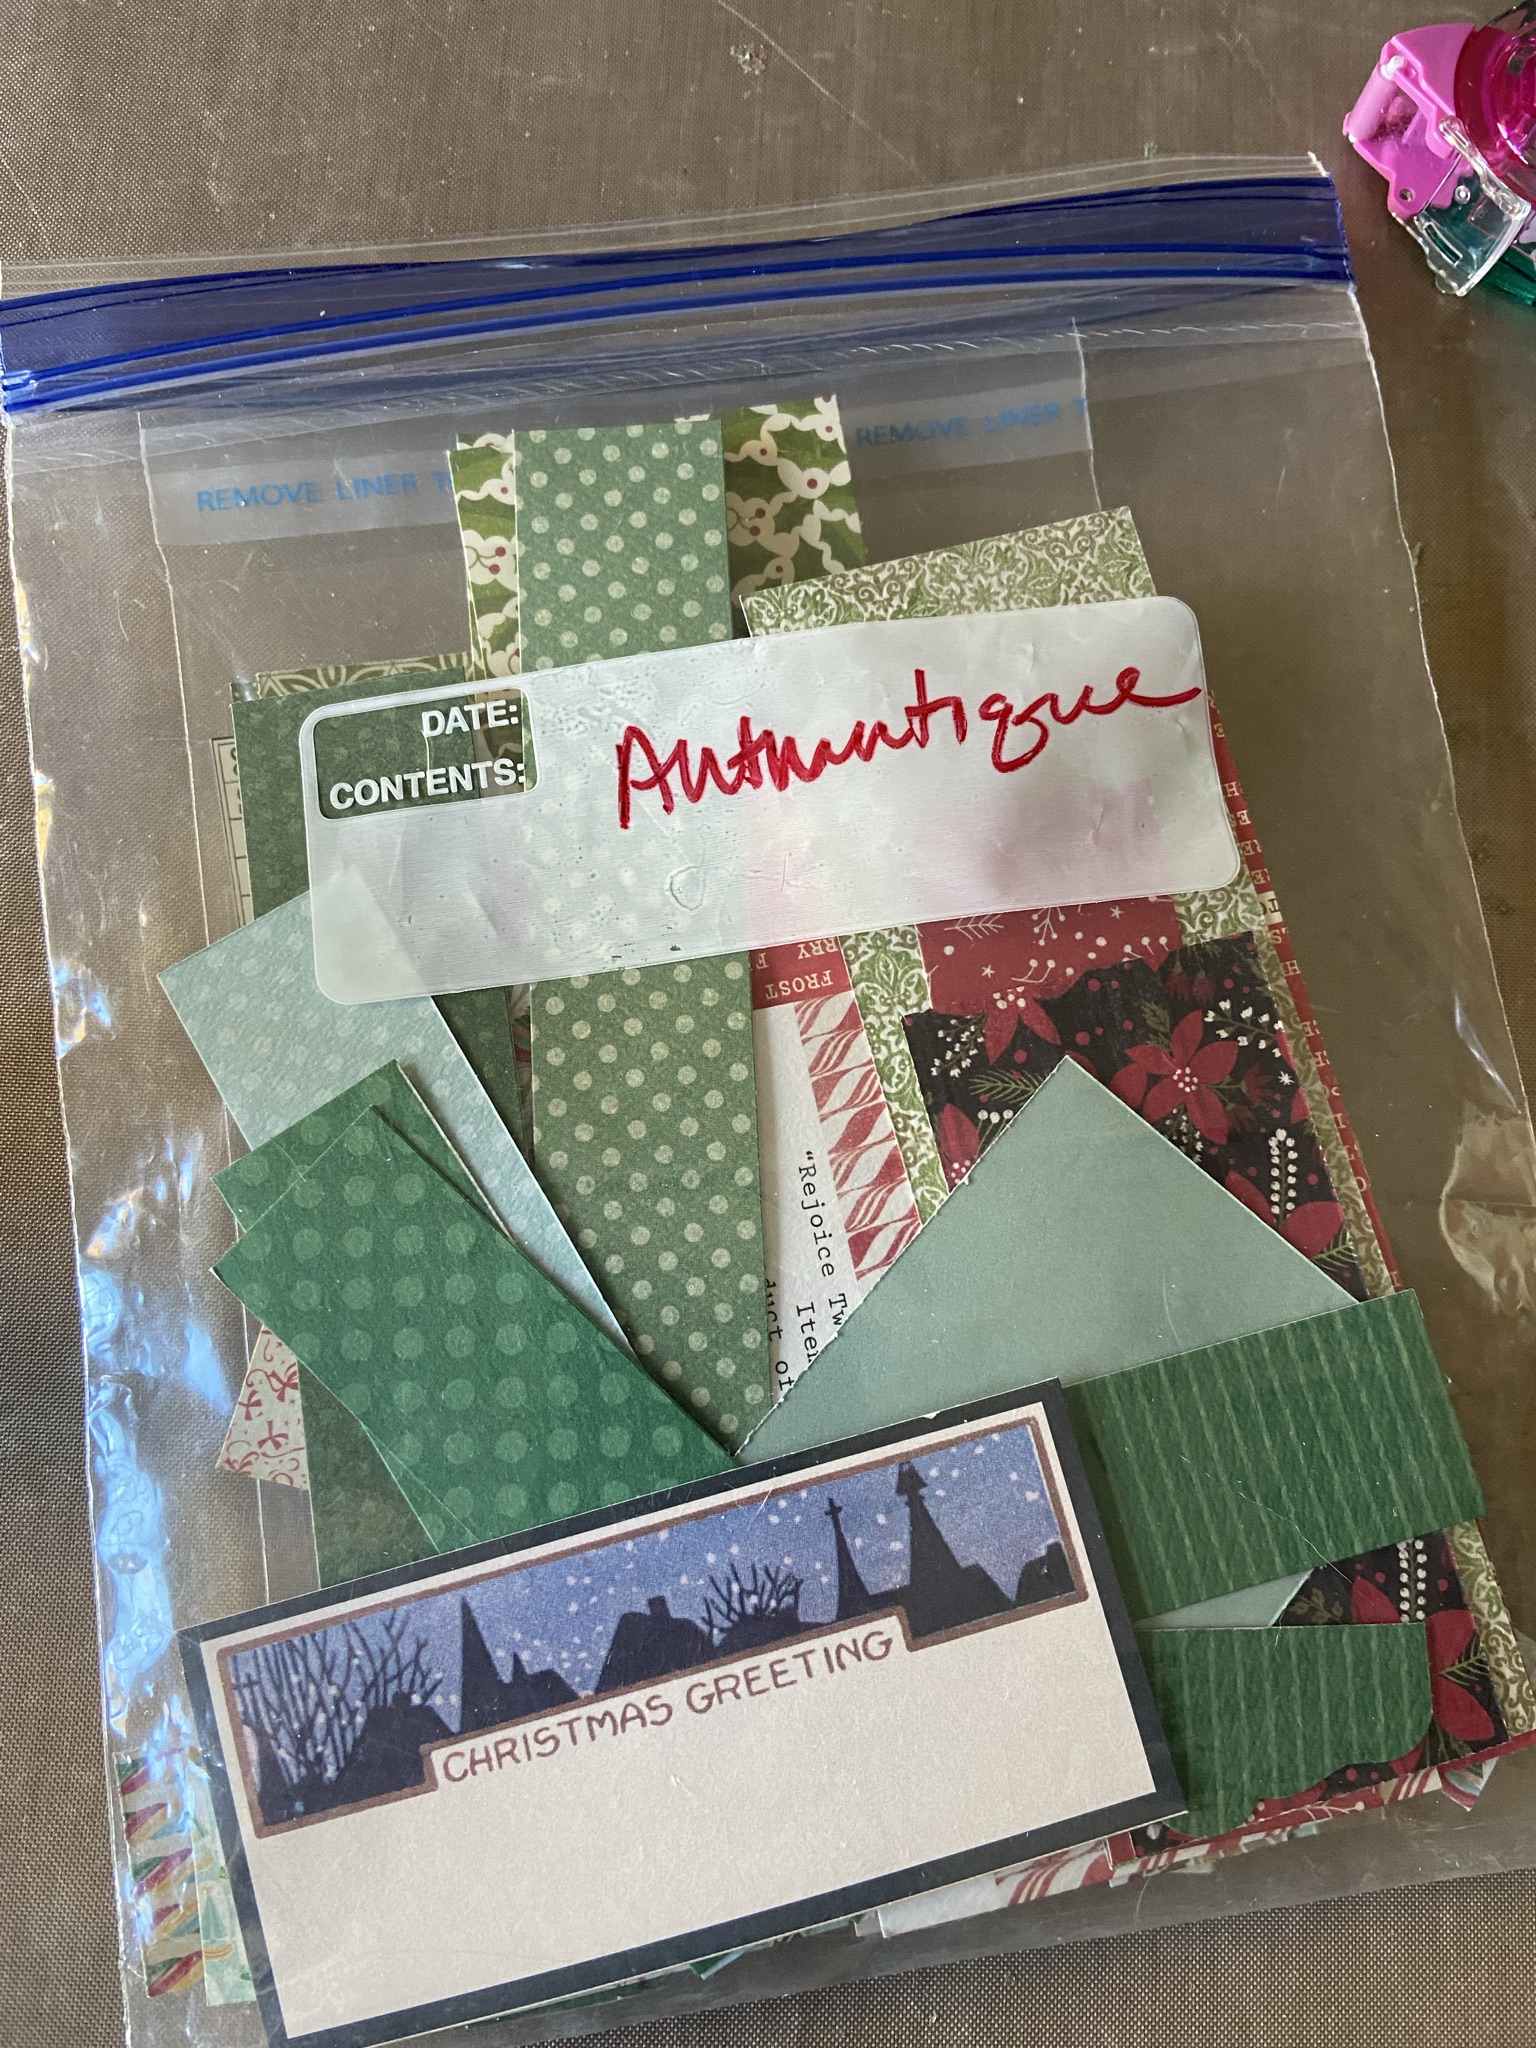
It doesn't take much product to make a nice card, especially if you supplement your paper with die cut pieces. For instance, I had just a small baggie of my favorite 6x6" (hoarded!) Authentique papers left and decided to see if I could use it all up (I still haven't!).  I've made Christmas cards with this pad for at least two years so you know I'm coming to the end of my stash! Along with the few pieces of Authentique, I also had a few scraps of coordinating papers.


I started by sorting the papers into piles by pattern. At that point, I realized that I had four Santa pieces which would make nice card fronts. The challenge was that this Santa piece was long and skinny, and none of my paper scraps were very large.


With my papers sorted, I came up with a design that would enable me to make four nearly identical cards. Since I had a lot of 1" strips, I started with one at the left. Next came the Santa piece. I also had a few 2x3" pieces so used one on each card at the right, followed by a horizontal 1x4" strip across the bottom. The pieces were arranged in a stair-step fashion which worked great for the narrow Santa. When adhering them, I started with the right-hand piece, overlapping each one slightly so that Santa appears to be looking out from behind the strip at the left.


The strip across the bottom covers the cut edges and provides a "ledge" for the text piece and embellishments to come.


I added a text piece made with MS Word text boxes, then finished each card with some glittered greenery, a die cut poinsettia, and punched circles. I really like the pop of black which ties into Santa's buckle, so I repeated it three times in the punched circles, Nuvo Crystal Drops, and text piece.

After making Card #1, I created the remaining cards in assembly line fashion which made the whole process quite fast!


For the past few years, I've been lining the envelopes for all of my cards. This is a great way to step up your card presentation. So after making these cards, I found a coordinating green paper and cut liners for each envelope. 
 
In addition, I also like to run my envelopes through the printer with the addresses formatted in a pretty font. Along with the liner, the printed address makes the card presentation a little more special. After the envelope is printed, I adhere the liner. In the meantime, I'll store the cards, envelopes, and liners together so that everything is ready when I sit down to print on my envelopes.
 

In addition to these cards, I had a couple of small pieces of Authentique artwork left to use on my favorite "strip cards". This is a design I tend to use when I'm coming to the end of a paper collection and just have small strips. It works for any occasion. I made graduation cards with this design back in May, as well as on several occasions since then!


This is such a handy design and one that you can make with almost nothing! While I was at it, I cut liners for the envelopes so they are ready to go.

Another time-saving measure is printing directly on the insides of my cards. I have formatted a MS Word document with a text box that prints on the upper right of each card base. For me, this is definitely faster than stamping and much more efficient than printing my card inserts separately and gluing them inside each card.


As I sorted through my scraps, I found enough to make 10 Christmas cards for the Cards for Kindness program. If you enjoy making cards but perhaps (like me) don't have a ton of people to send them to, I'd encourage you to check it out! It's a wonderful way to use your card-making skills and stash to spread a little kindness in the world. And it's not just for Christmas cards! They need cards in a variety of themes all year long. In addition to making 10 Christmas cards, I also made 10 "hello" cards, all using scraps in similar designs to the ones shown above. It was a great feeling boxing them up and sending them off this week!

Thanks for stopping by the blog today! My goal is to post more frequently and so far, so good!

jp


02 November 2021

Laundry Room Makeover

Starting in April of this year, we embarked on a series of updates to our house including the kitchen, upstairs guest bathroom, and the laundry room. While we still have a bit more to go, all of those updates are now finished and we are very happy with the results! 

Project SNOOP-ervisor, Lily Marie


 Of those three rooms, the laundry room probably gets the award for the biggest transformation because it had received the least amount of attention over the years. It's kind of like when I took our family dog Bob to obedience class many moons ago. He graduated "Most Improved Dog" because he was starting at the lowest point!

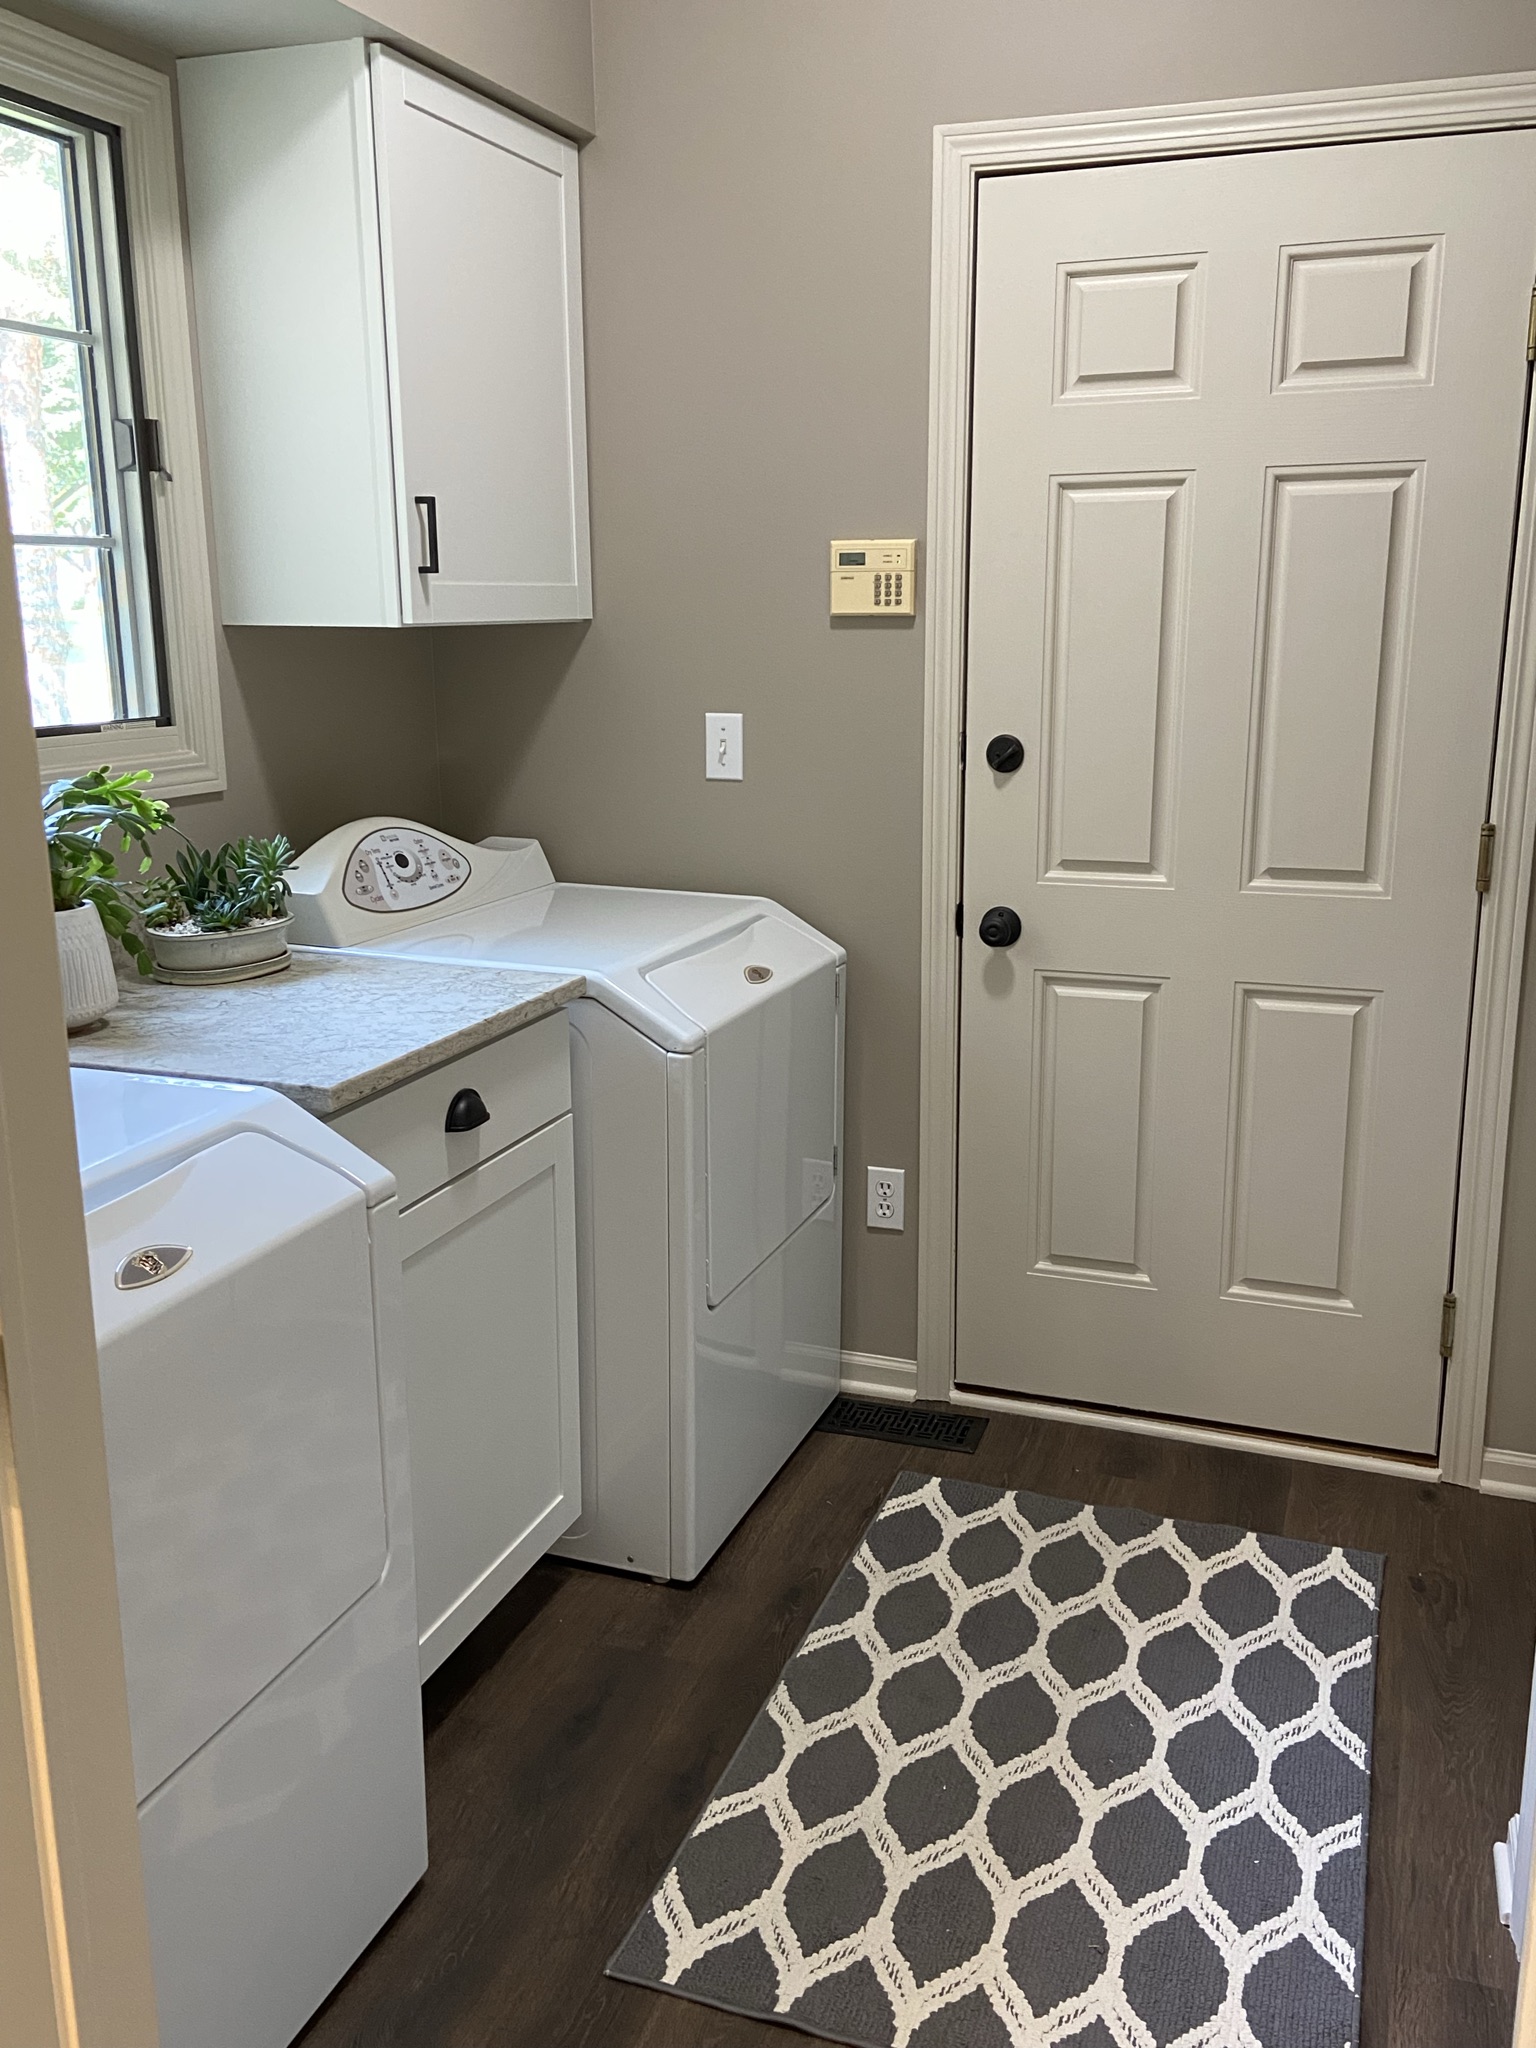
Our house was built in 1991 and the laundry room still featured the original laminate flooring, builder-grade cabinets, and countertops. The only change we had made to the laundry room over the years was the gold paint. I loved it for many years but it had begun to feel heavy and dated. 


In some houses, visitors never see the laundry room but that's not the case at ours. The laundry room is the way into our house for anyone who comes through the garage. Suffice it to say, the laundry room was past due for an update.

 Knowing we planned a more costly update in the kitchen, we looked for ways to save money in the laundry room but still create a nice look. The first step in the process was to replace the flooring with a wood-look planking. We found a moderately priced product we both liked. From the minute it was installed, it made a huge difference in the appearance!


 After the floor, we focused on cabinets. Again, we didn't want to spend a lot of money on custom cabinets. We found several affordable and in-stock options for cabinets and hardware at the big box stores.


The new cabinets are close in size to the old ones but they just feel so much fresher! After unloading them, I took the opportunity to go through all the stuff in each cupboard and only put back what we need. It was crazy how much weird stuff was stored in the laundry room cupboards!


Of course, we had to replace the old laminate countertop. Because we needed such a small amount, we initially looked for a remnant but didn't find anything we liked. Eventually our contractor recommended a countertop shop. We found the owner very helpful and ended up buying the same countertop for both the laundry room and the upstairs bathroom. It's not exactly what I would have envisioned when we started this project but I absolutely love it!

In this photo you can also see the hardware we selected for the laundry room. In both the laundry room and the kitchen, we added "bin pulls" to all the drawers. It's a little detail that I think makes a big difference in the overall appearance.

The last step in the process was paint. We engaged a painting firm to tackle all three rooms: The kitchen, bathroom, and laundry room -- walls and woodwork. Applying neutral paint and changing the woodwork from golden oak to a creamy white made a HUGE difference. 

We also ended up replacing the window in the laundry room (along with several others) due to exterior wood rot. The new window looks and works great.


I couldn't be happier with how the laundry room turned out! It's such a bright and clean space now and I'm not ashamed for visitors to walk through it. I'm so glad we finally took the plunge and made these updates to our house!

In upcoming posts, I'll share more about our guest bathroom and kitchen update. Things have been hopping around here this year!

Thanks for stopping by!

JP

31 October 2021

Handmade Sympathy Cards

This has been a sad week. My cousin passed away from lung cancer, the same type of cancer that took my dad, her uncle. It was heartbreaking and took me to a really bad place. The entire situation happened so fast that I'm honestly still in shock. Cancer has affected too many people in our family. 

This situation left me feeling powerless and vulnerable at the same time. The only thing I COULD do was send a handmade card offering my support.


I always tell people that the time to make a sympathy card is NOT when you're in the midst of dealing with a loss. Sympathy cards are really the most important to have on hand but unfortunately, I found my card basket lacking. In this case, I needed to make six separate cards to send to the many family members affected by her passing. So I came up with a really simple design that could be replicated easily.

To start, I cut my card bases down to 4x5.25". My cousin loved her flowers so I found a sheet of floral paper and cut it into 2.5x4" pieces. I added the floral paper to the tops of the cards, followed by a 1x4" strip of coordinating paper.

I die cut and embossed two flowers from coordinating cardstock, then tucked some punched greenery behind. I finished with a printed text piece and Nuvo Drops on the flower centers.

To make the presentation a little more special, I printed the addresses on the fronts of the envelopes on my printer (not shown) using a nice font. Once printed, I added a coordinating liner to each envelope.

My advice to all of my card-making friends is to stop what you're doing and make some sympathy cards to have on hand when you need them! If you need a design, this is a super-easy one to replicate. To make it more masculine, you could use different paper (I like neutral plaids) and substitute die-cut leaves for the flowers. 

You'll be glad you have a card or two on hand for those sad occasions when you need to reach out to someone who has experienced a loss.

jp


29 October 2021

Feline Friday

It's been quite chilly this week! During the warmer months, Lily does not enjoy being covered with blankies. But when the weather changes, watch out! 

She won't burrow under blankies on her own, but she will gladly accept them if offered! And she's not picky. She'll accept an old baby blanket...

clean laundry...

and even old rag towels from the garage! After washing and drying them, I wrapped them around her straight out of the dryer. Lily loves warm towels most of all!

 
I agree...heated blankies and towels are the BEST, any time of year!
jp