After I finished updating my craft room last summer, there were still a few outstanding tasks to be completed, including a storage system for handmade cards. I had designated a couple of the canvas bins (shown below) for cards, so I wanted a container that could fit into one of them but also sit out and coordinate with my decor.
I used to keep my handmade cards in a lunch-box type container but soon found it to be too small for my growing inventory. I was drawn to the larger size of the wonderful IRIS box we sell at Memory Bound, but it's too big to fit into the canvas bin.
I finally decided on either a basket or galvanized tin container, so I headed off to Target to see what I could find. In addition to my size constraints, the container also needed to have straight (not angled) sides to accommodate cards as well as a smooth finish to prevent damage.
After considering my (fairly limited) options, I chose a black plastic woven basket which was wide enough to accommodate A2 envelopes (the size of card I usually make) and short enough to fit in the bin. Success!
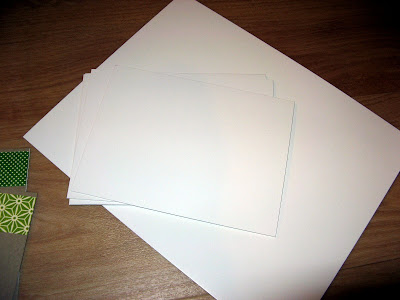
My first task was to create some simple dividers for the basket. I cut pieces of white chipboard slightly narrower than the width of the basket and a little taller than an envelope. Call me crazy, but I want the dividers to conceal the cards while they're in the basket, for the simple reason that the cards may not match my color scheme. I know, I know... :)

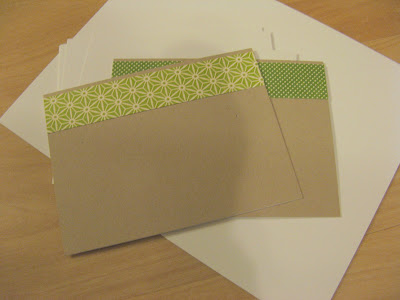
Because the dividers will be visible, I chose to cover them with kraft cardstock to match my space. Then I added a strip of patterned paper to the top of each divider. I used the same paper I've used in other areas of the room (to cover my ribbon jars, for instance), to keep everything coordinated!

Next I started to think about the labels for the dividers. I should have given this part more thought because I ended up going back three times to make more labels! I ended up with 12 categories -- birthday, blank, congrats, friendship, get well, good luck, hello, holiday, sympathy, thanks, thinking of you, and wedding. We'll see if those are the RIGHT categories, or if I still need more!
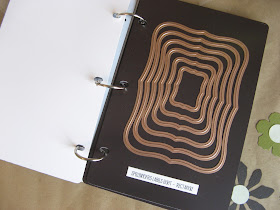
Next, I set out to create a black label for each of the dividers to tie the different papers together and match the labels I've created for other storage in the room. I decided to use the smallest die from my new Spellbinders set. After testing it out for size, it fit perfectly!
With the size determined, I created text boxes in Word for the labels, a little larger than the die. I used the same font I've used for my other storage labels, then filled the boxes with black color and switched the font color to white. (Click on the photo for a closer look.)
I printed the text on cream cardstock so that the white font color would look cream...again, to match the space!
Then I cut each label using the Big Shot. May I pause for a moment to say how much I LOVE my Big Shot and my Spellbinders dies?
I used to keep my handmade cards in a lunch-box type container but soon found it to be too small for my growing inventory. I was drawn to the larger size of the wonderful IRIS box we sell at Memory Bound, but it's too big to fit into the canvas bin.
I finally decided on either a basket or galvanized tin container, so I headed off to Target to see what I could find. In addition to my size constraints, the container also needed to have straight (not angled) sides to accommodate cards as well as a smooth finish to prevent damage.
After considering my (fairly limited) options, I chose a black plastic woven basket which was wide enough to accommodate A2 envelopes (the size of card I usually make) and short enough to fit in the bin. Success!
My first task was to create some simple dividers for the basket. I cut pieces of white chipboard slightly narrower than the width of the basket and a little taller than an envelope. Call me crazy, but I want the dividers to conceal the cards while they're in the basket, for the simple reason that the cards may not match my color scheme. I know, I know... :)

Because the dividers will be visible, I chose to cover them with kraft cardstock to match my space. Then I added a strip of patterned paper to the top of each divider. I used the same paper I've used in other areas of the room (to cover my ribbon jars, for instance), to keep everything coordinated!

Next I started to think about the labels for the dividers. I should have given this part more thought because I ended up going back three times to make more labels! I ended up with 12 categories -- birthday, blank, congrats, friendship, get well, good luck, hello, holiday, sympathy, thanks, thinking of you, and wedding. We'll see if those are the RIGHT categories, or if I still need more!
Next, I set out to create a black label for each of the dividers to tie the different papers together and match the labels I've created for other storage in the room. I decided to use the smallest die from my new Spellbinders set. After testing it out for size, it fit perfectly!
With the size determined, I created text boxes in Word for the labels, a little larger than the die. I used the same font I've used for my other storage labels, then filled the boxes with black color and switched the font color to white. (Click on the photo for a closer look.)
I printed the text on cream cardstock so that the white font color would look cream...again, to match the space!
Then I cut each label using the Big Shot. May I pause for a moment to say how much I LOVE my Big Shot and my Spellbinders dies?
The labels turned out pretty cute, if I do say so myself!
And here are a few of the completed dividers!
I think I'm really going to like my new card basket, so much that I have yet to put it in the canvas bin. Looks like I need to get busy filling it up. :)
jp
And here are a few of the completed dividers!
I think I'm really going to like my new card basket, so much that I have yet to put it in the canvas bin. Looks like I need to get busy filling it up. :)
jp


Am I considered a Target addict when I knew exactly what bin you were describing from the 4th paragraph? ;) ha I was looking at the larger size in white for toy storage in our toy room (turned out to be too short for what I wanted) and have been considering them for my craft room once I get further along (still unpacking boxes from our move last fall!). I love the dividers you made. Such a great idea. Still using a lunchbox style organizer myself, but I also have barely touched my paper supplies in months. I need to get back to unpacking those boxes and off the computer. ;)
ReplyDeletehaha Thanks, Sarah! I definitely am one! I think this basket is going to be an improvement over my last organizer. Thanks for stopping by! :)
ReplyDelete