As I mentioned in last week's post, we've been doing some updating to our house. Since this past spring, we've refreshed the laundry room, kitchen, and upstairs bath.
The upstairs guest bathroom was a smaller project that, I think, resulted in a big improvement! While we had painted the walls, and updated the faucets, hardware, and light fixture a few years ago, (10 years ago, to be exact) the bathroom now felt dark and out-of-date. The oak cabinet, laminate countertop, and builder-grade sinks were the main culprits.
Guest bathroom: BEFORE

Ideally, we would have torn out and replaced the old square tile floor
but that would have added quite a bit of time and cost to the project.
Instead, we opted to have the oak cabinet, walls, and
woodwork repainted. To save money and simplify things, we used the same
color on the cabinet as the kitchen island and same wall and woodwork colors, too. In
addition, we replaced the countertop and sinks but kept the light fixture, hardware, and faucets. We
used the same countertop as in the laundry room which simplified the
project and probably saved money.
The first update was replacing the countertop and sinks. Changing to an undermounted rectangular sink was an instant update. I'm really glad we decided to do that instead of keep the old sinks, which I considered for about one minute before I regained my senses. (They went on to a new life at the Habitat for Humanity ReStore.)
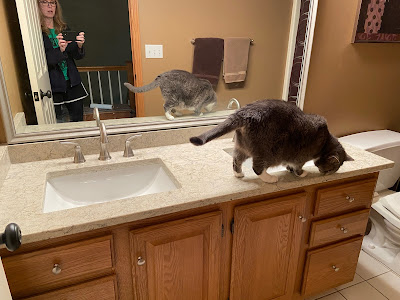
Inspector Lily approved! I love this new countertop. It's easy to keep clean and looks so much fresher than the old laminate.
Next came the cabinet painting. Since we were also having our kitchen cabinets painted, the guys took the doors for both rooms to their shop for painting and sprayed the cabinet bases in place.
I have learned that the prep for in-house spraying takes longer than the painting itself! It's important to cover everything in plastic and/or paper and tape it carefully. Here you can see the set-up and painting in progress. Inspector Lily took a quick peek to be sure everyone was on task!
There was a delay of a few days while we waited for the doors to come back from the shop but already I could see a huge difference! The oak cabinet took the paint beautifully.

Initially, I thought we could paint the cabinet ourselves -- and we
probably could have -- but since we had already engaged the painters for
the other projects, this seemed like an easy add-on. I'm so glad we
just had them do everything because they definitely did a much better
job than we could have!

When the doors arrived, I was even happier!
Here you can see how the old wall color clashed with the cabinets. If you'd been on the fence about painting the walls, this would have changed your mind!
We had the painters paint the bathroom walls and woodwork in the same colors as the kitchen. When you're doing a project like this, you can save money by limiting the number of paint colors. Whenever the painters have to clean out their sprayer to change colors, it costs money. We worked from one paint strip to keep it simple and cut costs as much as possible.
Guest bathroom: AFTER

I absolutely love how the bathroom turned out! Sure, it would have been better to replace the floor, but it's in good shape and doesn't look all that bad now that the rest of the room has been updated.
Once the painting was done, I found a new shower curtain at Target to replace the old darker one.
I was suprised at what a big difference it made to replace it. Lighter and brighter is the trend now, and I guess I can see why!
Here you can see the darker towels and rug...
...which I replaced with lighter ones.
At my daughter's recommendation, I also picked out a new wall hanging from iCanvas to bring in a little green. My mom's old milk glass planter with an IKEA plant finished the space.
It's kind of amazing to me how much fresher this room looks now. It's a much nicer space for guests now and when we eventually sell the house, hopefully the bathroom will be an asset instead of a liability!
Thanks for stopping by! If you're planning a home update, I hope you will be encouraged by these project photos to just get started. In an upcoming post, I'll share pictures of our kitchen update. I'm so happy with the changes we've made!


