28 December 2018

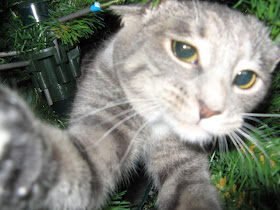
Feline Friday: Santa Came!

 Santa made a stop at our house and dropped off some goodies for Lily!
 

 He generously filled our stockings, too -- some of which feature red puffballs which are sewn firmly on, much to Lily's dismay! πŸŽ…
 

 He filled Cousin Rory's stocking, which also has a lovely hanging puffball which could not be removed, despite her best efforts!
 

 We hope Santa made a stop at your house, too! Wishing you a lovely end to 2018 and the very happiest New Year!  
 πŸŽ„Janet & LilyπŸŽ„


21 December 2018

Feline Friday: Ready for Santa!

Lily is ready for Santa! First she helped me put up all the Christmas trees.
 

 Then we made a whole bunch of cards. She was not impressed!
 

Finally, she helped me do a few crafty things which she found much more enjoyable.

The whole Christmas season has been exhausting! πŸ˜‰

Now she is ready for Santa. But I fear he will not find her tucked in the corner behind the tree!

Wherever you are, we wish a you a very
Happy Christmas with the people 
and fur-babies you love!

πŸŽ„Janet & LilyπŸŽ„

19 December 2018

Christmas Decorating

 
Boy, I had planned to get back to this little series of posts about Christmas decor but somehow life got in the way! We are expected our daughter and her boyfriend in just a few days, so I'm scurrying like a little beaver (actually more like a SQUIRREL!) as I try to finish up a number of class projects before they arrive. And of course I need to finish shopping, cleaning, and hopefully do a little baking!

 So back to the Christmas trees! In my recent Feline Friday post, I shared some photos of our old dining room tree. Lily knocked that tree over so many times that it was getting pretty bedraggled, so this year we decided to replace it. Spouse found a very nice pre-lit small tree at Hobby Lobby at a good price. Although it's the same height, it's a little bit narrower than the old tree. I love the tree but am going to keep a close eye on the lights, after our recent "fire" scare with our big pre-lit tree!

I put this new tree in the dining room in front of the bay window. I really like having it there because the lights look really pretty from the street. Since Lily is much better behaved these days, I can safely put my grandma's old mercury glass ornaments on this tree.

This year, I kept with the gold/silver/copper color scheme which works well since I have a lot of ornaments in those colors! To fill in around Grandma's ornaments, I added a few mercury glass ornaments that I picked up on the cheap at a garage sale last year. The gal hosting the sale was GOING TO THROW THEM AWAY and offered them to me, so how could I refuse? LOL
 Speaking of the old dining room tree, I decided that it could be deconstructed and still used. In fact, the top of the tree was in perfect condition -- undamaged by little white paws -- so I poked it down into a metal bucket. This worked great and now I have a small tree for the hearth! (Not that I needed more trees...) The only "ornaments" are pine cones from a recent visit to Texas.
 
In addition to the top of the tree, many of the branches from the old dining room tree are still in pretty good shape so I've used them as "greenery" around the house. I see no reason to throw out the tree when it clearly has more life in it...transformed!

Moving on to another tree! I have a 4 foot pencil tree on the landing. Over the years, this tree has had various themes. This year it holds a set of old world Santa Clauses given to us by Spouse's parents many years ago.

I filled in with some inexpensive red balls and silver "bell" balls, as well as some snowflakes punched from white cardstock.

I have a second pencil tree in the living room next to my grandma's old desk. The decorations also vary but this year I used more mercury glass ornaments in reds and blues to match the decor in that room.

My grandma's desk is one of my most treasured possessions. When I was growing up, we went to her house for Sunday lunch almost every week and after the meal was over, I was allowed to color and draw pictures at her desk. After she passed away, my parents had the desk refinished for me to keep. The typewriter is also very special and belonged to Spouse and his family.

On the desk you'll find my old camping lantern and a small shadow box I made this year. I really don't need any more Christmas decor but sometimes I just can't help myself! I had a lot of fun putting this little box together using some Christmas goodies from Tim Holtz.

The old calendar and snowman came from my grandma's house. I actually found them in a tub out in my parents' garden shed as I was preparing for their auction. Mom had brought home a lot of treasures from Grandma's house but didn't have a chance to sort through them all before she passed away. Finding treasures such as these brought me great joy and now I enjoy getting them out each year.


In the next few days I hope to share a few more Christmas decor and crafting posts! Thank you all for stopping by and I wish you the merriest of holidays!
jp


14 December 2018

Feline Friday


 Every year at this time, I enjoy seeing pictures of cats in Christmas trees. I know they can truly wreak havoc on holiday decor, but their antics sure make for some cute photos! Luckily Rory, shown above, has never shown an interest in Daughter's tree...other than napping sweetly under it!

The same cannot be said for Miss Lily. She may look innocent here, helping me recently with the kitchen tree.

  And she may actually appear helpful here, assisting me with stringing lights on the now NOT-pre-lit tree.

You missed a spot, Mommie!

She reaches for a branch when suddenly -- for just a moment -- Lily remembers her first Christmas way back in 2006.

That year, she was QUITE involved with setting up (and taking down) the dining room tree.

 If memory serves me, we never got past the bead garland that year. There were no ornaments on this tree.
 

 Because of this...

  ...and this...

...and this.

This naughtiness continued into the following year, when we tethered the trees to the the window frames with fishing line. Still, she knocked the trees completely over.

Thankfully, we are past all of that. But I'll admit that I can't help but look back on these pictures and smile!

Happy Feline Friday!
jp and Lily

13 December 2018

Christmas Decorating

Back in the olden days, I had a vision of having a Christmas tree in every room of the house. My idea was that I'd have one large/main tree then several smaller ones with different themes each year. Since I have a December birthday, I have accumulated a lot of Christmas ornaments so I have enough to mix and match easily. 

I have never succeeded in having a tree in every single room but I have five trees in various sizes, most of which I've had for years. It takes a fair amount of room to store them but I think we all enjoy them when they're up! In this post, I will share pictures of a couple of trees, with more to come in another post.

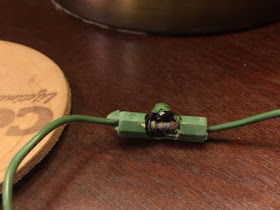
We replaced our main tree seven years ago with a pre-lit 9-foot tree. I love the "mixed" branches and the fact that we didn't have to mess with lights! Unfortunately this year as we plugged it in to check the lights, we smelled a hot/burning plastic scent. NOT GOOD! Upon close inspection, this is what we found! The plastic housing was melted completely through and even smoking in two different areas. YIKES!

I'm so thankful that this happened right away...and not when we were away from home with the tree lit! The lesson is this: If you have a pre-lit tree, unplug it when you leave home!

Now when the lights on a pre-lit tree fail, I think the assumption is that you'll throw it out and buy another tree. The pre-lit lights are so tightly and intricately wound that they're somewhat intimidating to remove, but that's what I decided to do. I love the tree too much to just toss it, and that seems really wasteful. After a few hours, I had all the lights off so we could re-string it with regular lights. Now it's as good (almost) as new. 

I will say that it took a LOT of fluffing to make the branches look full again, as the old lights were so tightly wound!
 

 Speaking of fluffing, did you know there is a proper way to fluff the branches of an artificial tree? I actually ran across a blog post or video somewhere which gave some helpful tips. I used those tips when fluffing our big tree above.

Here's a quick "tutorial" using branches from our very old kitchen tree. If you have the kind of tree that has branches like this, it's easiest to fluff them before putting the tree together. If the branches of your tree are not removable, you can still fluff them in the same manner. Just start at the bottom of the tree and work your way around and up, branch by branch.

Start at the back of the branch, closest to the hook. Pull those back pieces straight up and fan them out like a peacock tail. This will help conceal the trunk of the tree. Once that's done, pull the remaining pieces out to the side and up, staggering them.

 You can see how nice and full the branches are once this is done!

 Now you can go ahead and assemble your tree. Of course, you'll have to do a bit more fluffing once the branches are all in place. This tree is very old but I really love the blue-green color so I hope to keep it for a long time. Proper fluffing makes a big difference!πŸ˜ƒ

 This year, I got out a set of decorations by Cosmo Cricket I made in a class I taught years ago at Memory Bound. The papers have a blue-green base which makes the ornaments prefect for this particular tree. I used my grandma's old picnic tablecloth for the skirt.

Thanks for stopping by today! I'll be back soon with more holiday photos. Meanwhile, it's back to Santa's workshop for this elf! 
πŸŽ„πŸŽ„πŸŽ„πŸŽ„πŸŽ„

jp


07 December 2018

Feline Friday


Yep, that's our girl! πŸ˜‰